
Nothing beats the bright, tangy flavor of fresh lemonade made with your Breville juicer on a hot summer day. That first sip of homemade lemonade—bursting with authentic citrus flavor and none of the artificial aftertaste of store-bought versions—makes you wonder why you ever settled for anything less. When you extract lemon juice using your Breville appliance, you capture the full spectrum of citrus flavors, including those precious essential oils from the peel that bottles can’t replicate. This Breville juicer lemonade recipe delivers restaurant-quality refreshment right from your kitchen, with complete control over ingredients and sweetness levels.
The magic happens because Breville juicers extract maximum yield while preserving delicate citrus flavors that cheaper models often sacrifice. Whether you own a Breville Juice Fountain, Juice Fountain Elite, or any other centrifugal model, this guide transforms your appliance into a professional-grade lemonade maker. You’ll discover exactly how to select the juiciest lemons, optimize your juicer settings, and create variations that will make your homemade lemonade the talk of the neighborhood.
Choosing Peak-Ripeness Lemons for Maximum Juice Yield
Lemons that feel heavy for their size contain the most juice—this simple test separates the juice-rich from the dry. At the store, give each lemon a gentle squeeze; it should yield slightly under pressure but bounce back immediately. Avoid specimens with soft spots or wrinkled skin, as these indicate moisture loss and diminished flavor. Bright, uniform yellow coloring without green patches signals perfect ripeness, while lemons with green tints often need more time to develop full sweetness.
Organic lemons prove essential when making Breville juicer lemonade since you’ll likely use the entire fruit. Conventional lemons often carry pesticide residues that concentrate in the peel, which your juicer will extract along with the juice. If organic isn’t available, wash each lemon thoroughly with warm water and a vegetable brush, then rinse well before juicing. For Breville models with wide feed chutes, leave the peel intact to maximize flavor extraction from the zest oils.
California Meyer lemons offer a sweeter alternative with lower acidity if you prefer milder lemonade. These thin-skinned varieties produce up to 30% more juice than standard Eureka or Lisbon lemons but require less sweetener. When shopping, look for firm, glossy-skinned fruit without blemishes. Lemons reach peak juiciness from May through September, so plan your lemonade parties during these months for the best results.
Precise Ingredient Ratios for Balanced Homemade Lemonade

The perfect Breville juicer lemonade recipe follows a simple 1:1:6 ratio—1 cup fresh lemon juice, 1 cup sweetener, and 6 cups water. This formula creates ideal balance without overwhelming tartness. For a standard batch, juice 6-8 medium lemons to yield exactly one cup of juice. Measure your extracted juice carefully, as lemon size varies significantly, affecting the final flavor balance.
White granulated sugar dissolves most reliably, but honey adds floral complexity while maple syrup provides earthy depth. If substituting liquid sweeteners, use ¾ cup instead of 1 cup since they’re more concentrated. Create a simple syrup by dissolving your sweetener in 2 cups warm water before combining with lemon juice—this prevents graininess and ensures even distribution. Many home juicers make the mistake of adding sugar directly to cold juice, resulting in undissolved crystals at the bottom of the pitcher.
Adjust ratios based on your taste preferences and lemon variety. For stronger citrus flavor, try a 1:2 water-to-juice ratio. If using sweeter Meyer lemons, reduce sweetener to ¾ cup. Always taste before chilling—flavors mellow slightly when cold, so your room-temperature mixture should taste slightly tart. Remember that Breville juicers extract more bitter compounds from pith than hand-squeezing, so proper straining becomes essential for smooth results.
Optimizing Your Breville Juicer Settings for Citrus
Before juicing, assemble your Breville appliance according to the manual, ensuring the filter basket clicks securely into place. Place a fine-mesh strainer over your collection pitcher to catch pulp and seeds—Breville’s high-speed extraction often pushes more solids through than slower masticating juicers. For best results, juice lemons at room temperature; cold fruit yields up to 20% less juice due to constricted membranes.
Position your Breville near the sink with immediate access to running water—citrus pulp dries quickly and becomes difficult to clean. Most Breville models feature a medium speed setting (usually position 2) ideal for citrus fruits. High speed creates excessive foam and heat that can dull delicate lemon flavors, while low speed may not extract efficiently from tougher-skinned varieties.
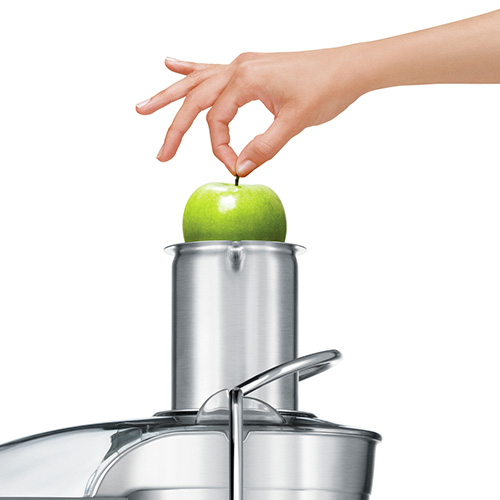
Cut lemons crosswise into halves for optimal feed chute alignment. The flat surface provides better contact with the pusher, maximizing juice extraction. Apply steady downward pressure without forcing—the juicer’s centrifugal force does most of the work. If your model has a reverse function, activate it briefly if pulp jams the filter basket. This feature proves invaluable when processing multiple lemons in succession.
Troubleshooting Low Juice Yield and Foam Issues
Weak extraction typically stems from cold lemons or improper assembly. Always bring lemons to room temperature for 30-60 minutes before juicing—this simple step dramatically increases yield. Check that your Breville’s pulp container is less than half full; an overflowing container restricts the juicing mechanism. If juice appears watery or yields seem low, inspect the filter basket for clogs and clean with the provided brush between batches.
Excessive foam results from overfilling the feed chute or using high speed. Reduce foam by juicing smaller lemon pieces and maintaining medium speed. Let the juice settle for 5 minutes before straining—foam rises to the top and can be easily skimmed off. Some Breville models include foam separators that minimize this issue when properly positioned.
Pulp in your juice indicates a damaged or improperly seated filter basket. Turn off the machine and check that the basket clicks securely into place with no gaps. If the mesh shows signs of wear, replace it immediately—Breville offers affordable replacement parts for most models. For ultra-smooth lemonade, strain juice twice through cheesecloth before mixing with other ingredients.
Three-Step Lemonade Assembly Process
Create perfect Breville juicer lemonade in three precise steps. First, prepare simple syrup by dissolving 1 cup sugar in 2 cups warm water—stir until completely clear with no graininess. Second, combine 1 cup fresh lemon juice with the simple syrup in a large pitcher, stirring thoroughly. Third, add 4 cups cold water and stir again. This method prevents sugar from sinking and ensures consistent sweetness throughout.
Chill the mixture for at least 1 hour before serving—this crucial step allows flavors to meld and mellow. Freshly extracted lemon juice has a harsh edge that softens beautifully with brief resting time. For immediate serving, use ice cubes made from filtered water to prevent dilution. Never add ice directly to the pitcher; instead, chill glasses separately and add ice to individual servings.
Taste and adjust just before serving—citrus flavors change as they integrate. Need more tartness? Add 1-2 tablespoons additional lemon juice. Too sweet? Squeeze in half a fresh lemon. For stronger lemon presence without increased tartness, add a teaspoon of lemon zest to the pitcher. This Breville juicer lemonade recipe produces approximately 8 servings at standard strength.
Creative Flavor Variations to Impress Guests
Transform basic lemonade into signature beverages with simple additions. For lavender lemonade, steep 2 tablespoons dried culinary lavender in your simple syrup for 20 minutes, then strain before mixing. Strawberry-basil lemonade combines 1 cup mashed ripe strawberries with 10 torn basil leaves stirred into the finished beverage. The natural pectin in berries creates beautiful color swirls without affecting clarity.
Mint lemonade requires only 15 fresh mint leaves gently muddled with simple syrup before adding other ingredients. For adults-only gatherings, add 2 ounces vodka or gin per serving. Sparkling lemonade substitutes 2 cups chilled club soda for water in the final mixture—add just before serving to preserve carbonation.
Freeze lemonade in ice pop molds for a refreshing treat that uses every drop. Add edible flowers like violets or borage to the molds for stunning presentation. Remember to label any alcoholic variations clearly at parties, and provide non-alcoholic options for all guests.
Proper Storage Techniques to Maintain Freshness
Store homemade lemonade in airtight glass containers in the refrigerator for up to 5 days. The acidity preserves freshness, but flavor peaks within 48 hours. Never leave lemonade at room temperature for more than 2 hours—bacteria growth becomes a concern beyond this point. Discard immediately if you notice cloudiness, off-odors, or mold.
For longer storage, freeze lemonade in ice cube trays then transfer cubes to freezer bags. These lemonade cubes keep drinks cold without dilution and work perfectly in water or sparkling water for quick refreshment. Thaw frozen cubes in the refrigerator overnight for best results—microwave thawing alters flavor and texture.
When making large batches for events, juice lemons and prepare simple syrup separately, then combine just before serving. This approach preserves maximum freshness and allows last-minute adjustments to sweetness based on lemon quality. Always wash and dry your Breville juicer components thoroughly before storage to prevent citrus residue buildup.
Essential Cleaning Protocol After Juicing
Disassemble all Breville components immediately after use—dried citrus pulp becomes extremely difficult to remove. Rinse parts under warm running water before soaking in a baking soda solution (¼ cup baking soda per gallon of water) for 15 minutes. This neutralizes acidity and loosens stubborn residue without damaging plastic components.
Use the provided cleaning brush to gently scrub the filter basket in circular motions—pay special attention to the fine mesh where pulp accumulates. Never use abrasive cleaners or steel wool on Breville parts, as these scratch surfaces and create places for bacteria to hide. Most components are top-rack dishwasher safe, but hand washing preserves longevity.
Dry all parts completely before reassembly to prevent mold growth in crevices. Store the motor base uncovered in a cool, dry place—moisture trapped inside can damage electrical components. Regular maintenance after each use extends your Breville juicer’s lifespan significantly and ensures consistent performance for your next lemonade batch.
Mastering this Breville juicer lemonade recipe transforms ordinary summer refreshment into an extraordinary culinary experience. The vibrant flavor of fresh-pressed lemons, perfectly balanced with your preferred sweetener, creates a beverage that store shelves simply cannot match. By following these precise techniques—from selecting peak-ripeness fruit to optimizing your juicer settings—you’ll consistently produce lemonade that delights your family and impresses guests. Each batch builds your confidence with the appliance, opening doors to more complex recipes while enjoying the pure satisfaction of homemade refreshment. The next time summer heat strikes, you’ll be ready with ice-cold, perfectly balanced lemonade that tastes like sunshine in a glass.


