
Your Vitamix suddenly dies mid-smoothie or won’t power on at all. That sinking feeling hits when you’re staring at a countertop full of ingredients but a silent machine. Before you assume your investment is dead, understand this: 90% of “broken” Vitamix blenders suffer from preventable issues like improper container seating or thermal overload—not fatal motor failure. This guide delivers manufacturer-approved fixes you can implement immediately, saving you unnecessary service calls or premature replacements. You’ll diagnose power failures, silence strange noises, prevent mid-blend shutdowns, and extend your blender’s legendary lifespan using only Vitamix’s engineering specifications.
Power-On Failures
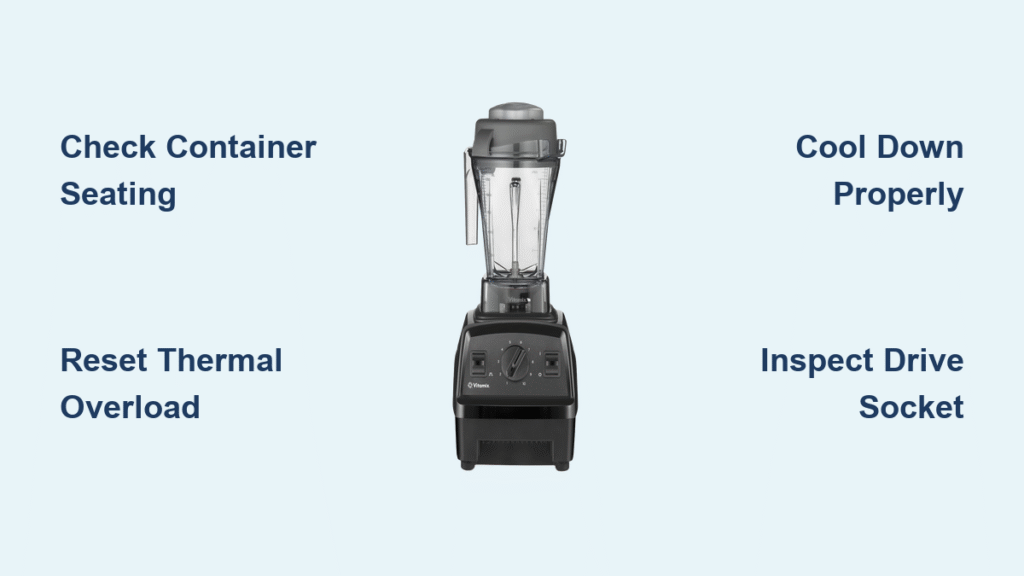
When your Vitamix won’t respond after pressing the power switch, skip panic mode. Focus on these four critical checkpoints—where 80% of startup failures originate—before assuming motor damage.
Verify Container Seating and Power Source First
The safety interlock system blocks operation if the container isn’t perfectly aligned. Remove your container, inspect the base for food debris, then firmly press it onto the motor base until you hear a distinct click. Test stability by gently twisting—if it wobbles or lifts, reseat it. Meanwhile, plug a lamp or phone charger into the same outlet to confirm power delivery. Crucially, bypass surge protectors entirely; Vitamix’s high-wattage motor (up to 1,500W) overloads basic protectors, mimicking a dead unit. If other devices work, check your cord for kinks near the plug or base entry points where internal wires fray.
Reset Thermal Overload Protection

Factory testing or back-to-back blending sessions trigger thermal cutoff—a safety feature, not a flaw. If your blender worked recently but now refuses to start, unplug it immediately. Remove the container to expose cooling vents and let the base rest 30–45 minutes (60+ in hot kitchens). Accelerate cooling by directing a hair dryer on cool setting into the motor base’s center vent. Never force restarts—the unit won’t power until internal temperatures drop below safety thresholds. If humming occurs without blade rotation after cooling, inspect the drive socket (plastic circle around the metal coupling): Spin it by hand. If cracked, frozen, or loose, contact Vitamix service.
Mid-Blend Shutdown Fixes
Automatic shutoff during thick blends isn’t a defect—it’s your Vitamix saving itself from burnout. Thermal overload activates when motors overheat from excessive strain.
Execute Precision Cool-Down Protocol
At the first sign of shutdown (common with nut butters or frozen desserts), switch OFF and unplug. Remove the container to maximize airflow through motor vents. Wait minimum 30 minutes—no shortcuts—before retrying. In humid environments, extend to 60 minutes. For urgent needs, use a cool-air hair dryer aimed at the base’s center vent to expedite cooling. Never pour water near vents or insert objects to force cooling; moisture risks electrical damage.
Prevent Recurring Shutdowns with Smart Blending
Batch size and ingredient order directly impact motor strain. For thick mixtures like hummus or sorbet:
– Reduce fill levels: Fill containers only ⅓ full for nut butters; never exceed the max line for frozen items
– Optimize ingredient sequencing: Liquids first → soft produce → juicy items → firm vegetables → frozen components → ice → powders
– Master speed technique: Ramp to high speed within 5 seconds—counterintuitively, higher speeds create better vortex flow, reducing motor load
Never blend continuously beyond 2–3 minutes. Pause every 60 seconds for viscous mixtures using the tamper through the lid plug (never without the lid!).
Strange Noises Explained
Screeching, grinding, or violent wobbling demands immediate action—these indicate mechanical failure spreading destructive debris into your motor.
Pinpoint Noise Source Before Damage Spreads
With the container removed:
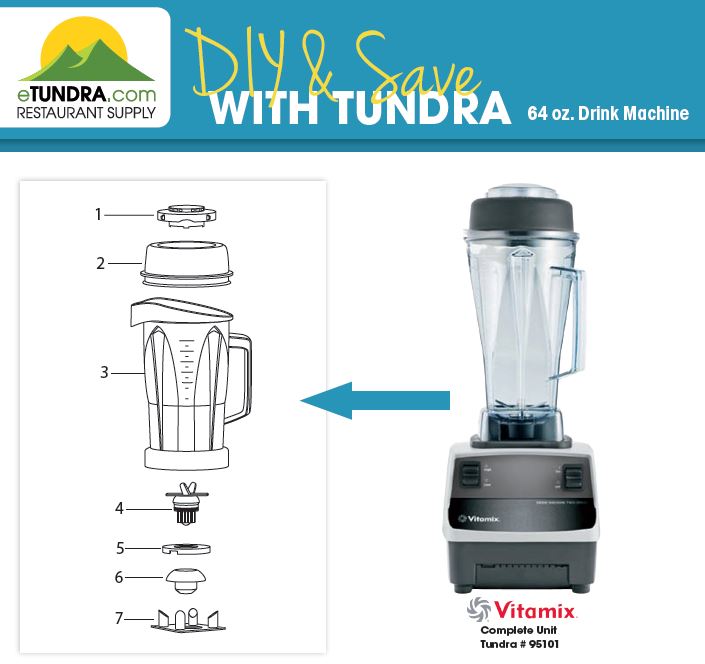
1. Spin the blade assembly by hand on a flat surface—smooth rotation points to motor issues
2. Test the drive socket (plastic circle on the base): It should rotate freely with slight resistance. If frozen, cracked, or wobbly, stop use immediately
3. Inspect rubber feet for wear; uneven surfaces cause vibration that strains internal components
Critical warning: Continued operation with grinding sounds spreads metal shavings through bearings, turning a $50 repair into a $300 motor replacement. If you hear screeching, unplug and contact Vitamix—do not attempt DIY fixes.
Leakage Troubleshooting
Leaks fall into two categories: simple lid fixes versus critical base failures requiring professional intervention.
Seal Lid Leaks in 60 Seconds
Most “leaking” issues originate from improper lid assembly:
– Press down firmly until the lid clicks into place—listen for the seal engagement
– Remove and inspect the rubber gasket for food particles or tears; replace if hardened
– Ensure the lid plug is fully seated (common failure point with frozen blends)
Replace lids showing warped edges, cracked rims, or missing gaskets—never reuse damaged seals.
Handle Base Leaks as Emergency Situations
Liquid seeping from beneath the motor base indicates failed internal seals—a warranty-covered issue. Never disassemble the base; twisting screws voids your warranty and risks electrical shock. Unplug immediately, wipe exterior moisture, and contact Vitamix with your serial number ready. Continued use risks short circuits.
Burning Smell Solutions
Not all burning odors mean doom. Distinguish between normal break-in smells and dangerous overheating.
Identify New-Machine Curing vs. Critical Overheating
The first 3–5 heavy uses may produce a faint “hot wires” smell as motor windings cure—this dissipates within minutes and never recurs. True overheating warnings include:
– Acrid, electrical-burning odor persisting after cooling
– Visible smoke from motor vents
– Automatic shutdown during operation
– Discolored/melted components near the base
Follow the cool-down protocol immediately. If the smell returns after resting, professional inspection is mandatory—do not restart.
Digital Display Errors (Ascent Series)
Modern Vitamix models use error codes to pinpoint issues—decoding them saves troubleshooting time.
Decode and Resolve Ascent Series Errors

- Circle with line symbol: Container undetected. Reseat firmly until symbol disappears.
- E1–E4 codes: Record the exact code and your serial number (on base underside) before calling support—this speeds diagnosis.
- Timer confusion: Counting down = preset program; counting up = manual mode timer; blank screen = sleep mode (wake by rotating dial).
Never ignore persistent error codes—they indicate internal faults needing calibration.
Warranty & Service Navigation
Your Vitamix warranty covers most failures, but navigating it correctly avoids delays.
Maximize Coverage with Smart Claims
Warranties last 5–10 years (model-dependent) and transfer to second owners using the original purchase date. Coverage is geographically limited—using your blender outside its purchase country voids local service. Always have your serial number ready (located under the base barcode) when calling 1-800-VITAMIX.
Streamline Repairs with Pro Tactics
For in-warranty repairs:
1. Call Vitamix with serial number to get a Return Authorization Number
2. Ship free via prepaid label (2–3 day turnaround typical)
3. Pro tip: Mention trade-in interest—dead units still qualify for credits toward new models
Out-of-warranty repairs cost shipping both ways but often run under $150—cheaper than replacement.
Maintenance Prevention Plan
Prevent 95% of failures with daily habits and weekly checks based on Vitamix engineering specs.
Daily Operation Best Practices
- Always ramp to high speed within 5 seconds—this creates optimal ingredient flow, reducing motor strain
- Follow ingredient layering: Liquids → soft items → juicy produce → firm vegetables → frozen goods → ice → powders
- Use the tamper correctly: Insert through lid plug while running; hold in container corners to break air pockets
For thick batches (hummus, cooked beans), reduce quantities by 50% and add extra liquid.
Weekly Critical Inspections
Check these weekly to catch issues early:
– Drive socket for cracks or looseness
– Power cord for fraying near plug/base
– Container base for hairline leaks
– Blade assembly rotation smoothness
Address abnormalities immediately—small issues escalate fast in high-torque motors.
Final Takeaway
Most “broken” Vitamix blenders are actually functioning exactly as designed—thermal cutoffs and safety interlocks protect your investment from user error. By following these manufacturer-approved steps, you’ll resolve power failures, prevent mid-blend shutdowns, and silence strange noises without voiding warranties. When in doubt, Vitamix’s customer service (1-800-848-2649) provides free diagnostics with your serial number. Remember: Your blender was engineered for decades of use. Proper troubleshooting isn’t just about fixing today’s problem—it’s about preserving peak performance for years to come. Never ignore error codes or persistent smells; timely intervention transforms minor glitches into non-events. Keep this guide handy, and your Vitamix will outlast every other appliance in your kitchen.


