
You’re in the middle of making your morning smoothie when your Vitamix blender motor stopped without warning. The sudden silence is more than frustrating—it halts your entire routine. This exact issue affects thousands of Vitamix owners annually, often during the most critical meal preparation moments. The good news? In most cases, this isn’t a permanent failure but a correctable issue that you can diagnose and often resolve in under an hour.
When your vitamix blender motor stopped, it’s usually triggered by one of several common problems rather than catastrophic motor failure. This guide provides immediate troubleshooting steps to get your blender running again today, plus long-term strategies to prevent future shutdowns. You’ll learn to distinguish between simple thermal resets and serious component failures, saving you unnecessary service calls or premature replacement costs.
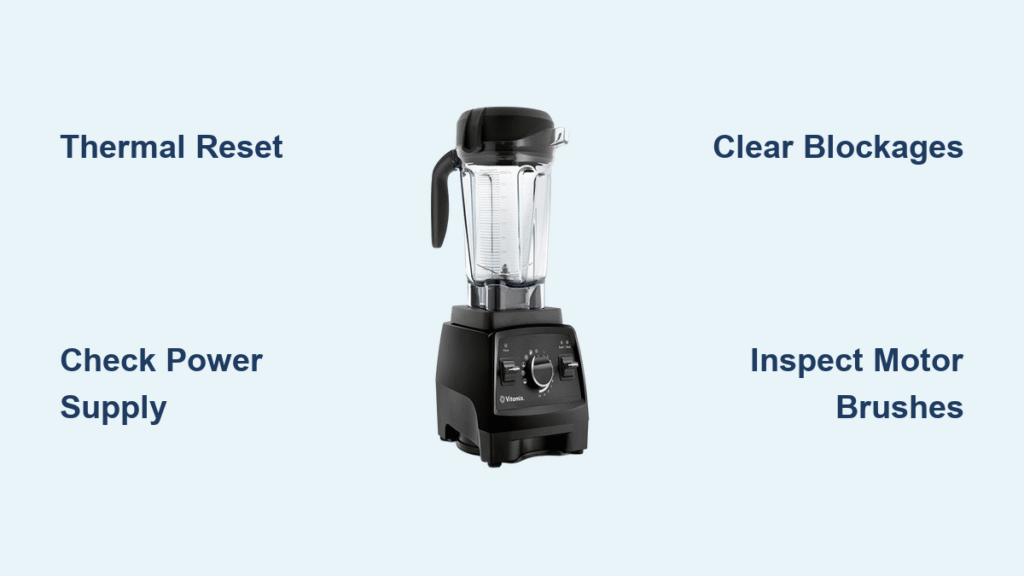
Thermal Overload Shutdown: The Most Common Culprit
Recognize Thermal Protection Signs Immediately
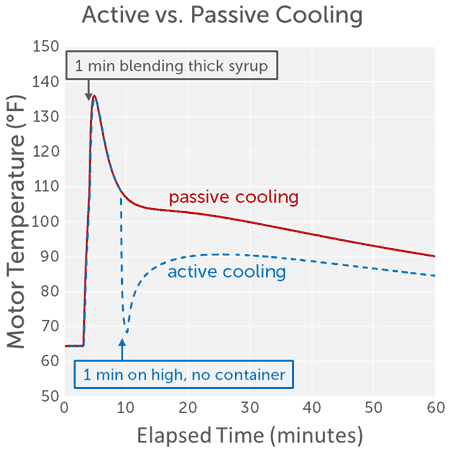
Your Vitamix contains sophisticated thermal protection that instantly cuts power when internal temperatures exceed safe limits. This safety feature engages when processing thick nut butters, frozen fruit without adequate liquid, or during extended high-speed operation beyond 5 minutes. When your vitamix blender motor stopped unexpectedly during heavy blending, thermal overload is likely the cause.
Key indicators include:
– Complete motor stoppage mid-blend with no power response
– Possible faint burning smell (normal during overload)
– Unusually warm motor base to the touch
– No error codes on digital models (Ascent series)
Execute the Thermal Reset Protocol Correctly
Follow this precise sequence to restore function after thermal shutdown:
- Unplug immediately – prevents additional heat buildup
- Remove container – allows heat to dissipate from motor base
- Wait 45-60 minutes – critical cooling period before reset
- Locate reset button – small red button on motor base underside
- Press firmly for 10 seconds – ensures full system reset
- Test with water only – confirms operation before normal use
Pro tip: Set a timer for the full cooling period. Attempting reset too early causes immediate re-shutdown, doubling your downtime. Most thermal issues resolve with this simple procedure—no parts needed.
Electrical Supply Problems Mimicking Motor Failure

Verify Power Delivery in 60 Seconds
Before assuming motor failure, confirm your electrical supply meets requirements. Many vitamix blender motor stopped incidents stem from power issues rather than the blender itself.
Quick electrical verification:
– Plug in a high-draw appliance like a toaster to test the outlet
– Check GFCI reset button if your kitchen uses these outlets
– Inspect circuit breakers for any tripped switches
– Test with a different outlet on a separate circuit
Warning: Never use extension cords with your Vitamix. These cause voltage drops that trigger protective shutdowns and void warranty coverage.
Detect Power Cord Damage Before It Worsens
A damaged cord creates dangerous electrical hazards while causing intermittent stoppages. Perform this 30-second inspection:
- Examine entire cord length for cuts, burns, or pinch points
- Check plug prongs for looseness or discoloration
- Ensure firm seating in the outlet without wobbling
- Inspect cord connection point at motor base for fraying
Replace damaged cords immediately with Vitamix-authorized parts to maintain safety certifications and warranty protection.
Mechanical Obstruction Removal Without Tools
Clear Blockages in Under Two Minutes
Physical obstructions force your motor to work against excessive resistance, triggering protective shutdowns. When your vitamix blender motor stopped during operation, check for these common blockages.
Step-by-step clearing process:
- Power down completely – unplug before any intervention
- Remove container – twist counterclockwise and lift off base
- Invert container – provides access to blade assembly
- Check for obvious blockages – remove pits, seeds, or utensils
- Manually rotate blade assembly – should spin freely with slight resistance
- Clean thoroughly – wash container and blade assembly
Use only wooden or plastic utensils for dislodging items—never metal tools that could damage the blade assembly.
Assess Drive Socket Wear That Causes Intermittent Failure
The drive socket transfers motor power to your blade assembly. Worn sockets create intermittent stoppages that mimic motor failure.
Critical inspection points:
– Cracks or chips in drive socket teeth
– Metal shavings indicating excessive wear
– Proper seating without wobble when container is locked
– Clean threads free from dried residue buildup
Replace damaged drive sockets immediately—these cost $15-$50 and are user-replaceable on most models.
Component Failure Diagnosis: When It’s Serious
Identify Motor Brush Wear Before Complete Failure
Legacy and Explorian series use replaceable motor brushes that wear over time. When brushes reach minimum length, your vitamix blender motor stopped functioning completely.
Warning signs preceding complete failure:
– Gradual power loss during operation
– Visible sparking through motor vents
– Burning electrical smell during use
– Intermittent operation when jar position changes
Ascent series models feature brushless motors, eliminating this common failure point in newer units.
Decode Ascent Series Error Messages Accurately
Digital models (Ascent series) display specific error codes when component failures occur. These codes direct you to the precise issue:
- E01: Motor overcurrent protection
- E02: Thermal sensor failure
- E03: Communication error between components
- E04: Motor speed sensor fault
Document these codes when your vitamix blender motor stopped—they dramatically speed up professional diagnosis.
Preventive Usage Patterns for Long-Term Reliability
Modify Recipes to Protect Your Motor
Adjusting ingredient ratios prevents thermal overload and extends motor life significantly. For thick mixtures like nut butters or frozen smoothies:
- Frozen fruit: Minimum 1:1 liquid to solids ratio
- Nut butters: Start with 2:1 liquid to nuts ratio
- Thick smoothies: Add liquid in ¼ cup increments
- Hot soups: Follow maximum fill line and use vented lid
Pro tip: Pulse first for 10-15 seconds before continuous blending—this breaks down ingredients gradually, reducing motor strain by up to 40%.
Implement Operational Best Practices Today
Establish these habits immediately to prevent future stoppages:
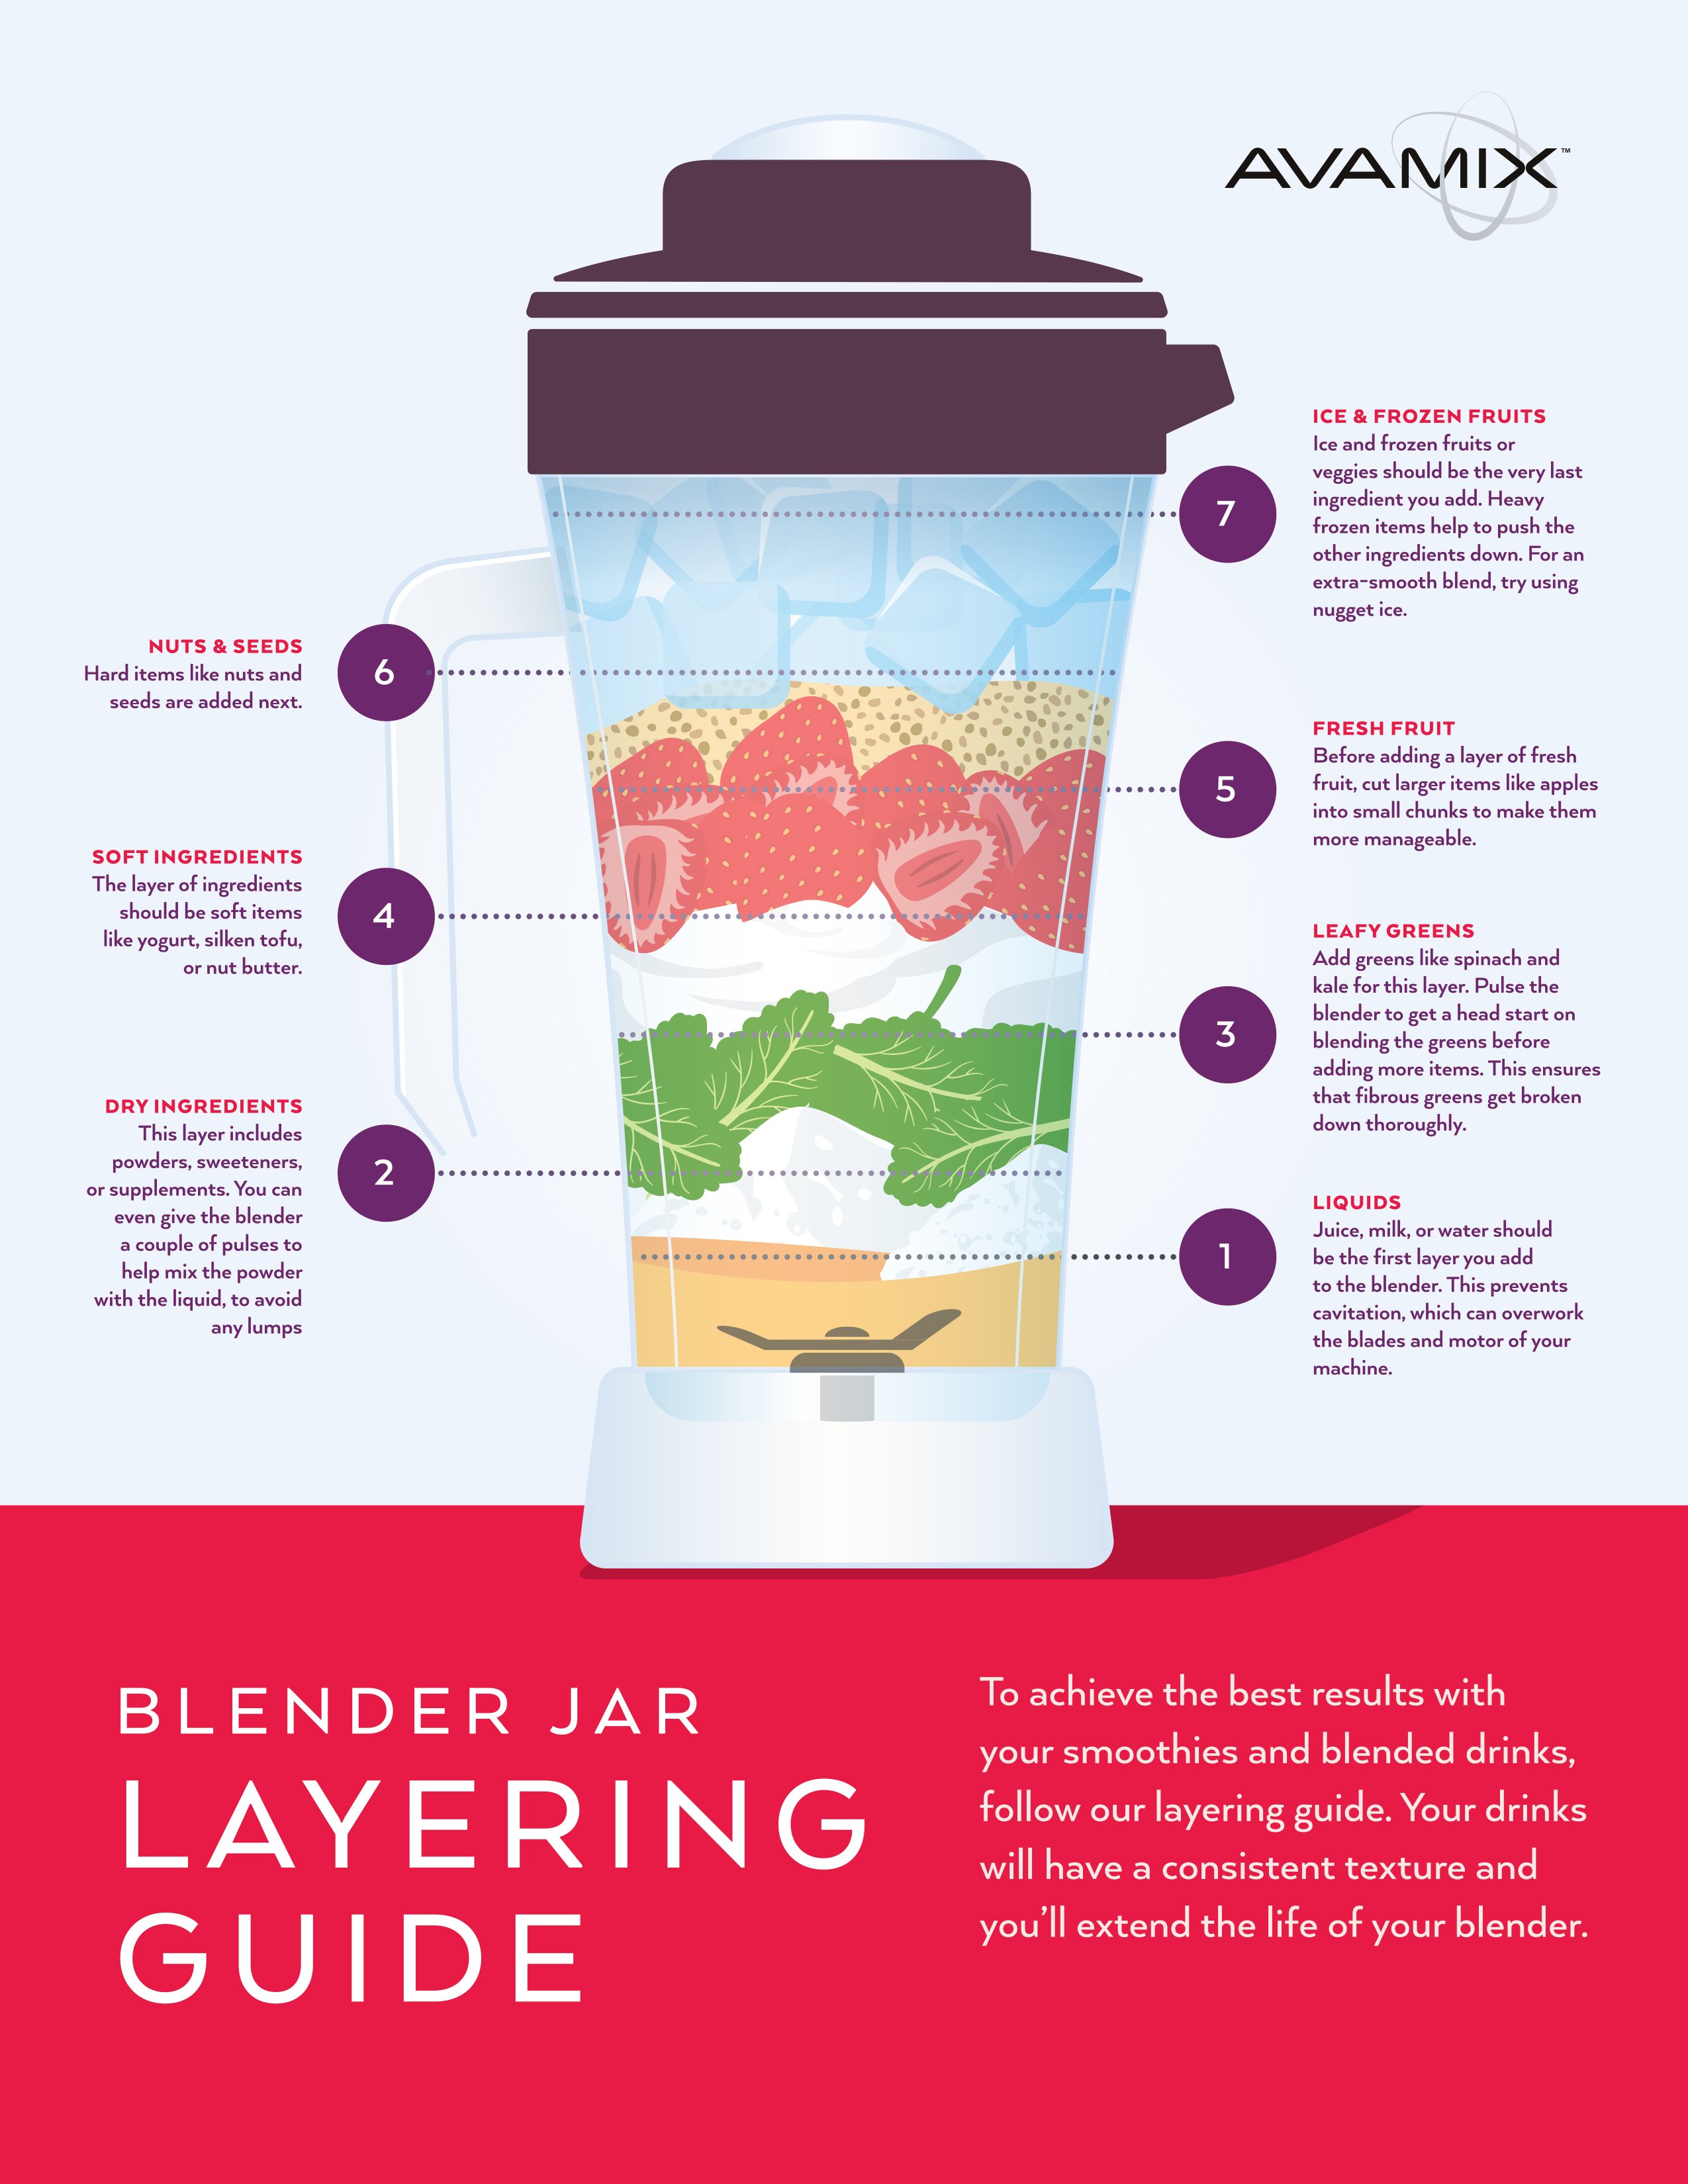
- Layer ingredients: liquids first, soft items middle, frozen items last
- Allow 2-3 minutes between heavy blending sessions
- Monitor motor sound changes indicating approaching overload
- Maintain 4-inch clearance around motor base for ventilation
These simple adjustments can double your Vitamix’s operational lifespan.
Professional Service Decisions: Repair vs. Replace
Verify Warranty Coverage Before Paying
Vitamix warranty coverage varies significantly by model. Home use models typically include 5-10 year full coverage, while commercial units have 3-year protection. Check your coverage by:
- Locating serial number on motor base
- Checking purchase date against warranty period
- Contacting Vitamix customer service: 1-800-VITAMIX
- Providing detailed symptom description
Many thermal-related issues remain covered even after years of ownership when usage guidelines were followed.
Evaluate Repair Economics Honestly
Weigh these cost factors before committing to service:
- In-warranty repairs: $0 including shipping
- Motor replacement: $150-$400 depending on model
- Drive socket replacement: $15-$50 (user-serviceable)
- Professional assessment: $50-$75 (applied to repair)
When repair costs exceed 50% of a new unit’s price, replacement becomes the smarter investment.
Emergency Workarounds During Critical Meal Prep
Perform the 30-Second Water Test
Quickly determine if your issue is serious with this diagnostic:
- Fill container with 2 cups room temperature water
- Secure lid and place on base
- Start on low, quickly increase to high
- Pass: Smooth operation indicates container/ingredient issues
- Fail: Immediate shutdown suggests motor or electrical problems
This simple test saves hours of unnecessary troubleshooting.
Model-Specific Reset Procedures for Immediate Results
Ascent Series Thermal Reset Protocol
For A2300, A2500, A3300, and A3500 models:
- Wait for automatic restart (30-45 minutes)
- Check display for error codes
- Use Vitamix app for detailed diagnostics
- Monitor cooling fan activation indicators
These models feature automatic thermal restart capabilities that simplify recovery.
Legacy Series Manual Reset Steps
For 5200, 7500, and Professional Series models:
- Unplug and cool for 45 minutes minimum
- Invert motor base carefully
- Press red reset button firmly for 10 seconds
- Test with water before normal use
Your vitamix blender motor stopped situation rarely indicates permanent failure. Most thermal shutdowns resolve with proper cooling, while electrical and mechanical issues are often simple fixes. Implement preventive measures immediately—adjust recipes, monitor usage patterns, and maintain proper maintenance schedules. When professional service becomes necessary, verify warranty coverage first and weigh repair costs against replacement value. With proper care, your Vitamix will deliver decades of reliable blending performance.


