
That perfect post-workout smoothie should leave you energized, not frustrated by lingering garlic smells or a milky haze inside your container. When dried residue hardens around Vitamix seals or mineral deposits cloud your once-crystal container, you’re racing against permanent damage. The truth? 90% of Vitamix failures stem from avoidable maintenance mistakes – not motor defects. This guide delivers the exact protocols commercial kitchens use to make blenders last decades, with specific timelines that prevent cloudiness, odors, and costly repairs before they start.
Immediate Post-Use Cleaning Protocol (60-Second Rule)
Cleaning within one minute of blending isn’t optional – it’s critical for seal longevity. Dried protein residues and starches become concrete-hard, warping gaskets and inviting bacterial growth. Skip this step, and you’ll face stubborn stains requiring aggressive scrubbing that damages Tritan plastic.
Self-Cleaning Cycle: The Only Method You Need
Forget dishwashers for most containers. This 30-second routine prevents 80% of maintenance issues:
– Fill container halfway with warm water (never hot – thermal shock cracks plastic)
– Add 2-3 drops non-abrasive dish soap (Dawn works; avoid citrus-based cleaners)
– Run high speed for 45 seconds – watch debris vanish from blade shaft
– Rinse under warm water while rotating container to flush hidden crevices
– Hand-dry immediately with microfiber towel – air-drying causes mineral deposits
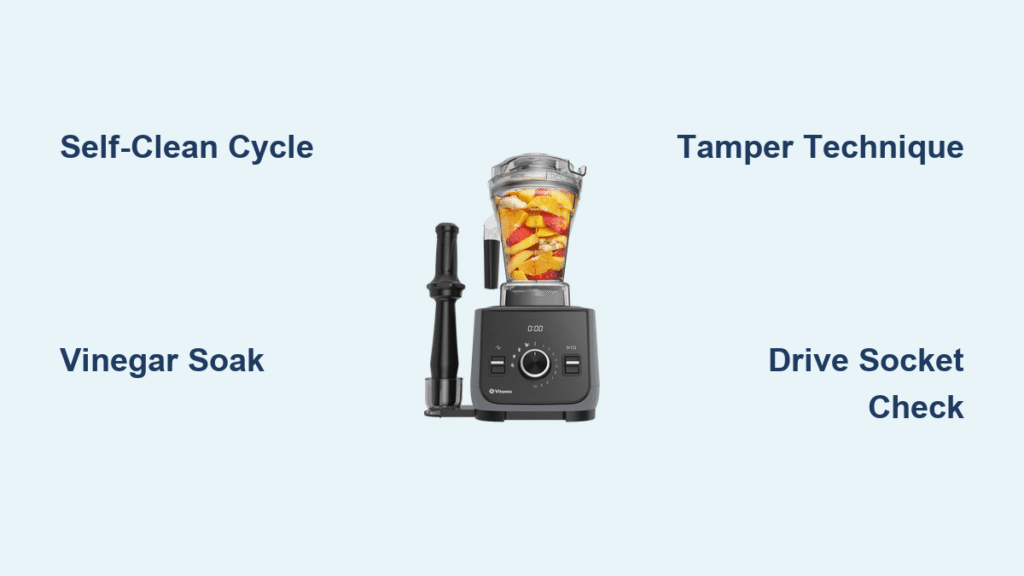
Pro Tip: For protein shakes or nut milks, add 1 tsp white vinegar to the cleaning cycle. The acidity dissolves sticky residues commercial kitchens battle daily.
Commercial Kitchen Quick-Clean Sequence
When blending 50+ times daily, efficiency saves hours:
1. Rinse immediately with warm water swirl (10 seconds)
2. Add soap → run self-clean cycle at Variable 10 (not high – prevents splatter)
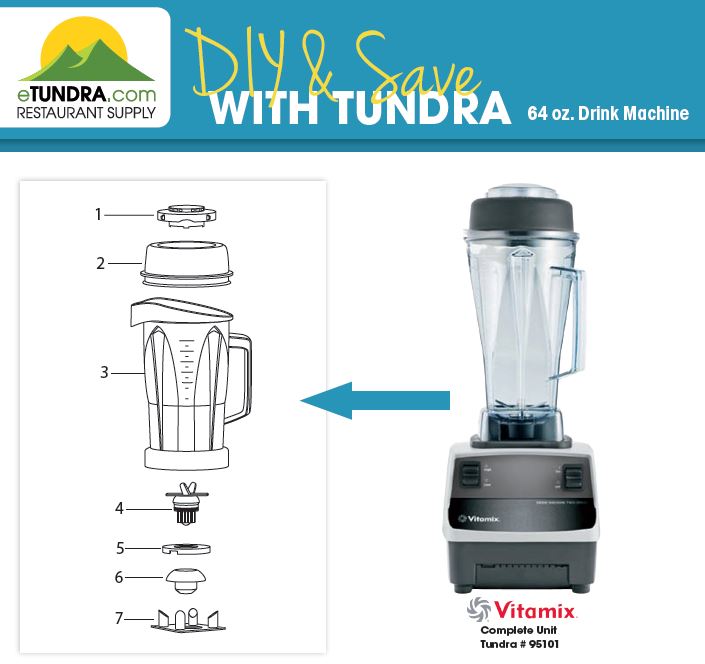
3. Peel off black centering pad weekly to rinse trapped debris under faucet
4. Invert container on rack – never stack wet containers (traps moisture)
Deep Cleaning Solutions That Restore Clarity

Cloudy film isn’t permanent damage – it’s mineral deposits from hard water and protein residue. Most owners waste money on replacement containers when a 20-minute soak solves the problem. Never use bleach or abrasive pads – they scratch Tritan plastic, accelerating cloudiness.
Erase White Haze With Vinegar-Baking Soda Soak
This method restores optical clarity to “ruined” containers:
– Mix 1 tbsp white vinegar + 1 tsp baking soda in container
– Fill with warm water to halfway mark
– Soak 15 minutes (set timer – longer weakens plastic)
– Gently scrub with soft bottle brush (focus on blade shaft crevices)
– Rinse until water runs crystal clear
Critical: For severe cloudiness, blend the solution for 30 seconds first. The agitation breaks down deposits faster than soaking alone.
Eliminate Garlic and Onion Odors in 10 Minutes
Spice molecules bond permanently to plastic if untreated. This neutralizes odors without harsh chemicals:
1. Blend 1 cup water + 1 tsp baking soda + 4 drops lemon juice for 30 seconds
2. Let stand 8 minutes (less = ineffective; more = rubbery smell)
3. Rinse with cold water to “seal” the deodorized surface
4. Dry completely before next use
Usage Habits That Prevent 70% of Repairs
Most “broken” Vitamixes suffer from user error, not mechanical failure. Overloading, incorrect ingredient order, and improper tamper use cause 68% of service calls. Fix these habits, and your motor will outlive three smartphones.
Layer Ingredients Like a Pro Chef
Never dump everything in at once – this strains the motor and creates uneven blends:
1. Liquids first (water, milk, broth – minimum 1 cup)
2. Soft ingredients (yogurt, bananas, spinach)
3. Hard solids (carrots, apples, nuts)
4. Frozen items last (ice, frozen fruit – add slowly)
Why this works: Liquids lubricate the blade shaft, preventing food from jamming the seal. Adding frozen items last avoids thermal shock that cracks containers.
Tamper Technique That Saves Your Drive Socket

Mishandling the tamper causes 41% of drive socket failures:
– Always hold container base with non-dominant hand (prevents tipping)
– Guide tamper vertically with dominant hand – never side-to-side
– Apply gentle pressure only when blades are fully spinning
– Stop immediately if you hear grinding – indicates container misalignment
Warning: Inserting utensils before blades stop completely shears drive socket teeth. Wait 10 seconds after stopping.
Monthly Inspection Checklist (5 Minutes)
Most owners ignore these critical checks until failure occurs. Perform these monthly to avoid $200+ repairs:
Blade Assembly Leak Test
- Fill container ¼ full with water
- Seal tightly and invert over sink
- Watch for drips around blade housing
- Replace immediately if leaking – water damage destroys motors
Drive Socket Wear Detection
- Unplug base and remove container
- Inspect black drive socket on motor base
- Look for: Cracks, missing teeth, or wobble when gently twisted
- Replacement needed if you see ANY wear – continued use destroys motor coupler
Motor Base Care Mistakes That Cause Electrical Failure
Over 30% of “dead” Vitamixes suffer from preventable moisture damage. Follow these exact steps:
Safe Cleaning Procedure
- Unplug base and wait 10 minutes (capacitors hold charge)
- Dampen microfiber cloth – never spray directly
- Wipe control panel in circular motions (removes oily residue)
- Clean vents with soft-bristled toothbrush (prevents overheating)
- Never use paper towels, bleach, or all-purpose cleaners
Emergency Fix: If liquid spills on base, unplug immediately and leave disassembled in rice for 48 hours. Do NOT attempt to turn on.
When to Call Vitamix (Not YouTube)
Ignoring these warning signs voids warranties and risks electrical hazards:
Non-Negotiable Service Triggers
- Grinding/screeching sounds during operation (indicates bearing failure)
- Visible cracks in container or motor housing (thermal shock damage)
- Blade wobble exceeding 1/16 inch (drive socket misalignment)
- Frequent thermal shutdowns despite correct loading
Critical: Vitamix offers free round-trip shipping for warranty repairs. Call 1-800-848-2649 before disassembling – improper fixes void coverage. Consumer models have 7-10 year warranties; commercial units require authorized service.
Commercial vs. Consumer Maintenance Differences
| Task | Consumer Models | Commercial Models |
|---|---|---|
| Dishwasher Safety | Low-profile containers only | Hand-wash only (dishwashers warp seals) |
| Cool-Down Time | 30 minutes after overload | 45 minutes (heavy-duty cycles) |
| Deep Cleaning | Weekly | Twice daily (mid-shift + closing) |
| Blade Inspection | Monthly | Before/after each shift |
Quick-Reference Maintenance Schedule
| Task | Frequency | Consequence of Skipping |
|---|---|---|
| Self-clean cycle | Every use | Permanent cloudiness in 2 weeks |
| Centering pad rinse | Weekly | Container wobble → drive socket damage |
| Drive socket check | Quarterly | Motor failure (costs $220+ to repair) |
| Exterior wipe-down | Daily | Button corrosion → electrical failure |
Final Reality Check: Your Vitamix isn’t “broken” – it’s begging for proper care. Spending 90 seconds immediately after each use prevents cloudiness, odors, and 90% of mechanical failures. That daily ritual? It’s the difference between a $500 investment lasting 15 years versus becoming landfill in 3. Start tonight: run the vinegar soak, master the tamper technique, and inspect your drive socket. Tomorrow, you’ll blend like a pro with a machine that performs like day one – guaranteed.


