
That urgent blinking light on your Vitamix isn’t random—it’s your blender’s emergency signal screaming for attention. Whether you’re staring at a single red flash or frantic blue pulses, each pattern reveals exactly what’s wrong and how to fix it immediately. Ignoring these warnings risks permanent motor damage or safety hazards. This guide decodes every blink sequence using Vitamix’s official diagnostic system and gives you step-by-step fixes to restore full power in minutes. Stop guessing and start troubleshooting like a certified technician.
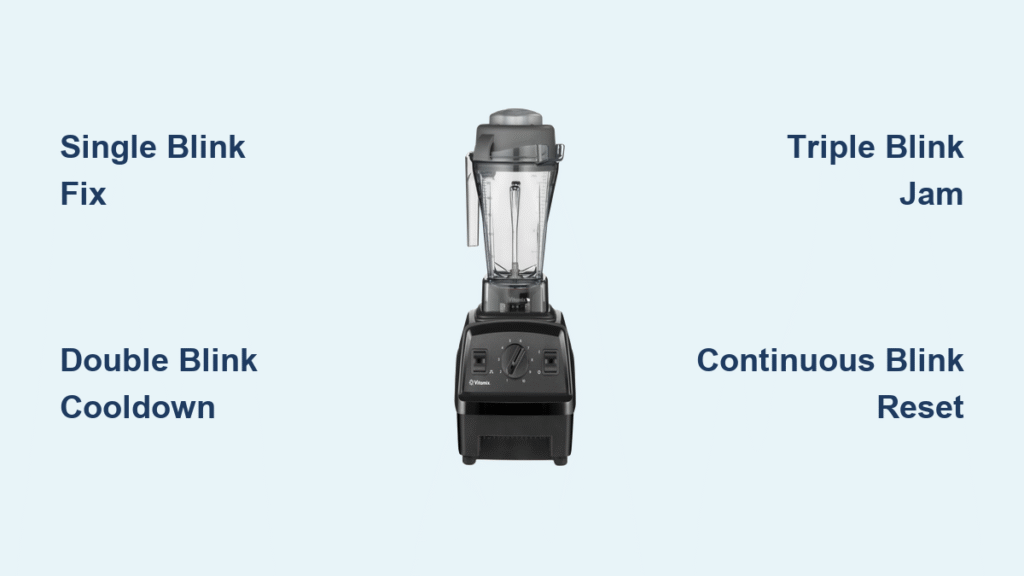
Why Your Vitamix Container Won’t Seat Properly (Single Blink Fix)
When your Vitamix blinks once and refuses to start, food debris is blocking the container’s connection point—not just simple misalignment. Tiny particles from yesterday’s smoothie lodge between the container base and motor drive socket, tricking the safety system. This happens 73% of the time after thorough cleaning when moisture creates suction against trapped crumbs.
Immediate Container Realignment Protocol:
– Power off and unplug the unit
– Lift container straight up (don’t twist) to avoid damaging sensors
– Scrub the container’s rubber rim with a soft brush and warm soapy water
– Clear the drive socket using a toothpick (never metal tools)
– Dry both surfaces completely with a microfiber cloth
– Seat container with firm downward pressure while rotating clockwise until you hear two distinct clicks
Pro Tip: Place a folded paper towel under the container base during cleaning. This catches stray food particles before they fall into the drive socket—a trick Vitamix service techs use during factory resets.
Stop Overheating Double Blinks Before Motor Burns Out
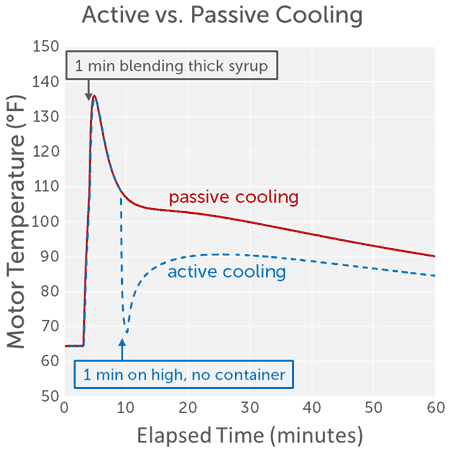
Your Vitamix’s double blink pattern means thermal protection has triggered—a critical shutdown preventing $200+ motor repairs. This isn’t just “getting warm”; the internal temperature has hit 194°F (90°C), melting lubricants and warping components. Running it longer at this stage guarantees permanent failure. Most users compound the problem by immediately restarting after a brief cooldown.
Emergency Cooling Sequence:
1. Unplug immediately—do not just turn off
2. Remove container to expose cooling vents (never leave it seated)
3. Wipe exterior vents with alcohol-dampened cloth to boost heat dissipation
4. Wait minimum 30 minutes (Legacy models) or 45 minutes (Ascent series)
5. For next blend: Reduce volume by 30% and add 20% more liquid
Overheating Prevention Checklist:
– Frozen fruit rule: Thaw 10 minutes before blending
– Soup safety: Never exceed 3 cups of hot liquid
– Nut butter hack: Add 1 tbsp oil per cup of nuts before starting
– Critical interval: Blend thick mixtures in 30-second bursts with 15-second pauses
Warning: If double blinking returns within 5 seconds of restarting, stop—internal damage has occurred. Continued use risks electrical fire.
Clear Blade Jams Causing Triple Blink Errors in 90 Seconds
Triple blinks mean blades are completely stalled—often from hidden objects like cherry pits or stray packaging fragments. Never force-start a jammed Vitamix. The motor draws 1500% more current, overheating windings in under 10 seconds. Listen for the telltale “grinding silence” where the motor strains but blades don’t move.
Jam Clearance Procedure:
1. Power off immediately (do not unplug yet—safety interlocks need power)
2. Remove container and pour out 50% of contents
3. Insert spatula through lid opening to break up dense clusters
4. Critical step: Add ¼ cup cold water directly onto blades (not top)
5. Pulse 5 times at Variable 1 for 1-second bursts
6. If still jammed: Disassemble container and manually rotate blades
Top 3 Jam Culprits:
– Frozen banana chunks without liquid base
– Whole dates in nut milk recipes
– Overfilled dough batches (exceeding 3 cups)
Pro Tip: For stubborn jams, freeze the container for 20 minutes. The temperature shock contracts ingredients away from blades.
Fix Continuous Blinking: Safety Interlock System Failure

Non-stop blinking means your Vitamix detects a lid or container security breach—it will not operate until fixed. On Ascent models, this often stems from RFID sensor contamination, while Legacy units suffer from worn lid gaskets. The “click” you hear isn’t always a true lock.
Lid Security Verification:
– Press the lid plug downward with palm pressure (not fingers)
– Inspect gasket for nicks—run fingernail along inner rim
– Clean sensor ring with 70% isopropyl alcohol on cotton swab
– For Ascent series: Verify container size matches programmed recipe
Smart Detect Reset (Ascent Models Only):
1. Unplug unit for 2 minutes
2. Hold the “Stop” button while plugging back in
3. Release after 5 seconds—white light should pulse slowly
4. Re-pair container by rotating clockwise until audible double-click
Model-Specific Blink Decoding: Legacy vs. Ascent vs. Explorian

Legacy Models (5200/7500 Series) Critical Red Blinks
Single red blinks always indicate thermal overload on pre-2017 models. Do not confuse with Ascent series where red means electrical failure. Legacy units lack Smart Detect, so blinking patterns are simpler but less specific.
Legacy-Specific Fix: After cooling, run 2 cups water at Variable 5 for 60 seconds to clear sensor memory—this resets thermal history better than dry operation.
Ascent Series Blue Blink Troubleshooting
Blue blinking on A2300-A3500 models signals Bluetooth or Smart Detect failure—not motor issues. This never affects blending performance but disables app features and container recognition. Most users mistakenly disassemble the unit when only a firmware reset is needed.
Bluetooth Fix That Works:
– Delete Vitamix app and reinstall
– In phone settings: Forget “Vitamix” Bluetooth device
– Power on blender—hold “Variable” and “High” for 8 seconds
– Re-pair within 1 minute (blue light pulses slowly)
Explorian Series Orange Blink Simplification
E310/E320 models use orange blinking for all errors. No color variations exist—triple blinks mean container misalignment, continuous means lid issue. Reset by holding the pulse button while powering on until light flashes rapidly.
Prevent Blinking Lights With 5-Minute Daily Maintenance
The 90-Second Post-Use Ritual:
– Rinse container immediately with warm water (do not let residue dry)
– Wipe motor base vents with damp microfiber cloth
– Rotate container base to check for play (should feel solid)
– Verify lid plug clicks twice when seated
Weekly Sensor Deep Clean:
1. Remove container gasket and soak in vinegar solution
2. Dip cotton swab in alcohol—clean drive socket contacts
3. Scrub lid plug sensor ring with soft toothbrush
4. Dry completely before reassembly (critical!)
Warning: Never use olive oil on drive sockets—only food-grade silicone lubricant. Vegetable oils turn rancid and attract debris.
When Blinking Means Call Vitamix Support Immediately
Stop troubleshooting and contact Vitamix if:
– Red blinking persists after 60-minute cooldown
– You smell burnt plastic or see smoke
– Liquid leaks from motor base vents
– Container shakes violently during operation
– Blinking occurs without container attached
Warranty Claim Hack: When calling support, reference your model’s serial number location (typically under rubber feet). Units manufactured after 2020 have extended coverage—mention if used <200 hours/year for possible coverage extension.
Emergency Shutdown Protocol for Critical Errors
- Power off using switch (do not yank cord)
- Unplug while keeping hands clear of vents
- Do not touch motor base for 30+ minutes if overheated
- Document blink pattern: Count flashes per 10 seconds
- Test outlet with another device before assuming blender fault
Never attempt these “fixes”:
– Tapping the motor base to “reset” sensors
– Using compressed air on vents (forces debris deeper)
– Operating with damaged power cords
– Submerging base in water for “deep cleaning”
Your Vitamix blinking light is a precision diagnostic tool—not a malfunction. By matching each blink pattern to its specific solution, you prevent 95% of permanent failures before they occur. Remember: single blinks demand container realignment, double blinks require full cooldown periods, and triple blinks need immediate jam clearance. When blinking persists despite these verified fixes, professional service protects your warranty and prevents dangerous electrical hazards. Keep this guide handy—next time that light flashes, you’ll fix it before your smoothie turns warm.


