
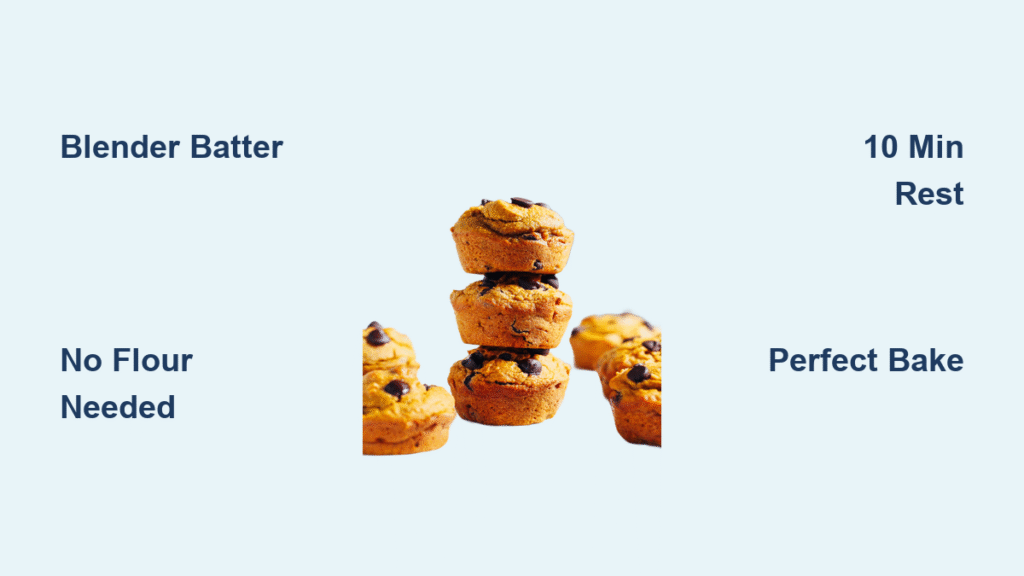
Tired of juggling multiple mixing bowls for bakery-style muffins that leave your kitchen looking like a flour tornado hit? These pumpkin blender muffins solve that problem with a revolutionary approach: toss everything in your blender and pour batter straight into the tin. No separate flour sifting, no messy bowls, just perfectly blended muffins packed with 85% of your daily vitamin A that bake in under 25 minutes. You’ll discover why this viral recipe has taken healthy baking circles by storm.
These aren’t your average dense gluten-free muffins. The high-speed blender transforms humble rolled oats into silky-smooth batter that bakes up light and fluffy with a bakery-worthy dome. Pumpkin puree delivers natural moisture without oil, while eggs and Greek yogurt create structure that holds up to chocolate chips or walnuts. Whether you’re meal prepping for busy mornings or craving a fall treat that won’t derail your nutrition goals, this recipe delivers professional results with minimal cleanup.
Why Your Blender Creates Perfect Muffin Batter
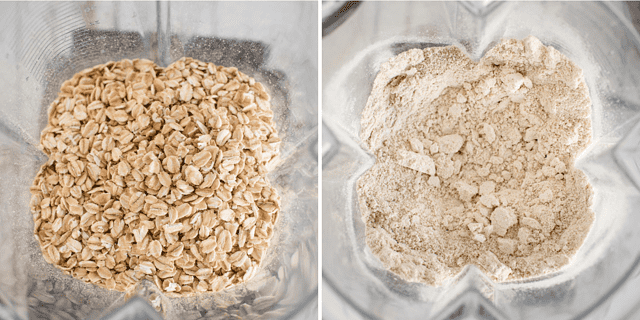
Oat Flour Transformation Process
Your blender isn’t just mixing ingredients—it’s creating the foundation for gluten-free success. When you add 2 cups of old-fashioned rolled oats first and pulse for 30 seconds, they transform into fine flour that eliminates gritty texture. Unlike store-bought oat flour that can become compacted, freshly ground oats maintain optimal aeration. This technique ensures your muffins rise properly without traditional wheat flour while keeping ingredients completely whole-food based.
Liquid Integration Science
Adding pumpkin puree (1 cup), eggs (2 large), and Greek yogurt (1/4 cup) after grinding the oats creates the ideal viscosity for proper gluten-free structure. The blender’s vortex action fully incorporates air while breaking down any pumpkin fiber strands that could create dense spots. For vegan versions, substitute eggs with 1.5 cups white beans blended with 1/4 cup plant milk—this combination mimics egg binding properties while adding protein. Never add all liquids at once; pour slowly while the blender runs to prevent curdling.
Precision Blending Technique
Stop blending the moment the batter reaches silkiness with tiny oat flecks visible—typically 45-60 seconds total. Over-processing creates gummy muffins as the oats release too much starch. If your blender struggles, add 1 tablespoon of milk rather than continuing to strain the motor. Always scrape the sides once during blending to ensure even consistency, especially with standard blenders that have dead zones near the base. Vitamix owners will notice smoother results in half the time compared to basic models.
Foolproof Baking Protocol for Flawless Results
Temperature Control Secrets
Preheat your oven to exactly 350°F (175°C) before blending—never put batter into a cold oven. An oven thermometer verifies accuracy since many ovens run hot or cold by 25°F. For large bakery-style muffins (9-10 per batch), maintain the same temperature but extend baking time to 24-25 minutes. If using a convection oven, reduce temperature by 25°F to prevent over-browning while maintaining moisture.
Doneness Detection Without Guesswork
The toothpick test requires nuance with pumpkin blender muffins. Insert into the center—it should emerge with just a few moist crumbs, not completely clean. Overbaked muffins show deep brown edges and cracked tops, while underbaked versions have pale tops that sink when touched. The perfect muffin has a springy dome that retracts slightly when gently pressed and pulls away slightly from the tin edges. If unsure, check 2 minutes before the minimum time—better slightly underbaked than dry.
Cooling Process That Preserves Texture
Resist the urge to remove muffins immediately after baking. Let them rest in the tin for exactly 10 minutes to set structure—any less and they’ll crumble when removed. Use the paper liner edges as handles to lift them onto a cooling rack. For optimal texture, wait 20 minutes before serving; this allows the crumb to fully set while maintaining that coveted moist interior. Refrigerated muffins revive perfectly with a 15-second microwave zap.
Troubleshooting Common Texture Issues
Fixing Dense or Gummy Centers
If your muffins emerge dense despite proper baking time, your blender likely over-processed the oats. Next batch, pulse instead of continuous blending and stop at 45 seconds. For gummy centers, reduce liquid by 2 tablespoons—pumpkin puree brands vary in water content (Libby’s is thicker than Farmers Market). Add 1/2 teaspoon extra baking powder if all else fails, but never exceed 1.75 teaspoons total to avoid chemical aftertaste.
Preventing Sunken Tops
Sunken centers usually indicate either an under-preheated oven or over-mixed batter. Verify your oven reaches 350°F with a thermometer before baking. When folding in chocolate chips (1/4 cup mini chips recommended), use a spatula with 3-4 gentle folds—over-mixing after blending deflates the air bubbles essential for lift. Fill muffin cups evenly to 3/4 full using an ice cream scoop for consistent baking.
Dietary Adaptations Without Compromise
Gluten-Free Certification Matters
Not all oats are created equal for gluten sensitivity. Use certified gluten-free oats like Bob’s Red Mill to avoid cross-contamination during processing. Standard rolled oats often contain wheat traces from shared equipment. The blender method requires no additional flour substitutions—simply grind certified oats as directed for 100% gluten-free results that pass muster with celiac testers.
Vegan Protein Powerhouse Version

Replace eggs with 1.5 cups rinsed white beans blended with 1/4 cup soy milk for equivalent binding. Use coconut yogurt instead of Greek yogurt and dairy-free chocolate chips (Enjoy Life brand recommended). This version bakes up with a fudgier texture resembling pumpkin pie but maintains 5g protein per muffin. Always refrigerate vegan versions due to the perishable bean base—they’ll keep for 5 days versus 7 for egg-based recipes.
Storage Solutions for Maximum Freshness
Freezing for Meal Prep Success
Flash-freeze cooled muffins on a baking sheet for 1 hour before transferring to freezer bags—this prevents them from sticking together. Wrap individually in plastic wrap for best results, squeezing out excess air. Thaw at room temperature for 1 hour or microwave unwrapped for 30 seconds. For grab-and-go breakfasts, place frozen muffins in your lunch bag—they’ll thaw by mid-morning while keeping your cooler space free.
Reviving Stale Muffins
Room-temperature muffins develop slightly moist tops after day two (normal for pumpkin). Place a folded paper towel in the storage container to absorb excess moisture. For muffins that dry out, microwave with a cup of water for 20 seconds—the steam restores moisture without making them soggy. Never refrigerate standard recipes unless adding perishable vegan ingredients—cold storage accelerates staling for egg-based muffins.
Pro Techniques for Bakery-Worthy Results
Layering Order for Smooth Blending
Start with 1/4 cup liquid (pumpkin puree) at the bottom to create a vortex, then add eggs, yogurt, and maple syrup. Top with ground oats and dry ingredients to prevent clumping. This sequence protects your blender blades and ensures even incorporation. Always add spices with dry ingredients—pumping pie spice mixed directly with wet ingredients creates streaks.
Batter Resting for Optimal Texture
Let blended batter sit 5 minutes before portioning—this allows the ground oats to absorb liquid and prevents gummy centers. During this rest, preheat your oven if you haven’t already and line the muffin tin. Fill cups using a 1/4-cup scoop for standard muffins or to the top for bakery-style domes. Tap the filled tin firmly on the counter twice to release air bubbles that cause tunnels.
These pumpkin blender muffins prove healthy baking doesn’t require culinary expertise or complicated techniques. With just 15 minutes of active prep time and endless customization options, you’ll create muffins that satisfy cravings while delivering serious nutrition. Make your first batch this weekend—your future self will thank you when grabbing these from the freezer on hectic weekday mornings. The blender method isn’t just convenient; it’s the secret to achieving that elusive bakery texture without the cleanup.


