
You’re mid-blend on your protein-packed breakfast when you spot it: a growing puddle beneath your Ninja pitcher. That ominous drip from the base isn’t just a messy countertop hazard—it’s a ticking time bomb for your motor. Liquid creeping into the base can fry electrical components, trigger smoky burning smells, or even cause a fire if ignored. But here’s the relief: 95% of bottom leaks stem from fixable issues you can diagnose before your smoothie finishes blending.
This guide cuts through the confusion with a no-fluff action plan. You’ll learn exactly where to inspect for cracks, how to resurrect a flattened gasket, and when a $6 part replacement saves your entire blender. Forget generic advice—we’re targeting your specific leak source with Ninja-specific fixes that work on BL610, BL660, and Nutri Ninja models.
Unplug Before Panic Sets In
Stop blending immediately and pull the plug—liquid meeting live electrical contacts risks short circuits or fire. Never grab a leaking blender while it’s plugged in, even if the leak seems minor.
Secure the Scene in 60 Seconds
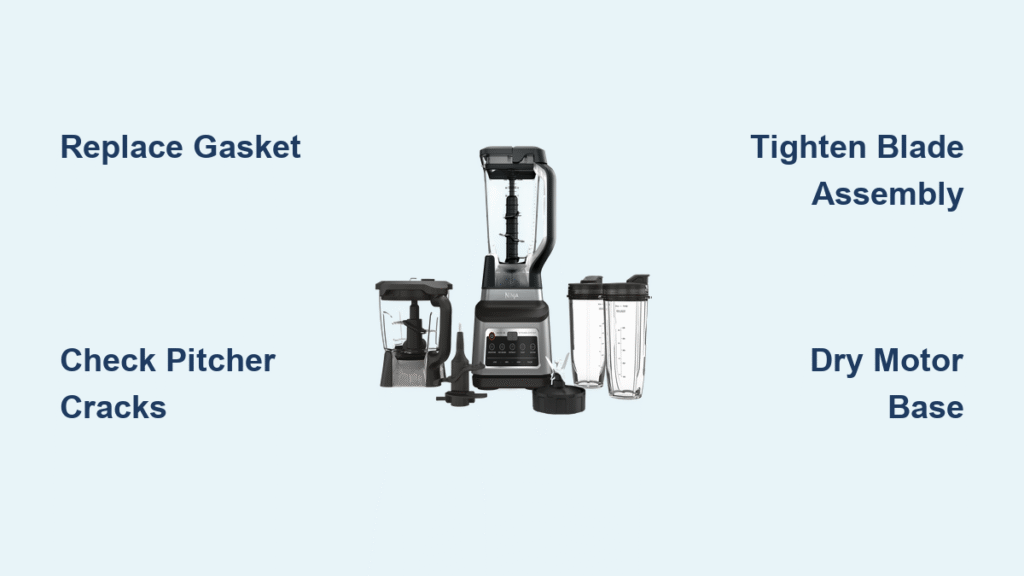
- Kill power first: Switch off the blender, then yank the cord from the wall
- Check motor base intrusion: Tilt the pitcher slightly. If liquid pooled inside the base cavity, do not re-plug until completely dry (24+ hours)
- Assess damage: Wipe residue with paper towels. If you smell burning or see smoke, contact Ninja support before using again
Why Skipping Safety Backfires
Ignoring this step risks permanent motor damage. One user reported sparks after re-blending with liquid in the base—resulting in a $100 replacement cost. Dry the motor base thoroughly with a microfiber cloth, then leave it upside-down in a warm, dry spot for a full day.
Pinpoint Your Leak Source Like a Ninja Pro

Gasket Failure: The 70% Leak Culprit
That black rubber ring between pitcher and blade assembly is your #1 suspect. Signs it’s failing:
– Flattened profile: Healthy gaskets spring back when pinched; worn ones stay compressed (original thickness is 2.5mm)
– Food film clogging the groove: Dried smoothie residue prevents full sealing
– Twisted installation: Common after aggressive cleaning or PULSE-heavy use
Do this now: Remove the gasket. Run your fingertip along its inner edge. Notice any rough spots, nicks, or permanent creases? Replace it immediately.
Blade Assembly Danger Zones
Dull blades strain the motor, creating cracks that leak. Check for these red flags:
– Wobbly blades: More than 1mm vertical play means bearing failure (grab blades—if they move up/down, it’s bad)
– Rust near the bearing: Indicates liquid breached the seal repeatedly
– Cracks radiating from center: Hold pitcher up to bright light; hairline fractures often start here
Pro Tip: If your blades no longer crush ice cleanly, replace the assembly. Straining motors accelerate seal wear.
Pitcher Cracks You’re Missing
Ninja’s Tritan plastic develops invisible stress fractures. Inspect like this:
1. Fill pitcher with water and hold against window light
2. Trace the blade housing neck with your finger—cracks feel like hair-thin ridges
3. Check where the pitcher base meets the motor—micro-fractures hide here
Critical Note: Cracks worsen fast with frozen ingredients. If you see any line longer than 3mm, replace the pitcher.
60-Second Leak Test That Never Lies

Fill pitcher with 2 cups cold water (no ingredients!). Secure lid, blend on Speed 2 for 10 seconds. Watch where leaks emerge:
| Leak Location | Immediate Action |
|---|---|
| Center drip | Replace gasket (351KKU3000) |
| Side seepage | Inspect pitcher for cracks |
| Base pooling | Clean motor base socket; reseat jar evenly |
Why cold water? Hot liquids expand cracks. Room-temperature water shows true leak paths.
Fix the Gasket Seal in 5 Minutes
Step-by-Step Resealing Protocol
- Remove gasket: Pop it out with your thumb (no tools needed)
- Scrub residue: Use a soft bottle brush on the groove—never metal (scratches cause future leaks)
- Dry thoroughly: Moisture traps air bubbles when reseating
- Reinstall perfectly: Place gasket flat in groove with zero twists
- Tighten smartly: Hand-tighten blade assembly, then give 1/8 extra turn with pliers wrapped in cloth
Pro Tip: After washing, store the gasket outside the pitcher. Air-drying prevents warping from trapped moisture.
When Replacement Beats Repair

Gasket Swap: $6 That Saves Your Blender
Replace if:
– Visible tears or nicks (even hairline)
– Permanent flattening (won’t rebound when pinched)
– Used beyond 12 months of daily blending
Use ONLY OEM part 351KKU3000—generic silicone swells and leaks within weeks. Install it dry (no oil or grease!).
Blade Assembly Emergency Replacement
Upgrade now when:
– Blades wobble vertically more than 1mm
– Cracks exceed 3mm near the bearing sleeve
– Rust appears around the drive shaft
Part 357KKU3000 includes a new gasket. Skip sharpening dull blades—replacing the assembly costs less than motor repair.
Pitcher Crack Reality Check
Replace immediately if:
– Cracks penetrate through the pitcher wall
– Multiple fractures cluster near the blade housing
– You blend frozen ingredients daily
Warning: “Super glue” fixes fail under pressure. Tritan plastic requires OEM replacement.
Stop Leaks Before They Start: Ninja’s Secret Routine
Daily Non-Negotiables
- Rinse gasket/blades immediately after use—dried residue destroys seals
- Store pitcher upside-down on a rack (never nested) to air-dry the base
- Never exceed Max Fill line—overfilling forces liquid into seals
Weekly Damage Control
- Remove blade assembly entirely
- Inspect gasket for warping with a bright flashlight
- Check retainer nut tightness (shouldn’t turn by hand)
- Run fingers along pitcher neck for micro-cracks
Frozen Ingredient Rules That Prevent Cracks
- 1:1 liquid-to-frozen ratio (e.g., 1 cup berries + 1 cup liquid)
- Limit PULSE to 3-second bursts—longer strains the plastic
- Rest motor 30 seconds between blends (heat weakens seals)
Dangerous “Fixes” That Actually Worsen Leaks
Why These Backfire
- Over-tightening the jar: Pinches the gasket unevenly, creating gaps opposite the force point
- Using petroleum jelly on seals: Swells rubber short-term but degrades it permanently
- Blending boiling liquids: Thermal shock from >180°F liquids causes instant micro-fractures
- Ignoring dull blades: Straining motors vibrate seals loose 3x faster
True Story: One user tightened his jar until the pitcher cracked—requiring a full replacement. Hand-tight plus 1/8 turn is the golden rule.
Warranty Claims That Actually Get Results
Ninja’s 1-year warranty covers manufacturing defects only—not:
– Cracks from frozen ingredients (their #1 exclusion)
– Gasket wear from normal use
– Liquid damage from user-caused leaks
Get approved by:
1. Calling 1-877-646-5288 with your model/serial number
2. Proving the leak existed before using frozen items
3. Showing photos of uncracked pitcher with new gasket installed
Pro Tip: If cracks appeared within 6 months of light use, demand replacement—they often bend rules for early failures.
Final Leak-Proof Checklist (30 Seconds)
Before your next blend:
☐ Gasket sits flat with no twists or kinks
☐ Blade assembly hand-tight + 1/8 turn (no wrench needed)
☐ Pitcher base clean and dry—no food debris on rim
☐ Zero cracks when held to bright light
☐ Cold water test passed with no drips
A Ninja blender leaking from the bottom rarely means buying new. In 8 of 10 cases, a $6 gasket swap or proper reassembly stops the drip permanently. By targeting the true leak source—whether a flattened seal, hairline crack, or wobbly blade assembly—you’ll protect your motor and avoid costly repairs. Implement the 60-second pre-blend check weekly, and your countertop will stay dry for years. Remember: that first drip is your blender’s cry for help—answer it with this guide, and you’ll outlast the warranty by years.


