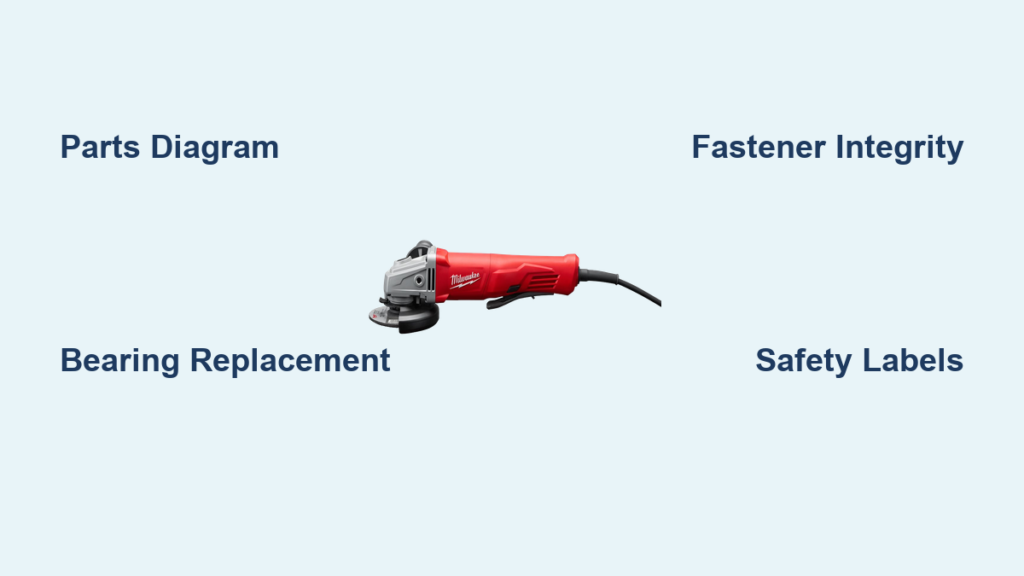
Your Milwaukee angle grinder has stopped working mid-job, and you’re staring at a confusing array of components trying to figure out which part needs replacement. With over 1,200 individual parts spanning multiple model generations, identifying the correct component from Milwaukee’s extensive parts ecosystem can feel overwhelming without a proper roadmap. This comprehensive Milwaukee grinder parts diagram guide cuts through the confusion by showing you exactly how to locate, identify, and source the specific components you need for successful repairs—whether you’re maintaining professional-grade equipment or tackling your first DIY grinder restoration.
Milwaukee’s parts documentation system represents one of the most extensive tool replacement component libraries available for professional-grade angle grinders. Understanding how to navigate this complex ecosystem transforms frustrating repair experiences into efficient maintenance sessions where you can confidently order the right parts the first time. This guide walks you through the critical components visible in Milwaukee grinder parts diagrams, highlights the most frequently replaced elements across common repair scenarios, and provides practical strategies for sourcing both active and discontinued parts when restoring your equipment to peak performance.
How Milwaukee Part Numbers Reveal Component Compatibility
Milwaukee’s systematic part numbering convention provides essential clues about component compatibility before you even consult the parts diagram. Recognizing how these identifiers work saves you hours of frustration when cross-referencing parts for your specific grinder model. The numerical prefixes in Milwaukee part numbers directly correspond to component categories, creating a logical system for organizing the extensive parts library.
Decoding Milwaukee’s part number structure:
– 02-04 series: Bearing components (e.g., BEARING 626RS SKU 02-04-2110)
– 06-97 series: Fastening hardware (e.g., 1/2 Split Ring Lockwasher SKU 06-97-4200)
– 10-98 and 10-15 series: Warning labels and safety identification
– 12-20 and 12-98 series: Service nameplates and instruction plates
– 14-20 and 14-29 series: Electronic assemblies and gear housings
When searching for replacement parts, always begin with your grinder’s model number and serial number. These identifiers appear on the service nameplate attached to your tool housing and determine which parts diagram applies to your specific equipment. The Milwaukee 6141 model, for example, refers to a 5-inch direct drive sander-grinder configuration requiring specific components distinct from other model variants.
Why model-specific parts diagrams prevent costly mistakes
Using the wrong parts diagram for your Milwaukee grinder leads to ordering incompatible components that won’t fit or function properly. Each model generation features subtle design variations affecting component compatibility—even when parts appear visually identical. The GEAR HOUSING ASSY 14-29-0310 (SKU 14-29-0310), for instance, serves specific model configurations and may not interchange with similar assemblies from other production years.
Critical verification steps before ordering parts:
1. Locate your grinder’s service nameplate (typically on the housing near the motor)
2. Record both model number and serial number exactly as printed
3. Cross-reference these numbers with Milwaukee’s official parts database
4. Verify dimensional specifications match your original components
5. Confirm availability status—many labels and nameplates are discontinued
Critical Bearing Components in Milwaukee Grinders

Bearing failures represent one of the most common repair scenarios for Milwaukee angle grinders, directly impacting performance and tool longevity. The Milwaukee grinder parts diagram clearly identifies these critical wear components that require regular inspection and timely replacement to prevent catastrophic secondary damage to more expensive assemblies.
Motor shaft bearings requiring routine replacement
The Milwaukee BEARING (626RS) with SKU 02-04-2110 ($3.89) serves as the workhorse replacement for motor shaft failures across multiple mid-sized grinder models. This bearing specification appears frequently in parts diagrams for grinders manufactured between 2005-2015, making it a staple inventory item for professional repair technicians. When this bearing fails, you’ll notice distinctive symptoms including:
- Audible grinding or whining from the motor area during operation
- Excessive vibration that intensifies at higher RPMs
- Visible play in the spindle shaft when manually tested
An equivalent alternative, the Milwaukee BEARING (606RS) SKU 02-04-2115 ($3.89), serves identical mechanical functions in alternative grinder configurations. While these bearings share similar pricing, they’re not always interchangeable—always verify compatibility with your specific model’s parts diagram before substitution.
Gear housing bearings handling extreme loads
The 20x47x14 bearing (SKU 02-04-2031) priced at $5.73 handles significantly higher radial and axial loads within the gear reduction system. This bearing’s numerical designation directly indicates its physical dimensions: 20mm inner diameter, 47mm outer diameter, and 14mm width. When replacing this component, inspect the housing bore for wear patterns that might indicate misalignment issues requiring additional correction.
For specialized mounting positions, the 6X19X6 BALL BRG 2 SE bearing (SKU 02-04-2080) at $7.06 provides precise fitment in certain Milwaukee grinder models. The pricing variation among bearing components reflects differences in load capacity, precision tolerances, and manufacturer specifications tailored to specific grinder requirements.
Preventing Milwaukee Grinder Assembly Failures with Proper Fasteners
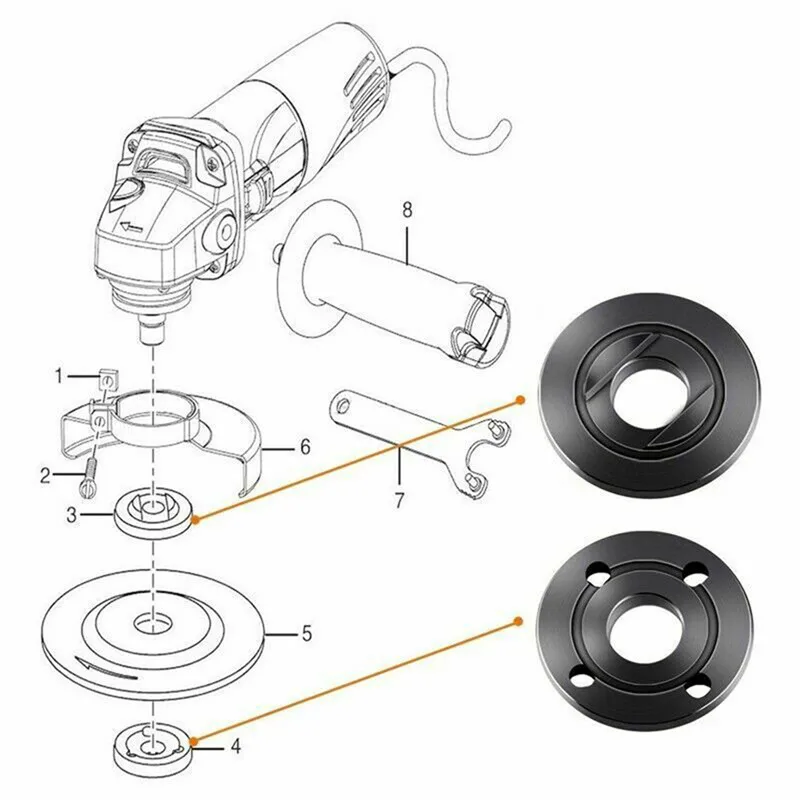
While often overlooked, fastening hardware proves absolutely critical for maintaining safe and reliable Milwaukee grinder operation under extreme vibration conditions. The parts diagram reveals specialized fasteners designed specifically to withstand the mechanical stress generated during grinding applications—standard hardware simply won’t survive.
Vibration-resistant lockwashers that maintain assembly integrity
The 1/2 Split Ring Lockwasher (SKU 06-97-4200) priced at $3.89 serves as Milwaukee’s engineered solution for preventing fastener loosening in high-vibration environments. Unlike standard flat washers, this component creates spring tension between mating surfaces that maintains clamp force throughout the tool’s operational life.
Proper installation technique for Milwaukee lockwashers:
– Always position the split ring with the gap facing away from the fastener head
– Verify proper seating before final torque application
– Replace lockwashers during every disassembly—they lose spring tension after removal
– Torque fasteners to specifications in the service documentation (typically 15-20 ft-lbs)
Using incorrect or worn lockwashers leads to gradual fastener loosening that causes component migration, housing misalignment, and potentially dangerous assembly failures during operation. The 1/2 inch sizing corresponds to the standard hardware used throughout Milwaukee grinder handle and gear housing assemblies.
Restoring Milwaukee Grinder Safety Labels and Identification
Milwaukee grinder parts diagrams prominently feature identification and warning labels that serve critical safety and regulatory compliance functions. These components aren’t merely decorative—they’re essential for maintaining tool compliance with occupational safety requirements and ensuring proper operator awareness of potential hazards.
Replacing discontinued warning labels with current equivalents
The WARNING NAMEPLATE 10-15-0155 (SKU 10-15-0155) represents an older label configuration now marked as discontinued. When replacing worn or damaged safety labels, always verify that the replacement meets current regulatory standards applicable to your region. The WARNING LABEL 10-98-7091 (SKU 10-98-7091) priced at $3.69 represents a more recent configuration that may serve as a suitable replacement despite its discontinued status.
Critical safety label replacement guidelines:
– Never operate a Milwaukee grinder with missing or illegible warning labels
– Check regional regulatory requirements before installing replacement labels
– Clean the mounting surface thoroughly before applying new labels
– Use only Milwaukee-approved adhesives to ensure label durability
– Document label replacements for equipment maintenance records
The CAUTION LABEL 10-98-5993 (SKU 10-98-5993) addresses specific operational warnings distinct from general danger notifications. These labels provide crucial guidance on proper tool usage practices that prevent equipment damage and operator injury—never remove or obscure them during maintenance procedures.
Gear Housing Assembly Replacement Procedures
The gear housing assembly represents a critical structural component visible in Milwaukee grinder parts diagrams that contains the gear reduction system transmitting motor power to the grinding wheel spindle. This assembly experiences substantial mechanical stress during operation, making it susceptible to wear, damage from impacts, and bearing-related failures.
Diagnosing gear housing failures through visual inspection
When the GEAR HOUSING ASSY 14-29-0310 (SKU 14-29-0310) shows signs of failure—marked as obsolete in current parts diagrams—you’ll notice these telltale symptoms:
– Visible cracks or deformation in the housing structure
– Excessive play in the output spindle
– Gear teeth showing visible wear patterns or chipping
– Oil leaks around bearing mounts indicating seal failure
Gear housing replacement becomes necessary when bearing failures have damaged housing bore surfaces beyond repair. Unlike simple bearing replacement, this procedure requires complete disassembly of the transmission system and careful realignment during reassembly.
Sourcing obsolete gear housing components
When faced with obsolete components like the GEAR HOUSING ASSY 14-29-0310, explore these alternative sourcing strategies:
– Check with Milwaukee’s legacy parts department for remaining inventory
– Search specialty suppliers focusing on discontinued power tool parts
– Consider compatible assemblies from similar model generations
– Evaluate aftermarket replacement options meeting original specifications
– Consult online forums where technicians share alternative solutions
Always verify dimensional compatibility before installing alternative gear housing assemblies. Even minor differences in mounting points or bore dimensions can cause premature failure or unsafe operating conditions.
Milwaukee Electronic Component Troubleshooting
/page_3.jpg)
Modern Milwaukee grinders incorporate sophisticated electronic feedback systems visible in parts diagrams that manage critical functions including electronic clutch control, overload protection, and variable speed operation. Understanding these components becomes increasingly important as tool designs incorporate more advanced control systems.
Power module assembly replacement for electrical failures
The POWER MODULE ASSY. 14-20-0780 (SKU 14-20-0780) priced at $33.00 handles electrical power distribution within compatible Milwaukee grinder models. When this component fails, symptoms include:
– Intermittent operation or complete failure to start
– Unexpected speed variations during use
– Warning indicator illumination on tool interface
– Burning smell near the switch housing
Before replacing electronic components, always verify that power supply issues aren’t the root cause by testing with known-good power sources and verifying cord connections. The ELECTRONICS FEEDBACK MDL 14-20-3105 (SKU 14-20-3105) is marked as discontinued, indicating replacement with updated electronic architectures in current production models.
Cost-Effective Milwaukee Grinder Repair Strategies
Successfully navigating Milwaukee’s extensive parts ecosystem requires understanding both component availability and strategic repair approaches that maximize your investment in professional-grade equipment.
When to repair versus replace Milwaukee grinders
Evaluate these factors before committing to extensive repairs:
– Cost comparison: If parts exceed 60% of new tool price, consider replacement
– Tool age: Grinders over 10 years old often benefit from modern safety features
– Part availability: Multiple discontinued components complicate long-term maintenance
– Warranty coverage: New tools include 5-year warranties versus limited repair coverage
Simple hardware components like bearings ($3.89-$7.06) and lock washers make economical maintenance items, while electronic assemblies ($33.00) and gear housings represent significant repair investments requiring careful cost-benefit analysis.
Proactive maintenance extending Milwaukee grinder lifespan
Implement these maintenance practices to prevent common failures:
– Inspect bearings every 50 hours of operation for early wear detection
– Verify fastener integrity after each heavy-use session
– Replace safety labels immediately when becoming illegible
– Clean ventilation ports regularly to prevent motor overheating
– Store grinders in dry environments to prevent corrosion
Regular bearing replacement before complete failure prevents secondary damage to housing bores and other expensive components, making proactive maintenance a cost-effective strategy for Milwaukee tool ownership. Always reference the specific parts diagram for your model when ordering components to ensure compatibility and proper installation.