
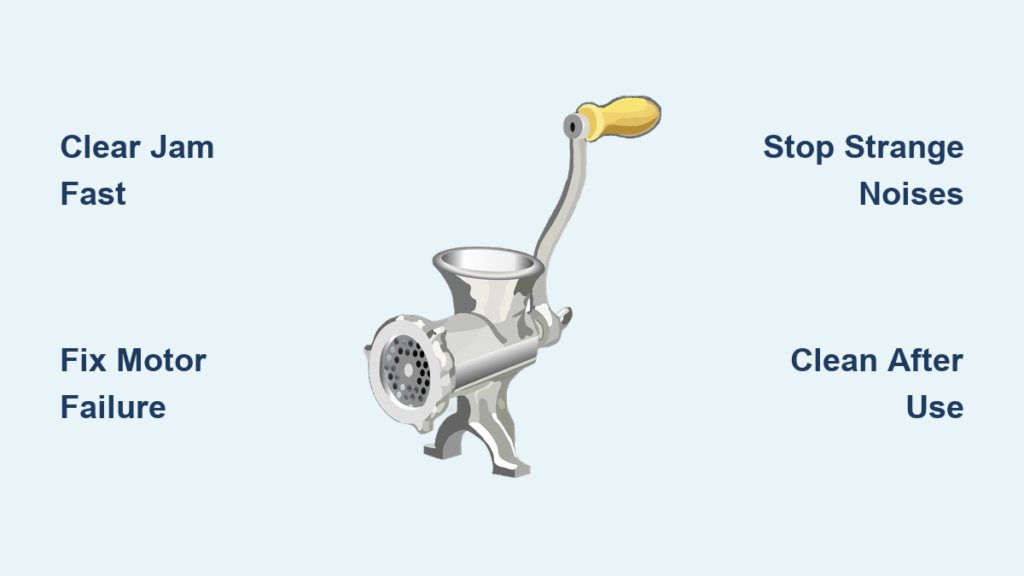
Your meat grinder suddenly stops working mid-task, leaving you with half-ground meat and a frustrating mess. Before you rush to buy a replacement or call a repair technician, most meat grinder problems have simple fixes you can handle at home. This comprehensive troubleshooting guide walks you through the most common issues, helping you diagnose problems quickly and get your machine back in action.
Whether you own a manual hand-crank model or a powerful electric meat grinder, understanding how these machines work and knowing how to address common failures will save you time, money, and the inconvenience of interrupted meal preparation. From jammed mechanisms and motor failures to grinding inconsistencies and strange noises, we cover every major problem category with step-by-step solutions you can follow right now.
Why Your Meat Grinder Suddenly Stops Working Mid-Grind
Mechanical failures account for most meat grinder breakdowns, typically resulting from improper use or lack of maintenance. When your grinder halts unexpectedly, hardened meat fat and connective tissue residue is often the culprit—this sticky buildup binds moving parts together over time. Electric models face additional challenges with motors, switches, and electrical components that degrade with use.
The most common failure pattern occurs when accumulated debris creates resistance that the motor can’t overcome. You’ll notice the motor straining, slowing down, or stopping completely while the grinding output diminishes. This residue affects everything from the auger’s rotation to blade performance, leading to the grinding inconsistencies and jams that frustrate home cooks. Regular cleaning after each use prevents this buildup, but many owners skip this maintenance step until problems become severe.
Motor-related failures represent another significant category, particularly for electric models. Overheating causes the most damage, occurring when users push too much meat through too quickly or fail to let the motor rest during extended grinding sessions. Quality grinders include thermal protection that shuts down the motor before permanent damage occurs, but repeated overheating events gradually degrade performance until failure becomes inevitable.
How to Clear a Meat Grinder Jam in Under 5 Minutes

When your meat grinder jams during operation, immediate action prevents permanent damage to the motor or gears. Never force the crank handle or continue running an electric motor when resistance increases significantly. Turn off and unplug the machine immediately—continuing to operate a jammed grinder risks burning out the motor or stripping internal gears.
Identify the Jam Location Before Disassembling
Before taking your grinder apart, determine where the obstruction is located. Remove the hopper and examine the grinding chamber. Common obstructions include:
– Bone fragments that slipped through during feeding
– Large pieces of connective tissue wrapped around the auger
– Hardened plugs of fat and meat formed in the throat of the grinding head
– Frozen meat chunks that expanded during grinding
If the auger appears frozen in place, gently try rotating it backward with a screwdriver inserted into the spiral groove. This often loosens minor jams without full disassembly. For manual grinders, try turning the crank handle backward—this frequently releases trapped material.
Complete Jam Clearance Procedure
For stubborn jams requiring disassembly:
1. Remove the face plate and carefully extract the cutting blade and auger
2. Soak all components in warm, soapy water for 15-20 minutes
3. Use a soft brush to clean the auger’s spiral groove thoroughly
4. Check the grinding plate holes for blockages using a toothpick or small brush
5. Reassemble components only after confirming all parts move freely
Pro Tip: After clearing a jam, run a small amount of bread through the grinder before resuming meat grinding. The bread acts as a natural cleaner that picks up residual debris and lubricates the mechanism.
Fix Electric Meat Grinder Motor Failures Without Tools
When your electric grinder won’t start, systematic diagnosis reveals the cause without specialized equipment. Begin with the simplest possibilities: check that the power cord is fully inserted into both the machine and the wall outlet, and verify the outlet functions by testing with another device. Many “dead” grinders simply need their power connection reseated.
Test the Electrical Switch Without a Multimeter
If power reaches the machine but nothing happens when you press the start switch:
– Listen carefully for a faint click when activating the switch
– A distinct click indicates the switch is working but another problem exists
– No click suggests a failed switch or wiring issue
For grinders with speed controls, try operating at different settings—sometimes only certain speed ranges fail due to internal switch contacts wearing out. Gently tapping the housing near the switch while activating it can temporarily restore contact if corrosion has developed on the electrical contacts.
Cool Down an Overheated Motor Properly
Overheating presents as a motor that runs normally at first, then loses power or stops completely after several minutes of use. This indicates the thermal protection circuit is activating. Never bypass thermal protection—this risks fire or complete motor failure.
To properly cool an overheated grinder:
– Unplug immediately and allow to rest for at least 30 minutes
– Clean dust from motor vents using compressed air
– Check that the grinding head isn’t overtightened, which increases resistance
– Next time, grind in smaller batches with 2-3 minute rest periods between
Stop Meat Grinder Noise Problems Before They Worsen
Unusual sounds from your meat grinder signal problems requiring immediate attention. Ignoring these warning signs typically leads to complete failure. A grinding or scraping sound usually means metal components are contacting unexpectedly due to improper assembly.
Fix Blade Alignment Issues Causing Scraping Noises
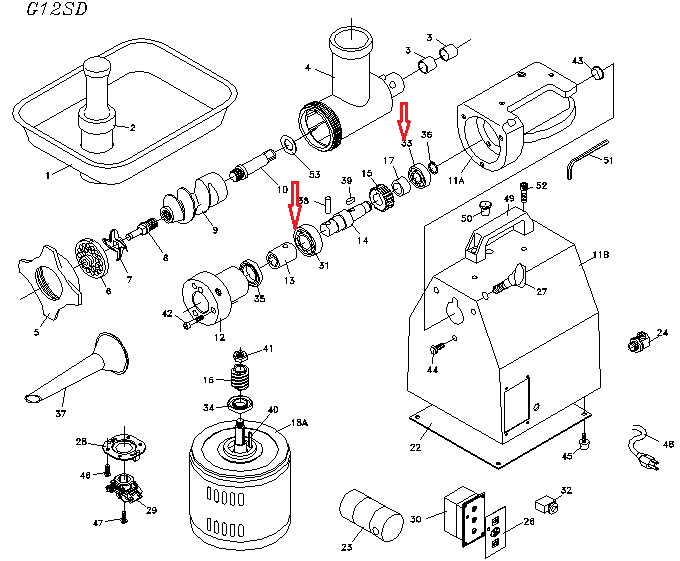
The cutting blade must seat firmly on the auger’s squared end and press flat against the grinding plate when the face plate is tightened. If your grinder produces a metallic scraping sound:
1. Disassemble the grinding head completely
2. Check that the blade is oriented with its cutting edge toward the grinding plate
3. Verify the blade sits flush against the plate without wobble
4. Ensure the face plate is tightened sufficiently (but not overtightened)
Warning: A loose blade can rotate out of position during operation, causing catastrophic damage to both the blade and grinding plate. Always check blade security before each use.
Eliminate Clicking Sounds from Gear Damage
Clicking sounds often originate from the drive mechanism, particularly in grinders with plastic gears. To inspect:
– Remove any access panels covering the gear housing
– Look for cracked or stripped gear teeth
– Check for foreign objects caught between gears
– Verify proper gear alignment and meshing
If gear damage is present, replacement is necessary—attempting to repair cracked plastic gears usually fails. When replacing gears, install both the driving and driven gears simultaneously since damaged teeth on one component typically damage its partner.
Get Perfect Grinding Results Every Time
Inconsistent grinding—chunky output in some areas, mushy paste in others—usually stems from assembly errors rather than mechanical failure. The most common cause is improper assembly of the cutting blade and grinding plate.
Correct Blade Orientation for Clean Cuts
The blade must face the correct direction with its cutting edge toward the grinding plate. Most blades include a directional arrow indicating proper orientation, but even without this marking:
– The blade should press flat against the plate when assembled
– The cutting bevel should face the direction of rotation
– The squared mounting hole must align perfectly with the auger’s drive end
Pro Tip: Apply a light coat of food-grade mineral oil to the blade and plate before assembly—this reduces friction and improves cutting performance without affecting food safety.
Optimize Meat Temperature for Consistent Grinding
Feeding technique significantly affects grinding quality. For optimal results:
– Chill meat to 28-32°F (just below freezing)
– Cut meat into 1-inch cubes before grinding
– Feed steadily without excessive pressure
– Alternate fatty and lean portions to maintain consistent flow
– Never force meat through the hopper—let the auger pull it in naturally
Meat that’s too warm creates smearing rather than clean cutting, while meat that’s too frozen strains the mechanism. The ideal texture allows your thumb to make a slight indentation when pressed.
Prevent Future Meat Grinder Failures With 3 Simple Habits
Regular maintenance extends your meat grinder’s lifespan dramatically while maintaining optimal performance. Establish these three habits immediately:
Clean Components Within 15 Minutes of Use
Disassemble and clean all food-contact components after every use while residue is still soft. Use warm water and mild dish soap with a soft brush to reach into the auger’s spiral groove. Never soak plastic components overnight—this can cause warping or cracking.
Dry Thoroughly Before Storage
Metal parts benefit from a light coating of food-grade mineral oil after drying to prevent rust. Store components loosely in a breathable container rather than forcing them together, which can deform seals over time. Keep your cleaning brush with your grinder for immediate access.
Lubricate Moving Parts Monthly
Apply a single drop of machine oil to any visible bearing points or gear assemblies according to your model’s specifications. Avoid over-lubricating, which attracts meat residue during use. Electric motor bearings typically require professional service, but accessible drive mechanisms need periodic oiling to prevent premature wear.
Final Note: The majority of meat grinder problems stem from improper cleaning after use. Establish a routine of immediate disassembly and cleaning—this simple habit extends your machine’s life by years while ensuring consistent performance for every batch of sausage, burgers, or ground meat you prepare. Keep replacement blades and plates on hand to avoid downtime when wear eventually occurs.


