
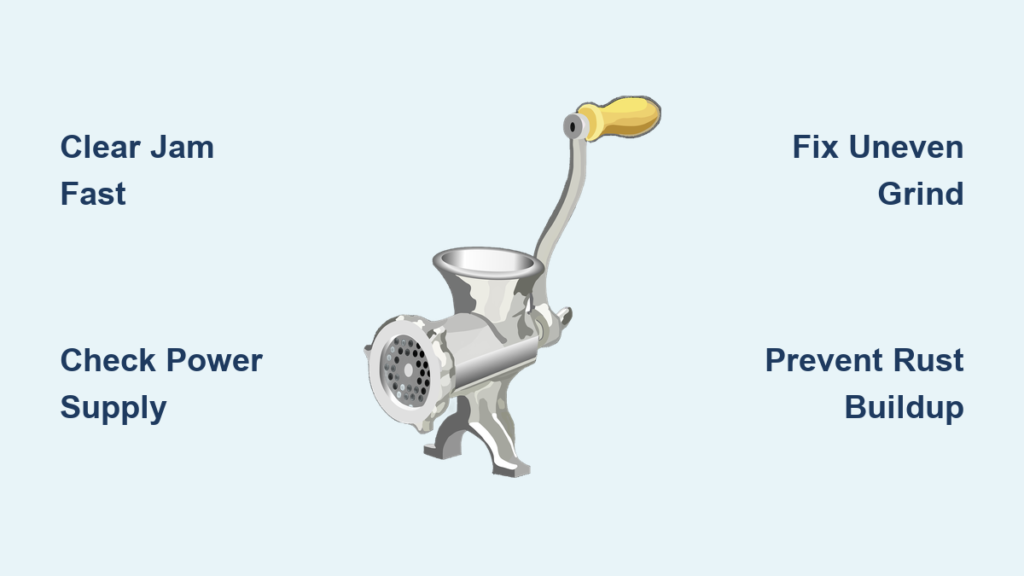
Your meat grinder suddenly stops mid-batch, leaving you with half-ground meat and dinner plans in jeopardy. This frustrating scenario happens to countless home cooks and hunters who rely on their grinders for fresh, quality ground meat. Meat grinder problems range from simple jams to serious mechanical failures, but most issues have straightforward solutions if you know what to look for. This guide reveals the exact steps to diagnose and fix the seven most frequent meat grinder malfunctions, helping you get back to creating perfect burgers, sausages, and pet food without costly replacements.
Why Your Meat Grinder Jams During Operation (And How to Clear It)
Nothing derails your grinding session faster than a jammed meat grinder. When meat stops flowing and the motor strains against an invisible barrier, you’re facing one of the most common meat grinder problems. This issue typically occurs when connective tissue wraps around the auger or when you feed meat too quickly into the grinding mechanism.
Immediate Steps to Clear a Jam Without Damaging Components
Stop grinding immediately when resistance increases—forcing meat through worsens the jam. Unplug your grinder and disassemble the head assembly carefully. Use a stiff brush to remove meat fragments from the auger threads and blade housing. Never use metal tools that could damage precision components. For stubborn jams, soak parts in warm (not hot) soapy water for 15 minutes before gentle scrubbing. Reassemble in exact order: blade (flat side toward plate), grinding plate, then retaining ring tightened firmly but not excessively.
Pro Tip: Always partially freeze meat for 30-45 minutes before grinding—this firms connective tissue while keeping meat pliable enough for smooth processing. Cut meat into 1-inch cubes to prevent overloading the feed tube.
Motor Won’t Start? Diagnose Electrical and Mechanical Failures
When flipping the switch produces no response, your grinder faces electrical or mechanical failure. This critical meat grinder problem requires systematic troubleshooting before assuming motor replacement is necessary.
Electrical Connection Checks You Must Perform First
Inspect the power cord for fraying or kinks near the plug and motor housing connection points. Test the outlet with another appliance to rule out circuit issues. Many grinders have thermal overload protection that cuts power when overheated—allow 20 minutes for cooldown before retrying. For models with reset buttons, press and hold for 5 seconds to restore function after overheating.
Internal Component Failures Requiring Professional Attention
Listen for humming without rotation—this indicates seized bearings or stripped gears. Visible smoke or burning smells mean immediate disassembly and professional assessment. Worn motor brushes (common in universal motors) cause weak performance and require specialized replacement. If the motor runs but the auger doesn’t turn, internal gear damage has likely occurred, particularly in plastic-geared budget models.
Decoding Strange Noises From Your Grinding Mechanism
Unusual sounds during operation signal developing problems that worsen if ignored. Each noise type reveals specific component issues needing immediate attention.
Grinding Metal-on-Metal Sounds
This harsh scraping indicates misaligned components or severe wear. Stop immediately and check if the blade is installed backward (flat side should face the grinding plate). Inspect for loose retaining ring screws that allow the plate to shift during operation. Worn bushings in the auger housing create excessive play, causing metal contact—these require replacement if movement exceeds 1/16 inch.
Clicking or Rattling During Operation
Foreign objects like bone fragments caught between blade and plate cause rhythmic clicking. Disassemble completely and inspect all components for damage. Bent auger shafts create uneven rotation that produces rhythmic thumping—replace if you detect any visible warp when rolling on a flat surface.
Fixing Inconsistent Grind Texture Issues
When your ground meat contains both fine particles and large chunks, your grinder fails at its primary function. This common meat grinder problem stems from three key factors that affect texture consistency.
Blade and Plate Wear Patterns That Ruin Your Grind
Dull blades tear rather than cut meat, creating mushy textures and uneven particle size. Check blades regularly by running your finger perpendicular to the edge—any smoothness indicates dullness requiring replacement. Worn grinding plates develop enlarged holes that allow oversized particles through, particularly noticeable when switching between coarse and fine plates.
Expert Note: Always grind tough cuts twice—first through a coarse plate to break down connective tissue, then through your desired plate for uniform texture. Never mix lean and fatty meats in the same batch for consistent results.
Preventing Meat from Sticking to Grinding Components
Sticky meat clinging to plates and blades creates frustrating interruptions and wasted ingredients. This issue becomes especially problematic when processing fatty cuts or during extended grinding sessions.
Temperature Control Techniques for Smooth Processing
Freeze your grinding plate and blade for 20 minutes before use—this prevents meat adhesion through thermal shock. Maintain meat temperature at 35-40°F throughout grinding; warmer meat sticks more readily to metal surfaces. For extremely fatty mixtures, wipe the grinding plate with a vinegar-soaked cloth between batches to cut through grease buildup.
Key Visual Cue: If meat appears smeared rather than cleanly cut, your components are too warm—pause grinding and rechill parts immediately.
Eliminating Rust on Critical Metal Components
Rust development threatens both food safety and mechanical function. Even stainless steel components can develop surface rust when exposed to moisture and improper storage conditions.
Safe Rust Removal Methods for Food-Contact Surfaces
For light surface rust, make a paste of baking soda and white vinegar, apply with a soft cloth, and scrub gently in circular motions. Rinse thoroughly and dry completely with a microfiber towel. Never use steel wool or abrasive pads that leave particles in microscopic scratches. For stubborn rust, use food-safe rust removers like Evapo-Rust following manufacturer instructions, then neutralize with a vinegar-water solution.
Critical Prevention Step: After complete drying, apply a thin coat of food-grade mineral oil to all metal components before storage—this creates a moisture barrier that prevents oxidation.
Correcting Assembly Mistakes That Cause Leaks and Poor Performance
Improper reassembly after cleaning causes 60% of apparent “meat grinder problems.” These preventable errors lead to leaks, inconsistent grinding, and premature wear.
Step-by-Step Assembly Verification Process
Lay out components in assembly order before starting. Install the blade with manufacturer markings facing outward (usually away from the plate). Ensure the plate’s orientation matches your desired grind size—smaller holes should face the blade. Tighten the retaining ring until snug, then give one quarter-turn more with pliers—overtightening strips threads. Test auger rotation by hand before powering on; it should turn smoothly with no binding points.
Warning: Forcing the retaining ring too tight cracks plastic housings and warps metal plates, creating permanent leaks that require part replacement.
When to Repair Versus Replace Your Meat Grinder
Determining repair viability saves money while ensuring food safety. Most meat grinder problems fall into clear repair or replace categories based on cost and component availability.
Repair-Friendly Problems Worth Fixing
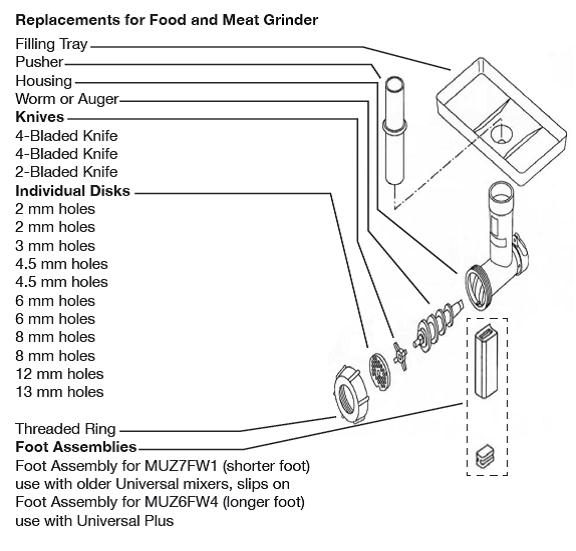
Blade and plate replacements cost $15-30 and restore like-new performance. Power cord replacements solve electrical issues safely when done correctly. Loose housing screws and worn pusher attachments require simple tightening or replacement. Most manufacturers offer these common parts for grinders up to 10 years old.
Replacement-Required Scenarios
Total motor failure in electric models typically costs more to repair than replacement. Stripped internal gears in plastic-geared units indicate end-of-life for budget grinders. Extensive rust penetration through metal components creates food safety hazards requiring disposal. Any electrical issues involving internal wiring beyond the power cord warrant replacement for safety.
Daily Maintenance Habits to Prevent Future Meat Grinder Problems
Proactive care prevents 80% of common meat grinder problems. These five habits ensure reliable performance and extend your grinder’s lifespan significantly.
Clean immediately after each use—dried meat residue becomes nearly impossible to remove. Hand-wash all components in warm, not hot, soapy water using non-abrasive brushes. Dry thoroughly with microfiber towels, then air-dry for 30 minutes before storage. Store components disassembled in a breathable container with silica gel packets to absorb moisture. Lubricate moving parts quarterly with food-grade grease as specified in your manual.
Final Pro Tip: Keep a dedicated maintenance kit with replacement blades, plates, food-safe oil, and cleaning brushes—this ensures you’re always prepared to address minor issues before they become major meat grinder problems. With proper care, your grinder will deliver consistent, high-quality results for years of reliable service.


