
Your NutriBullet blender sits on the counter, promising restaurant-quality smoothies but leaving you staring at its compact form. You’ve tried tossing in frozen fruit and spinach only to get chunky disasters or messy overflows. What if you could unlock its full power in under 60 seconds? This guide reveals exactly how to use NutriBullet blender like a pro—transforming your morning routine with perfectly smooth blends every time. Discover the precise ingredient order, critical safety steps, and cleaning hacks that prevent motor burnout. Let’s turn your countertop powerhouse into your most reliable kitchen ally.
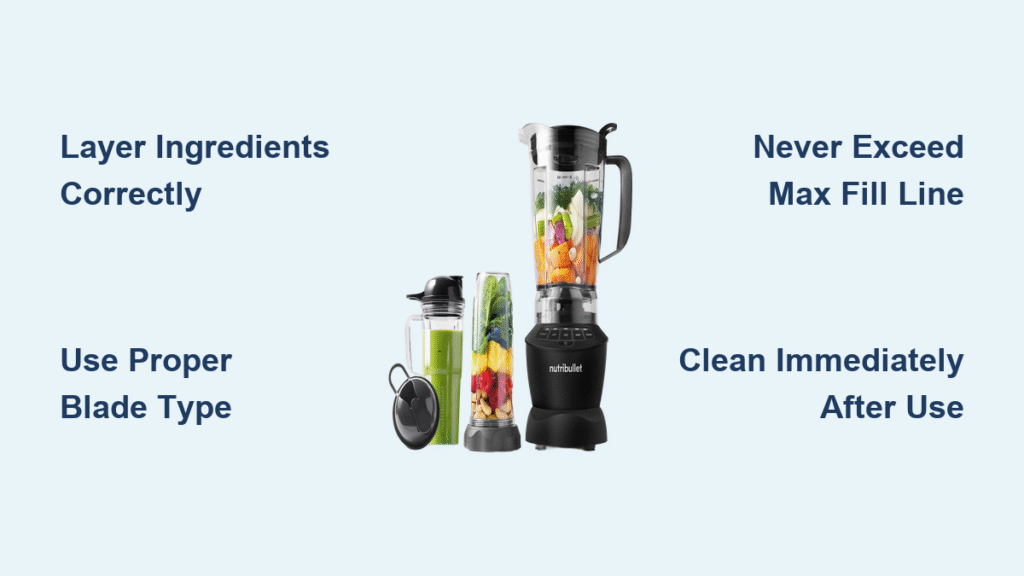
Stop wasting ingredients on failed blends. The secret lies in respecting three non-negotiable rules: never exceed the max-fill line, always layer ingredients strategically, and use the right blade for the job. Within minutes, you’ll master the “press-and-go” activation system and avoid the #1 mistake that destroys motors (hint: it involves hot soup). Whether you’re making baby food, nut butter, or post-workout shakes, this guide gives you actionable techniques straight from NutriBullet’s engineering specs. Your perfect blend starts now.
Identify Your NutriBullet Components Before First Use

Power Base and Motor Unit Essentials
Your NutriBullet’s power base isn’t just a motor—it’s the engineered heart of your blending system. The 600-900 watt motor uses downward pressure activation (no buttons!) to prevent accidental starts. Before plugging in, verify the suction cups grip your countertop firmly during operation. Always wrap the cord neatly around the base’s grooves for storage—never yank it from the outlet. Crucially, never immerse the power base in water; wipe it with a damp cloth only after unplugging.
Blade Types and Their Critical Functions

Extractor Blade (4-prong cross): This is your daily driver for smoothies, soups, and juices. Its angled edges pulverize frozen fruit and fibrous greens into silky textures. Always hand-tighten it clockwise onto cups—no tools needed. Milling Blade (2-prong flat): Reserve this for dry tasks like grinding coffee beans or making almond flour. Using it for wet ingredients causes dangerous splatter. Never interchange blades: the extractor blade’s sharp edges become safety hazards when grinding dry items.
Cups and Lid Compatibility Rules
Your NutriBullet includes 18-32 oz cups with a critical max-fill line 1 inch below the rim. Exceeding this causes explosive overflows—especially with leafy greens. The resealable lids convert cups into travel mugs, but only use them after removing the blade. Check for cracks near the threading before each use; damaged cups won’t seal properly on the power base, causing leaks during blending.
Prep Ingredients for Flawless Blends Every Time
Size Reduction: Why Cutting Matters
Large chunks strain your motor and create uneven textures. Follow these exact cutting rules:
– Apples/Bananas: Quarter lengthwise (remove cores/seeds first)
– Celery/Cucumber: 2-inch diagonal slices
– Leafy Greens: Tear into palm-sized pieces—no stems
– Frozen Fruit: Thaw 5 minutes to reduce motor load
Skipping this step risks overheating. When in doubt, cut ingredients smaller than you think—they blend faster and smoother.
Perfect Layering Sequence for Chunk-Free Results
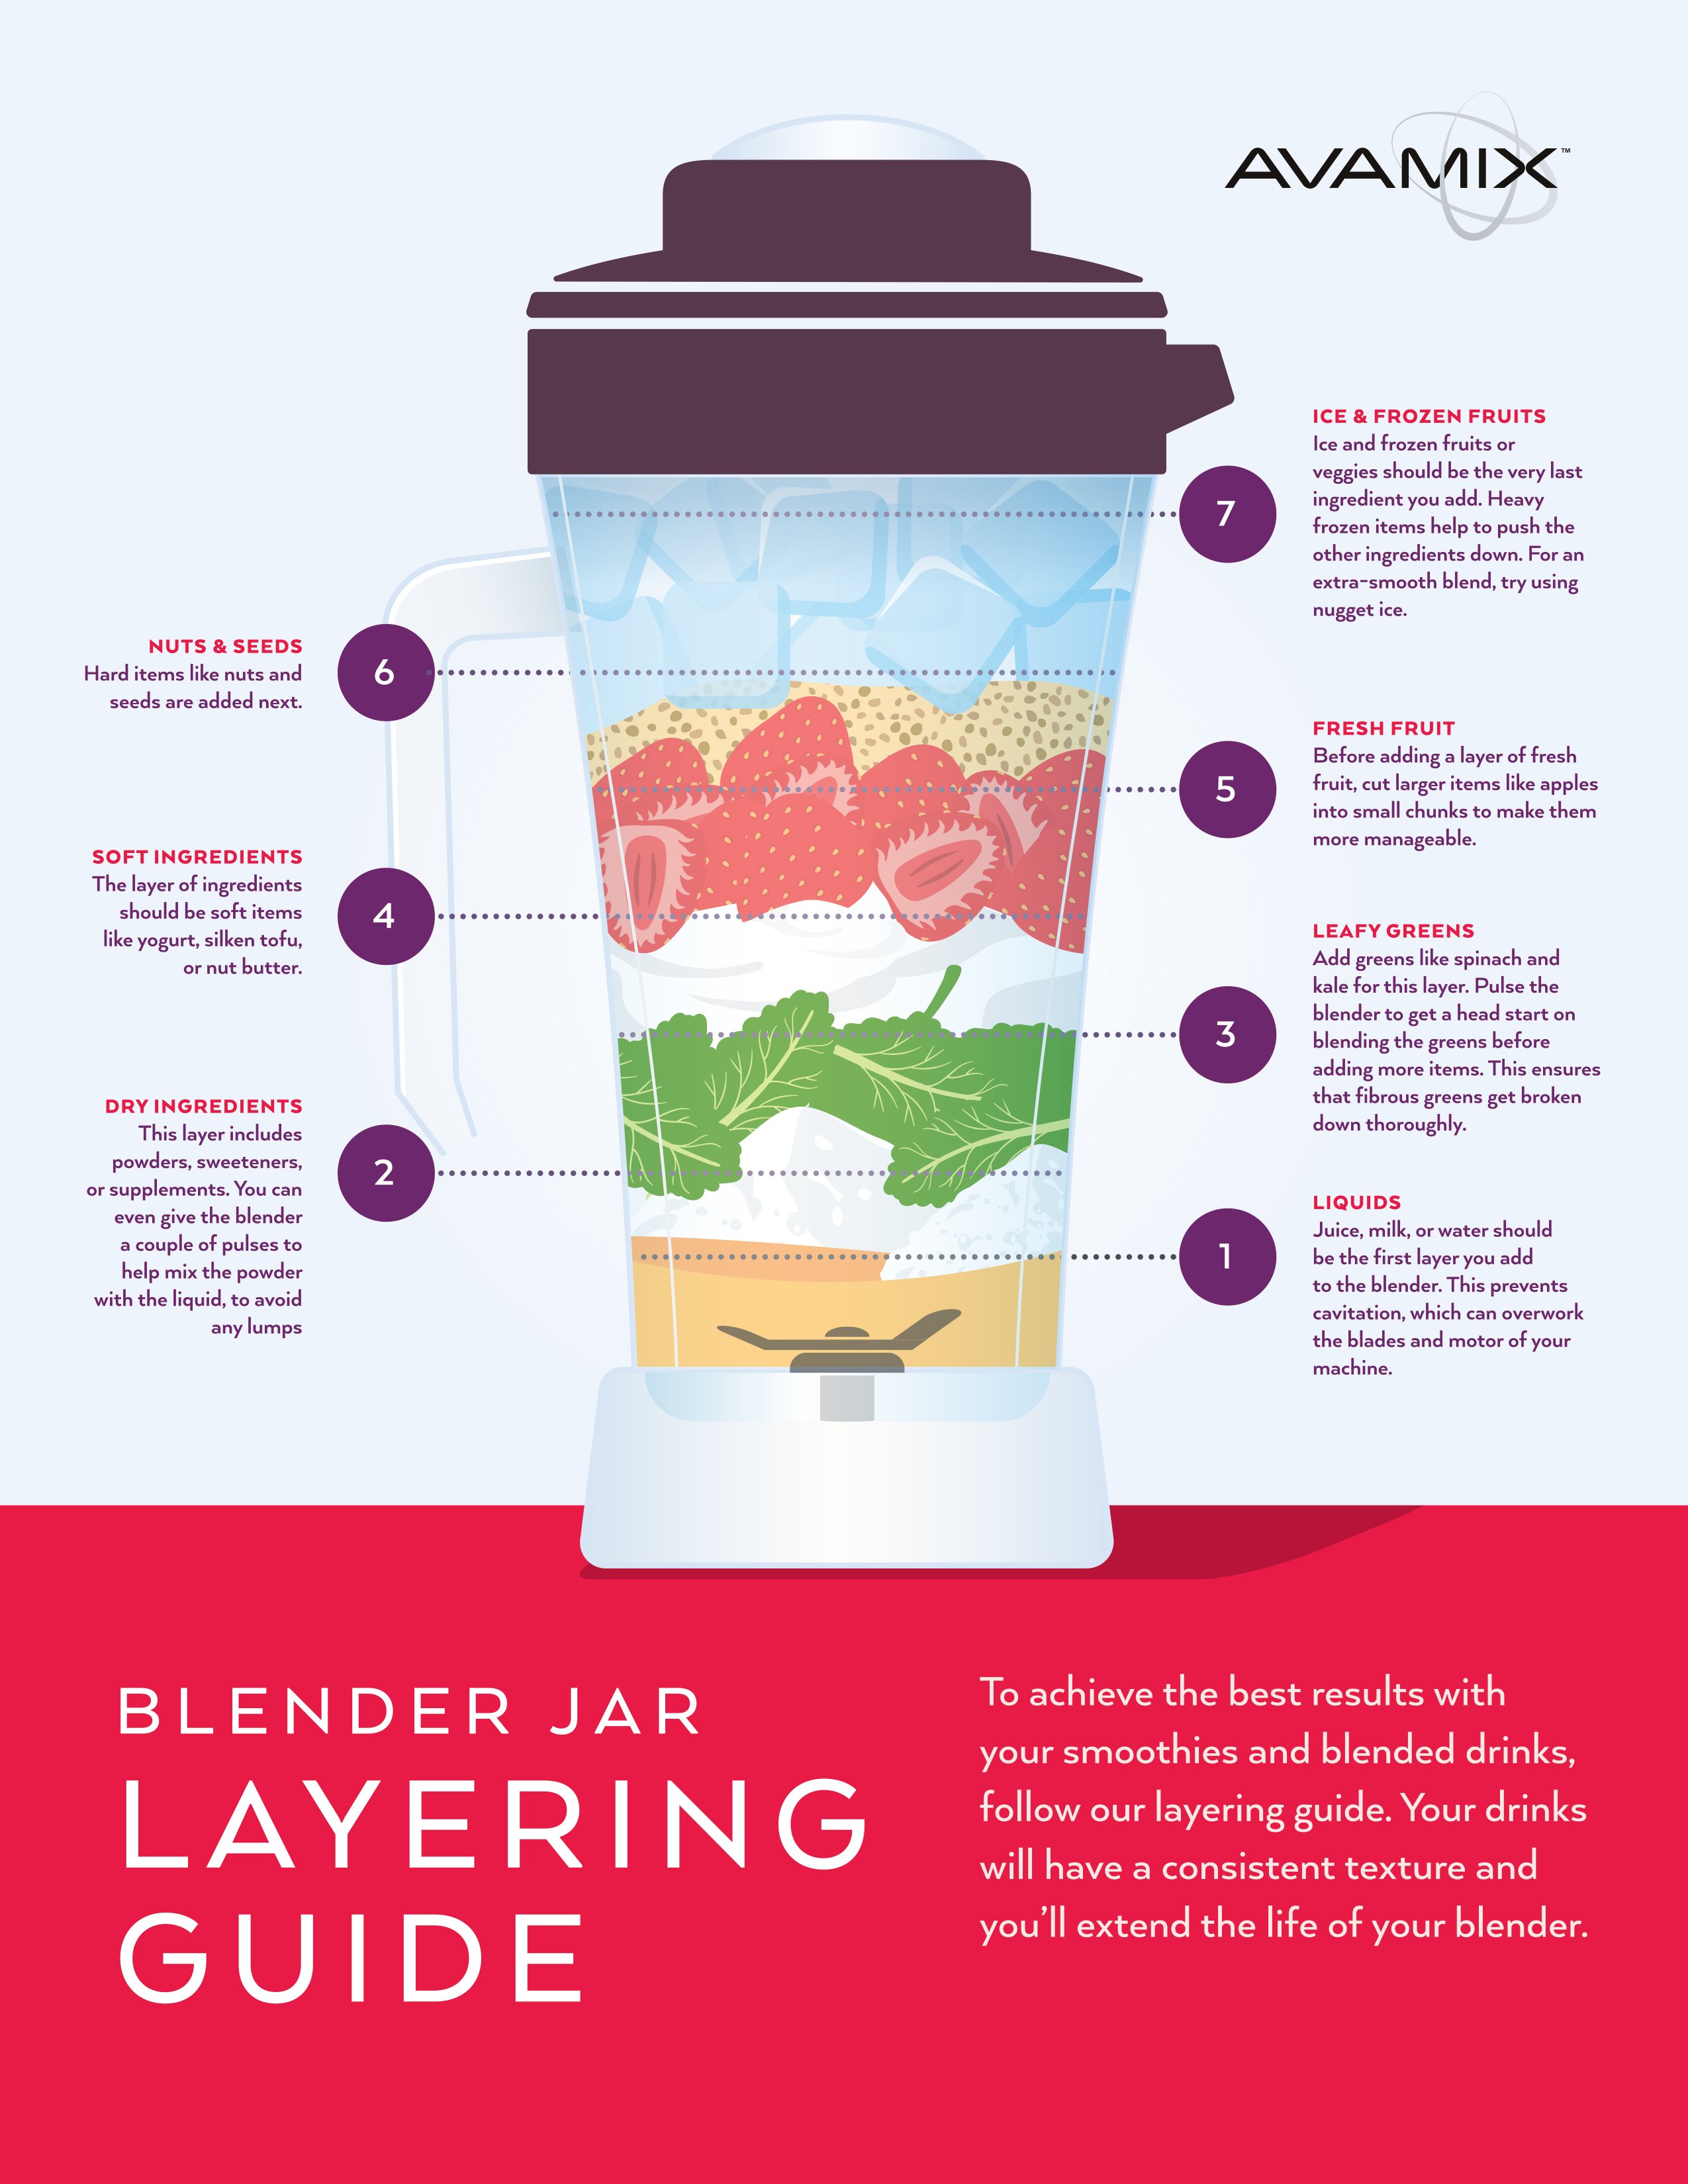
The golden rule: Dense ingredients go on the bottom, delicate items on top. Layer in this exact order:
1. Bottom: Banana chunks, mango, or avocado (creates a “liquid cushion”)
2. Middle: Protein powder or chia seeds (prevents clumping)
3. Top: Spinach/kale (so they hit blades first when inverted)
4. Liquid last: Pour to ¼ inch below max-fill line
This order prevents leafy chunks and ensures powders incorporate fully. Never add liquid first—it creates air pockets that stall the motor.
Liquid Ratios for Custom Consistency
Adjust liquids based on your desired texture:
– Drinkable smoothies: 1 cup liquid per 2 cups solids (e.g., almond milk + fruit)
– Spoonable bowls: ½ cup liquid per 2 cups solids (use frozen bananas)
– Nut butters: None initially—add oil only if too thick
Critical warning: Never use hot liquids or carbonated drinks. Pressure buildup can launch the cup off the base, causing serious injury.
Execute Flawless Blending in 4 Foolproof Steps
Assembly Process That Prevents Leaks
- Load ingredients using the layering sequence above
- Screw on blade clockwise until flush with cup rim (hand-tight only)
- Invert cup and align blade’s two round bumps with base notches
- Press down firmly—you’ll hear the motor engage instantly
If it doesn’t activate, check for obstructions in the base notches. Never force the cup; misalignment damages threading.
Texture Control Techniques You Need
- Silky smoothies: Hold pressure for 45 seconds (listen for motor pitch to rise)
- Chunky salsas: Pulse 5 times in 3-second bursts
- Thick nut butters: Blend 30 seconds, scrape sides, repeat until creamy
Stop blending immediately if the motor strains or emits burning smells. Reduce ingredients by 20% and add liquid.
Emergency Troubleshooting During Blending
Stuck ingredients? Lift cup slightly to reset the motor, then shake side-to-side before re-pressing. Too thick? Unscrew blade, add ¼ cup liquid through the opening, and restart. Motor smoking? Unplug immediately—this indicates severe overload requiring professional inspection.
Clean Your NutriBullet in 90 Seconds Flat
10-Second Rinse Method
Rinse the cup and blade within 60 seconds of finishing. Residue hardens rapidly into permanent stains. Pro tip: Fill the cup halfway with warm water and one drop of dish soap, attach the milling blade, and blend for 10 seconds. The self-cleaning action dislodges stuck particles without scrubbing.
Hand-Washing Blades Safely
Always grip blades by the plastic hub—not the razor-sharp edges. Soak in warm soapy water for 5 minutes, then use a bottle brush on crevices. Never put blades in the dishwasher; high heat dulls edges and warps plastic. Air-dry upside down on a towel—never store damp blades.
Power Base Maintenance You’re Missing
Wipe the base with a microfiber cloth dampened with vinegar solution weekly. Clean the blade-engagement notches with a cotton swab to prevent gunk buildup. Never submerge the base—even a drop of water in the motor housing causes permanent damage.
Avoid These 5 Costly Mistakes Immediately
Overfilling Past the Max Line
Exceeding the fill line causes explosive spills that damage counters and motors. Measure solids first—never add liquid to already-full cups. For 24oz cups, max solid volume is 1.5 cups. When blending greens, compress them gently to fit within limits.
Blending Forbidden Ingredients
Never blend:
– Hot soups (creates dangerous pressure)
– More than 2 ice cubes (chips blades)
– Fruit pits or large seeds (shatters cups)
– Carbonated liquids (causes violent eruptions)
Stick to room-temperature ingredients for safety.
Incorrect Blade Storage
Loose blades in drawers cause cuts and dull edges. Store them in original plastic sleeves or a dedicated container with blade tips covered. Check monthly for nicks—if light reflects off the edge, replace immediately.
Advanced Techniques for Culinary Mastery
Perfect Nut Butter in 3 Cycles
Use the milling blade with 2 cups roasted almonds. Blend 30 seconds, let sit 1 minute (releases oils), scrape sides, then repeat twice. Add 1 tbsp coconut oil only if too dry. Stop when the mixture pulls away from cup walls—over-blending creates almond paste.
Make Flour from Oats Instantly
Add 1 cup rolled oats to the milling blade. Pulse 15-second bursts 4 times until powder-fine. Sift through a mesh strainer to remove coarse bits. Works for coffee beans, flax seeds, and even stale bread crumbs.
Freeze-Ahead Smoothie System
Portion fruit and spinach into labeled freezer bags. When ready, dump a bag into the cup, add liquid to the max line, and blend. Thaw time: 0 minutes. Your breakfast is ready before the coffee brews.
Maintain Peak Performance for Years
Weekly Deep Clean Protocol
Soak cups and blades in warm water with 2 tbsp baking soda for 30 minutes. Use a nylon brush on stubborn stains—never steel wool. For odors, blend ½ cup lemon juice with water for 20 seconds. Always air-dry components completely before storage.
Blade Replacement Warning Signs
Replace blades when:
– Smoothies consistently have visible pulp
– You hear metal-on-metal grinding sounds
– Liquid seeps from blade threads during use
Blunt blades strain the motor and ruin textures. Genuine NutriBullet blades cost less than replacing the base.
Optimal Storage Setup
Store cups nested with lids attached upside down to prevent dust. Wrap the power cord loosely around the base grooves—never twist tightly. Keep in a dry cabinet away from stovetop heat. This prevents warping and electrical damage.
Your NutriBullet’s power lies in its simplicity—but only when you respect its engineering limits. Start tomorrow with a basic blend: ½ banana, 1 cup spinach, 1 cup almond milk layered in exact order. Press, blend 45 seconds, and taste the difference. Clean immediately using the 10-second rinse trick, and your blender will deliver perfect results for 5+ years. Ready to try the freeze-ahead smoothie system? Grab those freezer bags tonight—your future self will thank you at 6 AM. The perfect blend isn’t complicated; it’s just perfectly executed.


