
Your Ninja blender cup transforms frozen fruit and leafy greens into velvety smoothies in under 60 seconds—if you’ve mastered the inverted blending system. Unlike conventional blenders, these single-serve powerhouses demand precise assembly to avoid frustrating red light errors and achieve restaurant-quality results. I’ve seen too many users struggle with chunky textures or leaks simply because they skipped the critical tab alignment step. Whether you’re prepping a post-workout protein shake or a frozen margarita, nailing these techniques ensures silky consistency every time you press start.
This guide reveals the exact sequence Ninja engineers designed for flawless operation. You’ll learn how to load ingredients in the correct vortex-creating order, align the four safety tabs like a pro, and decode those blinking red lights that halt your blending dreams. Let’s transform your cup from a frustrating gadget into your most reliable kitchen companion.
Ninja Cup System Explained

Ninja’s single-serve cups revolutionize personal blending through an inverted design where sharp blades mount directly in the lid. This system creates a compact, powerful unit that screws onto your motor base, eliminating the bulky pitcher entirely. The 18 oz and 24 oz options accommodate everything from quick breakfast smoothies to post-workout recovery drinks.
Key Components Breakdown
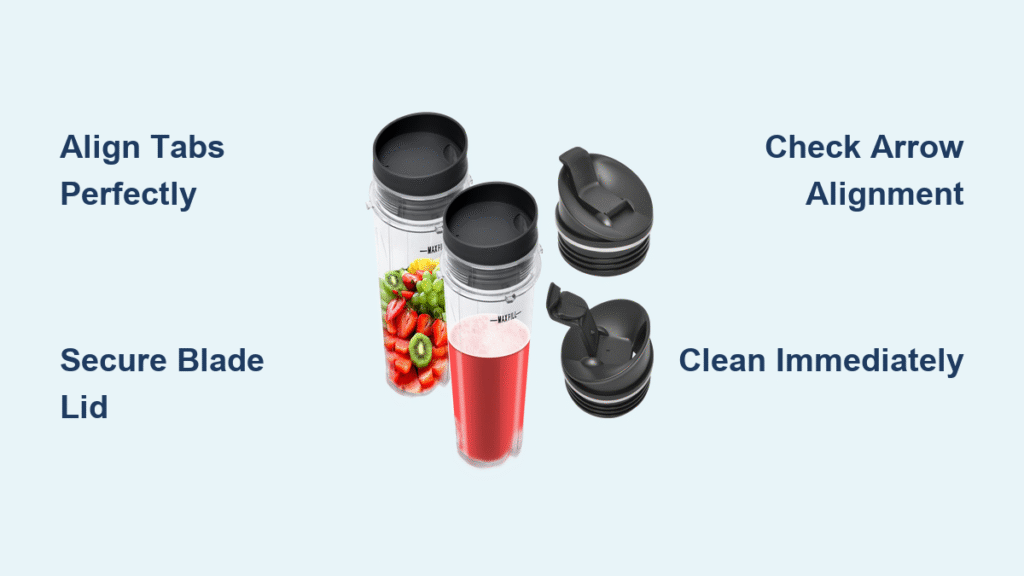
Cup Construction: Each cup features four alignment tabs that lock into corresponding slots on the motor base. These tabs ensure secure placement and prevent dangerous wobbling during high-speed operation—always verify all four tabs click into place before blending.
Blade Assembly: The integrated blade system uses stacked, razor-sharp edges designed for pulverizing rather than chopping. This design creates smoother textures but demands careful handling—always grip the plastic housing, never the blades themselves. Even minor nicks from improper handling compromise blending performance.
Safety Mechanisms: Built-in sensors detect proper alignment and locked positioning. The system won’t activate until all safety requirements are met, protecting both you and the motor from damage. This explains why your cup won’t spin if the white arrows on the lid and handle don’t align perfectly.
Pre-Blend Setup Steps
Before touching a single ingredient, establish your foundation for success. Remove the main pitcher completely—never attempt to use cups while a pitcher remains attached. Position your motor base on a stable, level surface where the power cord won’t accidentally disconnect during blending.
Power Verification: Plug in the base and confirm power availability. Unlike battery-operated alternatives, your Ninja requires consistent electrical connection throughout the entire blending process. If lights don’t illuminate when plugged in, check your outlet before proceeding.
Surface Stability: Test your counter space by gently pressing down on the base. If it shifts or rocks, relocate to prevent potential spills or motor strain. A wobbling base is the #1 cause of alignment failures during cup insertion.
Fill Your Cup Like a Pro
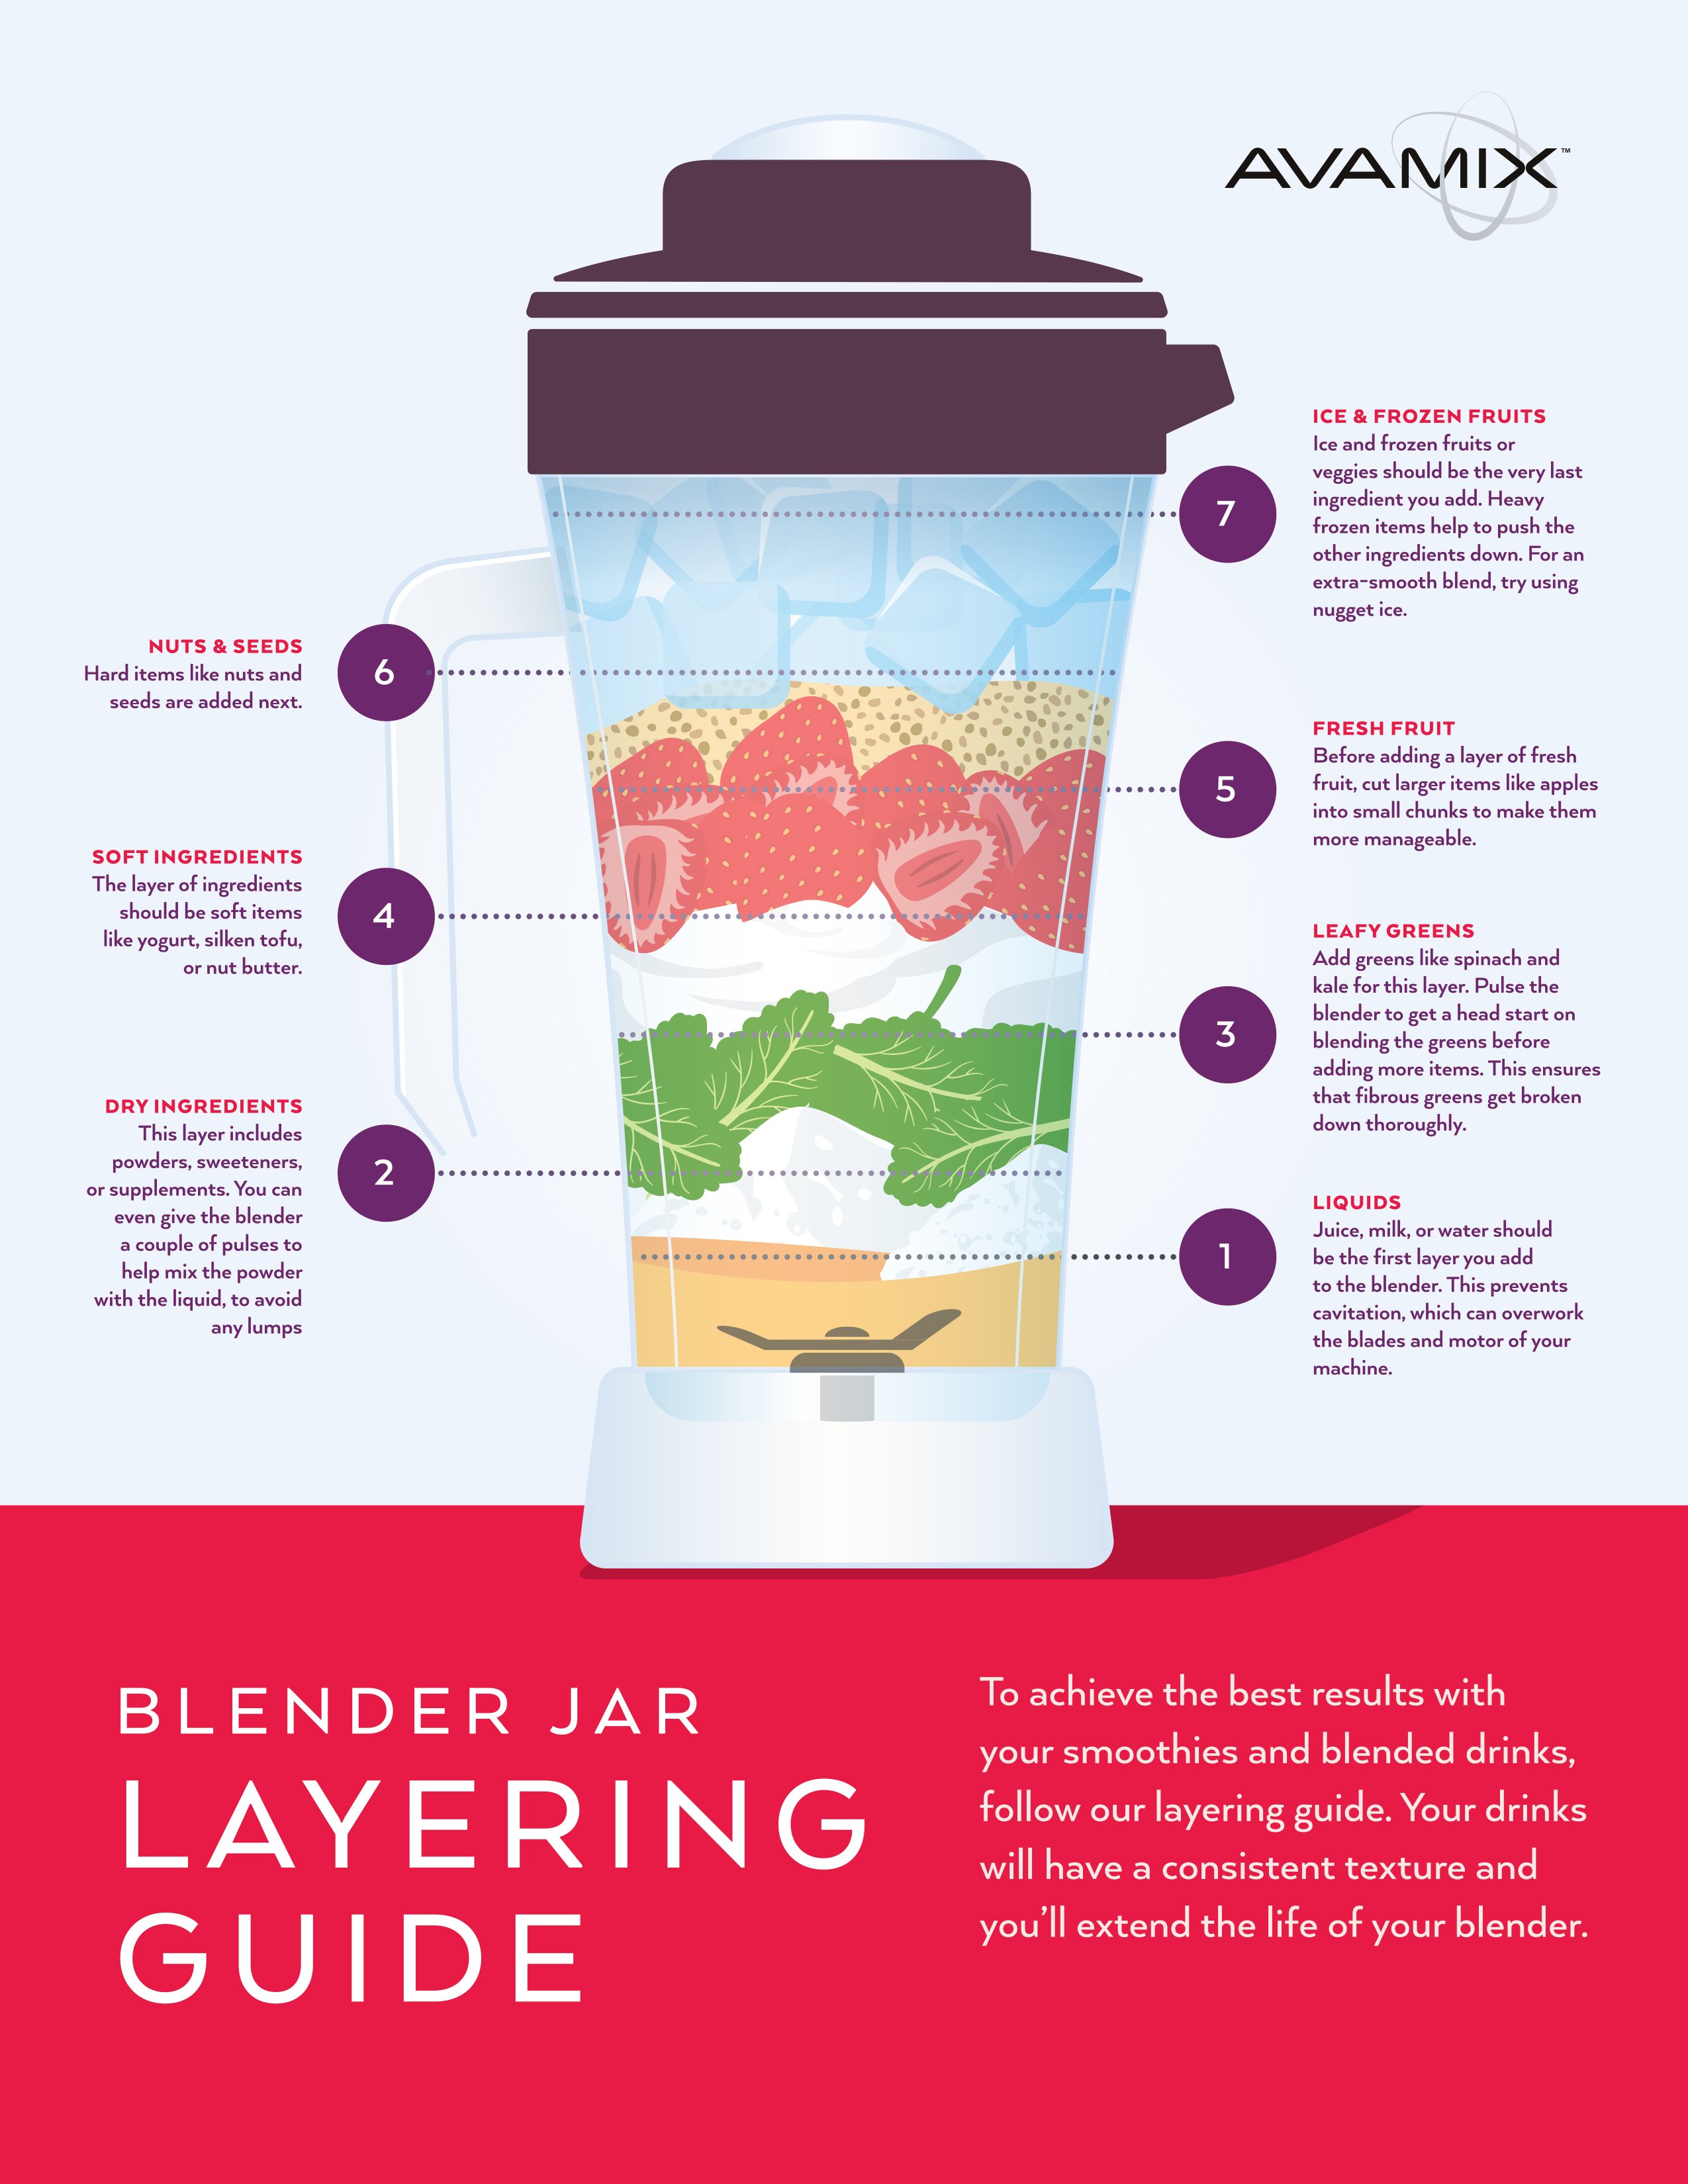
Loading ingredients in the correct order determines blend quality and prevents frustrating jams. Start with liquids at the bottom—this creates an immediate vortex that pulls solids downward for consistent blending.
Ingredient Layering Formula
Liquid Foundation: Pour liquids first (water, milk, or juice), filling to just below the halfway point. This creates the hydrodynamic pull needed for smooth processing.
Soft to Hard Sequence: Add soft ingredients next—bananas or yogurt—followed by leafy greens. Top with frozen fruits and ice cubes. Never exceed the max fill line; ingredients expand 20-30% during blending.
Space Management: Leave 1 inch of headspace for expansion. Overfilling guarantees messy overflow and triggers the motor’s safety shut-off. For thick smoothies, maintain a strict 1:1 liquid-to-solid ratio.
Assembly Process Simplified
Success hinges on perfect assembly. First, screw the blade lid assembly tightly onto your filled cup. You’ll feel resistance as the threads engage—continue turning until fully seated with no gaps between lid and cup.
Blade Security Check: Gently tug on the blade assembly to confirm it’s locked. Any wobbling indicates incomplete tightening and will cause leaks—re-screw firmly until resistance stops.
Inversion Technique: Carefully flip the assembled cup so the blade lid faces downward. Hold both the cup body and lid during this motion to prevent accidental separation. This inverted position is critical for the blade-to-motor connection.
Lock and Load Method
With your inverted cup ready, align the four tabs with corresponding slots on the motor base. This alignment is non-negotiable—the system simply won’t operate without perfect positioning.
Insertion Process: Lower the cup straight down into the base slots. You’ll feel the tabs slide into place with minimal resistance when properly aligned. Never force the cup—reposition if you meet resistance.
Locking Motion: Once fully inserted, twist clockwise approximately one-quarter turn until you hear and feel a distinct click. This click confirms the safety lock is engaged and the motor will operate.
Stability Test: Gently attempt to rotate the cup—it should feel solidly fixed with no wobbling or looseness. If it moves, unlock and reseat the cup.
Operation Mastery
Power on your blender and observe which buttons illuminate. Only options compatible with single-serve cups will light up, preventing accidental selection of inappropriate settings.
Speed Selection Guide
Speed 1 (Mix): Perfect for combining pre-blended ingredients or creating thin batters. Use for protein shakes with powder or simple juice blends—ideal for 30-second operation.
Speed 2 (Blend): Your go-to setting for most smoothies. Balances power and control for consistent results with fruits, vegetables, and ice—run for 45-60 seconds.
Speed 3 (Ice Chop): Reserved for tough ingredients like frozen fruit or large ice cubes. Use 5-second bursts to prevent motor overheating.
Pulse Function: Delivers maximum speed in controlled bursts. Ideal for chunky salsas—press and release rhythmically every 2 seconds.
Single-Serve Button: If your model features this dedicated option, it automatically cycles through optimal speeds—press and hold for 60 seconds.
Decode Red Light Issues

Blinking red lights halt your blending plans, but they’re actually helpful diagnostic tools. Each blink pattern points to specific solutions.
Red Light Troubleshooting
Check Lid Security: Remove and re-screw the blade lid assembly. Ensure complete threading—cross-threading is the most common error.
Arrow Alignment: Locate the white arrows on both the lid and cup handle. These must align perfectly—rotate until arrows match precisely.
Base Reseating: Remove the cup entirely and reinsert, paying special attention to the four-tab alignment. Sometimes debris in the slots triggers the safety lock.
Persistent Issues: If red lights continue after multiple attempts, unplug the base for 30 seconds to reset the safety system—this solves 90% of recurring errors.
Clean Immediately for Longevity
Hot water becomes your best friend immediately after blending. Rinse the blade assembly and lid under hot running water while ingredients are still fresh and soft—never let residue dry.
Quick Cleaning Protocol
Immediate Rinse: Within two minutes of finishing, disassemble and rinse all components. This prevents stubborn buildup that requires aggressive scrubbing later.
Hand Washing: Use hot water, mild dish soap, and a soft sponge or bottle brush. Focus on blade crevices where food particles hide—scrub the rubber gasket weekly.
Dishwasher Option: All cup components are top-rack safe. Place blades and lids on the top rack for gentle cleaning. Never submerge the motor base—wipe with a damp cloth only.
Drying Process: Air-dry all parts completely before reassembly. Trapped moisture creates mold issues and potential contamination.
Advanced Techniques for Perfect Results
Master these pro-level strategies to elevate your blending game beyond basic smoothies.
Texture Control Methods
Pulse Precision: Use 2-3 second pulses instead of continuous blending for better texture control. This technique prevents over-processing and creates restaurant-quality results.
Layering Mastery: For ultra-smooth results, maintain a 1:1 liquid-to-solid ratio. Adjust based on ingredient density—frozen fruits need 20% more liquid than fresh.
Ingredient Sizing: Cut all ingredients into 1-inch pieces before loading. This reduces strain on the motor and ensures even blending without large chunks.
Recipe Adaptation Secrets
Scaling Wisdom: Single-serve cups excel with recipes designed for 1-2 servings. Avoid doubling standard pitcher recipes—ingredients won’t fit and blending suffers.
Temperature Guidelines: Cool hot ingredients to room temperature before blending. Hot liquids create pressure that can force leaks or dangerous splattering.
Liquid Alternatives: Experiment with coconut water, almond milk, or green tea as base liquids for flavor variety without compromising blend quality.
Model-Specific Variations
Different Ninja systems offer unique features, but core operation remains consistent across models. The Nutri Ninja Pro works exclusively with single-serve cups featuring foolproof arrow alignment. The Mega Kitchen System includes multiple cup sizes alongside the large pitcher, offering enhanced motor power for tougher ingredients. Entry-level Master Prep models have simplified single-speed operation—always check your model’s max fill line as capacities vary.
Prevent Common Problems
Understanding potential issues before they occur saves time and frustration.
Leaking Solutions
Gasket Maintenance: Check the rubber seal around the blade assembly weekly. Clean thoroughly and replace if cracked or worn—a damaged gasket causes 80% of leaks.
Thread Inspection: Examine cup and lid threads for cracks or damage. Even small imperfections compromise the seal.
Overfilling Prevention: Respect the max fill line religiously. Ingredients expand 20-30% during blending—measure liquids with a separate cup for accuracy.
Performance Optimization
Motor Care: Allow 60-second rest periods between batches when making multiple servings. This prevents overheating and extends motor life.
Ingredient Balance: Ensure adequate liquid for every blend. Dry ingredients without sufficient liquid stress the motor and create poor results—add 2 tbsp liquid if blending thick.
Storage Wisdom: Keep cups, lids, and blade assemblies together in one location. This prevents mismatched components and ensures you’re always ready to blend.
Your Ninja blender cup becomes an indispensable kitchen companion once you master these fundamentals. The inverted system might seem unconventional initially, but it delivers superior single-serve results with practice. Start with simple recipes, perfect your assembly technique, and gradually experiment with more complex combinations. Remember: proper alignment, immediate cleaning, and respectful ingredient loading create the foundation for thousands of perfect blends ahead. Now grab your cup and make that smoothie—you’ve earned it.


