

Your Ninja blender just arrived, and you’re staring at all those buttons, blades, and pieces wondering where to start. Maybe you’ve tried making a smoothie and ended up with chunky fruit soup, or worse—nothing happens when you press the power button. Don’t worry. Mastering how to use Ninja blender takes minutes, not hours. This guide transforms you from confused beginner to confident blender master by revealing exact assembly steps, hidden features, and critical safety checks most owners overlook.
You’ll learn why your red light blinks (and how to fix it instantly), the ice-crushing technique that prevents motor burnout, and why layering ingredients wrong turns smoothies into kitchen disasters. Let’s unlock your Ninja’s full potential—starting with the one mistake that cracks pitchers instantly.
Lock Pitcher to Base Before Powering On
Place the pitcher on the motor base and twist clockwise until it stops. You’ll feel a distinct click confirming it’s locked—this isn’t optional. If the pitcher resists rotation, lift it slightly and reposition. Never force it; misalignment triggers the safety lock, causing that frustrating red blink. Check for smooth rotation: a properly seated pitcher spins freely when nudged. For single-serve models, flip your cup upside down and twist the blade base clockwise onto the motor until it clicks. Skipping this step is the #1 reason blenders won’t start.
Why Arrow Alignment Matters
Find the white arrow on your lid and match it precisely with the arrow on the pitcher handle. Even a 5-degree offset prevents the safety mechanism from engaging. Push down hard until you hear a definitive click—if it feels loose, restart the alignment process. This tiny detail solves 90% of “blender won’t turn on” emergencies.
Install Blade Assembly Safely

Drop the stacked blade unit straight down the pitcher shaft until it seats firmly at the bottom. Never force it—these blades are razor-sharp and can slice through skin if mishandled. If it won’t drop fully, rotate the assembly slightly until it clicks into place. For single-serve cups, screw the blade lid tightly onto the cup before flipping it onto the base. Remember: blades only work in one orientation. Reversing them causes uneven blending and motor strain.
Blade Handling Warning
Always remove blades by gripping the plastic center—not the metal edges. After use, rinse immediately under hot water; dried food requires dangerous scrubbing near sharp edges. Store blades in the pitcher or a protective case to prevent accidents. Loose blades in drawers cause 30% of kitchen blade injuries.
Secure Lid Properly to Stop Leaks
Line up the lid’s release button with the pitcher handle and push down until you hear a loud click. The blender won’t operate without this safety lock engaged—a critical feature preventing messy explosions. Test it: gently tug the lid upward; if it lifts, reseat it. For hot soups, leave the vent cap slightly open to release steam pressure, but never exceed the max fill line. Overfilling creates pressure that cracks plastic cups within seconds.
Master Speed Controls for Perfect Textures

Low Speed for Gentle Tasks
Use Speed 1 for mixing protein powder into liquids or starting chunky salsas. This prevents splashing and gives you control over texture. Ideal for incorporating dry ingredients into wet batters without creating air pockets that ruin consistency.
Medium Speed Daily Use
Speed 2 handles 80% of blending needs—everyday smoothies, pancake batters, and tomato sauces. Run for 30-45 seconds until smooth. This speed balances power with control, avoiding the vortex collapse that happens when using high speed for thin mixtures.
High Speed Power Mode
Speed 3 crushes ice and frozen fruit in 15 seconds. Never run continuously—pulse in 5-second bursts to prevent overheating thick mixtures like nut butters. If the motor strains, stop immediately and add ¼ cup liquid.
Pulse Function Secrets
Hold the pulse button for 1-2 second bursts to chop onions or create chunky guacamole. For smoothies, pulse 5 times after blending to eliminate stubborn chunks. This surgical precision prevents over-processing delicate ingredients like leafy greens.
Single-Serve Smoothie Method
Cup to Base Connection
Remove the main pitcher entirely. Fill your single-serve cup to the max line (never above), screw on the blade lid tightly, then flip the assembly upside down. Twist clockwise onto the motor base until locked. Critical: If liquid leaks during blending, you didn’t tighten the blade lid enough.
Automatic Blending Cycle
Press the single-serve button once for a pre-programmed 45-second cycle—perfect for smoothies without guesswork. No need to hold buttons. If it stops early, check for overheating; let the motor rest 2 minutes before retrying.
Fix Red Blinking Light Fast
Check Lid Lock First
The red light means the safety lock isn’t engaged. Push the lid down hard until you hear a click—often missed when adding thick ingredients. If it still blinks, lift the pitcher off, realign the arrows, and twist clockwise firmly.
Reposition Pitcher
Lift the pitcher, rotate it 180 degrees, and reseat it. The locking mechanism has two engagement points; trying the opposite side solves 70% of persistent red lights. If the light remains after three attempts, unplug for 5 minutes to reset the motor.
Crush Ice Like a Pro
Ice Cube Prep
Fill the pitcher ⅓ full with standard ice cubes (not large chunks). Too much ice stalls the motor—always use the 1:4 ice-to-liquid ratio. Add ¼ cup water or juice per cup of ice to create the vortex that pulls ice through blades efficiently.
Pulse Technique
Start with 5-second pulses to break large cubes, then switch to steady high speed. Perfect crushed ice takes 15-20 seconds total. Never blend more than 1 cup of ice at once—overloading burns out motors in budget models.
Make Perfect Smoothies Every Time
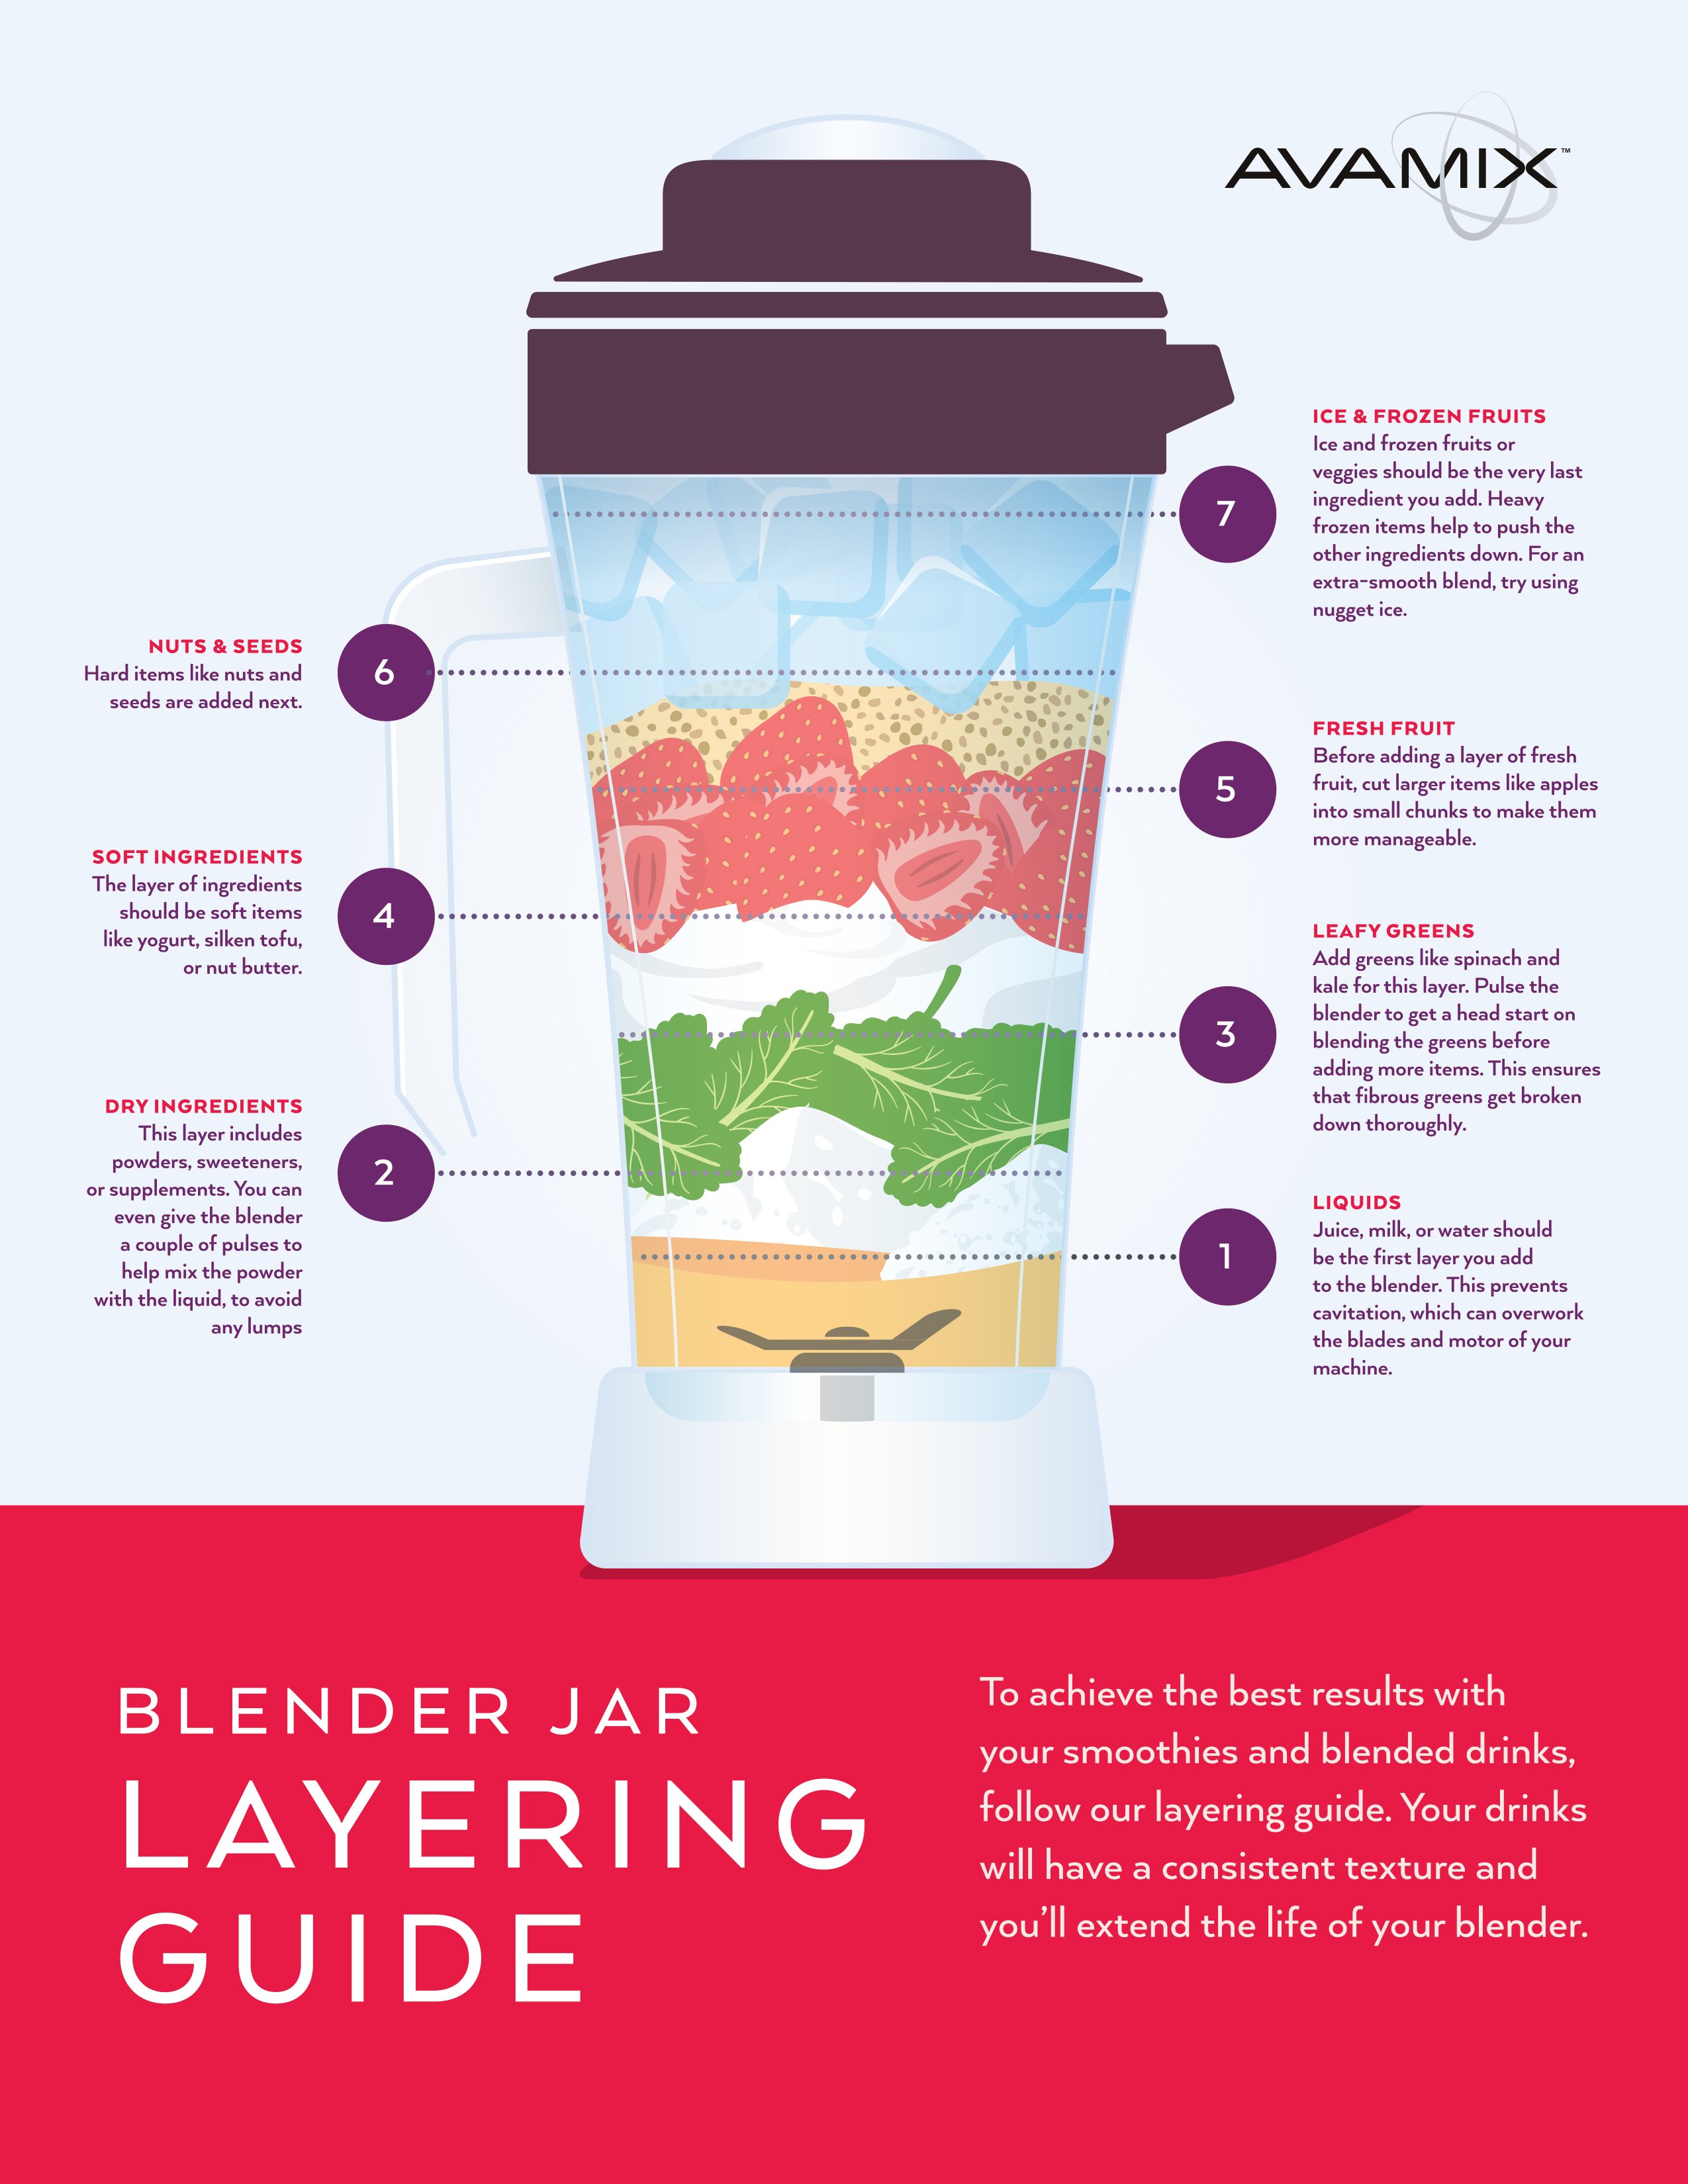
Layer Ingredients Correctly
Add liquids first (1 cup), then soft fruits (½ cup), leafy greens (1 handful), and frozen items last. This layering creates proper vortex action—reversing it traps air pockets and strains the motor. For thick smoothie bowls, reduce liquid by ¼ cup but never below ¾ cup total.
Texture Control
Blend on medium speed for 30 seconds, then pulse on high for 5 seconds to eliminate chunks. If too thick, add liquid 1 tablespoon at a time while blending. Too thin? Add frozen fruit and re-blend for 10 seconds.
Common Mistakes That Break Blenders
Overfilling Disasters
The max fill line exists for safety. Overfilled pitchers create pressure that cracks plastic during hot soup blending. For hot liquids, never fill past halfway and let soup cool 5 minutes first.
Running Empty
Never operate without ingredients—the blades spin too fast and can damage the motor within 3 seconds. Always add liquid before dry ingredients to cushion the blades.
Ignoring Weird Noises
Grinding or squealing sounds mean stop immediately. These indicate blade damage or food jamming. Unplug, disassemble, and check for obstructions before continuing.
Maintenance Schedule That Works
After Every Use
Rinse components immediately with hot water and soap. Run a 30-second “cleanse cycle” with soapy water on high speed. Wipe the base with a damp cloth—never submerge it. Store with the lid slightly ajar to prevent mold in gaskets.
Weekly Deep Clean
Disassemble completely. Hand-wash blades with a soft sponge (dishwashers dull edges faster). Inspect seals for cracks; replace if hardened. Descale with a vinegar-water mix if you have hard water.
Storage Tips for Longevity
Dry Storage Rule
Store all components bone-dry. Moisture dulls blade edges and breeds mold in gaskets. Wrap the power cord loosely—tight coils damage internal wires. Keep single-serve cups nested with blade lids attached to prevent warping.
Your Ninja blender handles tasks most kitchen appliances can’t—from hot soups to coffee grinding. Start with perfect smoothie layering, master the pulse function for controlled textures, and always respect the max fill lines. When red lights blink, realign those arrows firmly. Within days, you’ll create restaurant-quality results while avoiding the mistakes that turn powerful blenders into expensive paperweights. The secret? Treat it like the precision tool it is—then let your creativity run wild.


