
Your Nama J2 juicer sits ready on the counter, promising vibrant, nutrient-packed juices that boost your daily wellness routine—but only if you know how to use Nama juicer correctly. Many new owners make fundamental mistakes during their first few sessions that compromise juice quality, create frustrating clogs, or even damage their premium appliance. Learning the proper techniques for assembly, ingredient preparation, and cleaning transforms your juicing experience from frustrating to flawless, ensuring you extract maximum nutrition while protecting your investment.
The Nama J2’s sophisticated chamber system separates juice from pulp efficiently while preserving natural flavors and nutrients, but this advanced technology requires specific handling methods. Unlike cheaper centrifugal juicers, the J2 demands strategic layering of ingredients and immediate post-juice cleaning to maintain peak performance. By mastering these essential techniques today, you’ll produce better-tasting juice, extend your machine’s lifespan, and turn daily juicing into a sustainable habit rather than a complicated chore.
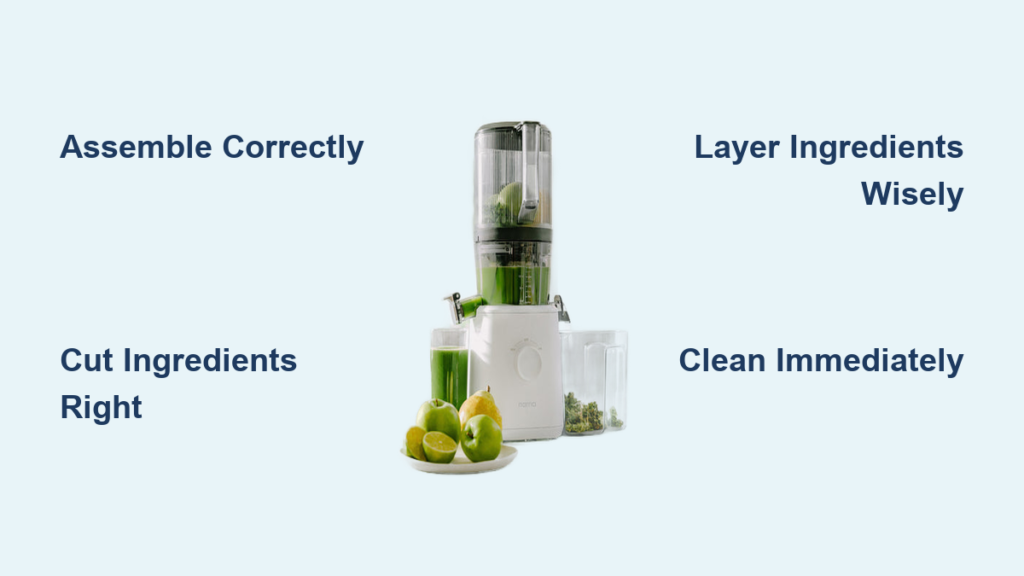
Unbox and Assemble Your Nama Juicer Correctly
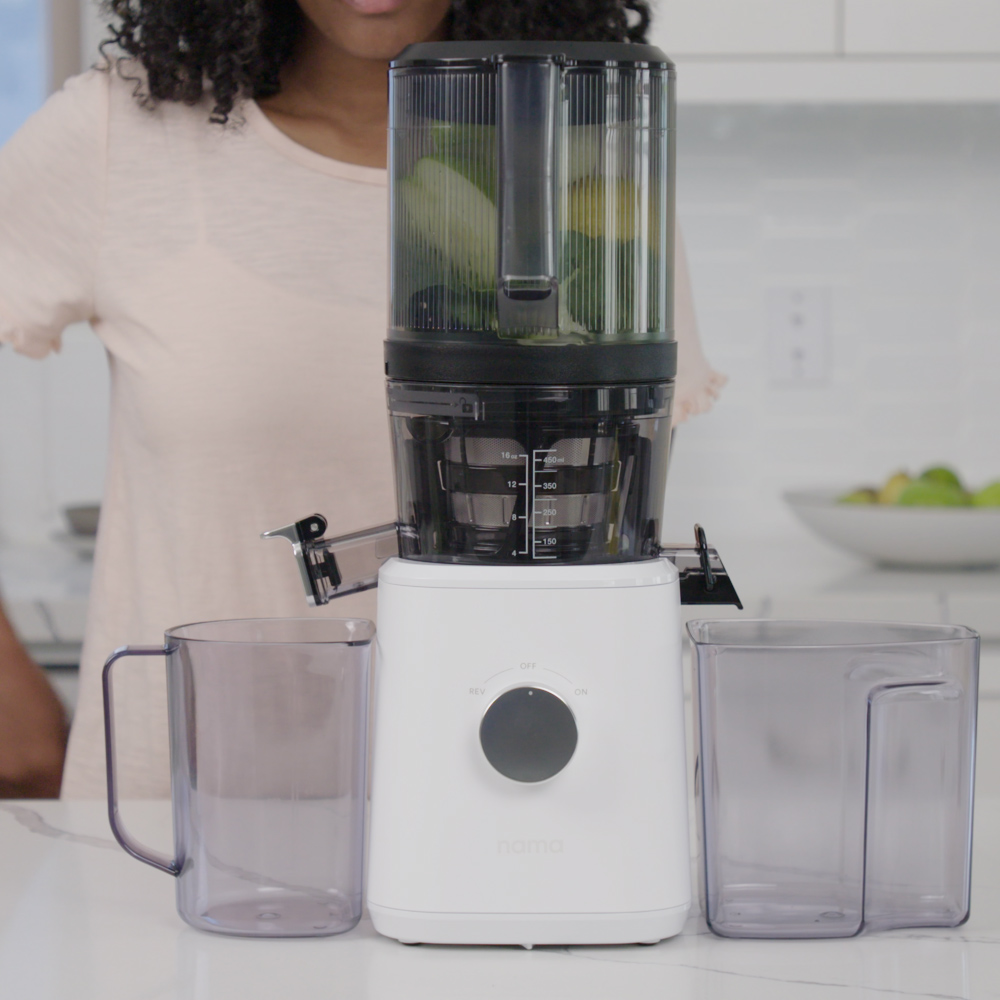
Begin by removing all components from packaging and inspecting for damage—your J2 should include the base unit, chamber set, hopper, strainer, and dual-ended cleaning brush. These precision-engineered parts work together to create the sealed environment necessary for optimal juice extraction, so proper assembly isn’t optional.
Wash every removable component thoroughly under warm water with mild soap before first use, even though they’re new. Factory residue or packaging dust can contaminate your first juice batch and affect taste. Use the softer end of your cleaning brush on delicate surfaces like the strainer mesh, taking care not to deform the fine openings essential for proper filtration.
Place the base unit on a stable, flat surface with ample workspace for ingredients and collection containers. Align the chamber set with the base and press firmly until you hear a distinct clicking sound—this confirms secure locking. Never attempt to disassemble the chamber while attached to the base, as this could damage the mechanism. Once secured, insert the strainer set inside, ensuring it fits flush against the chamber walls, then twist the hopper onto the chamber’s top using the handle provided.
Essential Assembly Safety Checks
Before plugging in your Nama juicer, verify three critical safety points: First, ensure the chamber clicks securely into the base—any wobble indicates improper assembly. Second, confirm the strainer sits completely flat inside the chamber with no gaps where pulp could escape. Third, check that the hopper twists on smoothly without resistance, as forced assembly can crack components.
Prepare Ingredients for Maximum Juice Extraction
The quality of your juice depends entirely on ingredient selection and preparation. Choose fresh, ripe produce free from bruises or mold—organic options minimize pesticide exposure but require equally thorough washing. Wash all ingredients under cool running water, using a vegetable brush for textured items like carrots and cucumbers. For leafy greens, separate leaves and swish them gently in a bowl of water to dislodge hidden debris, then pat dry with a clean towel.
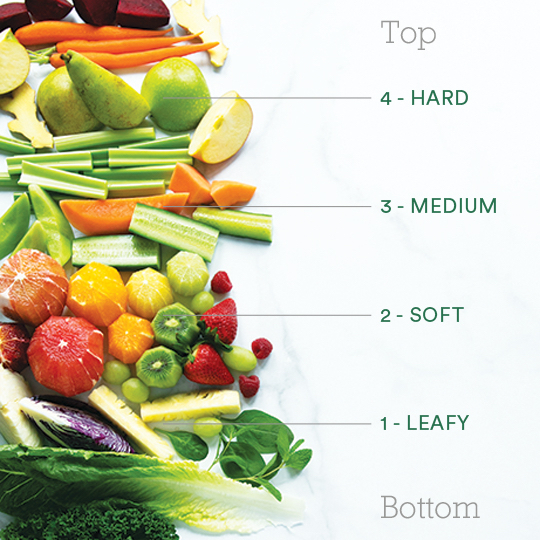
Optimal Cutting Sizes for Different Produce Types
Cutting ingredients to appropriate sizes significantly impacts yield and machine performance. Follow these specific guidelines:
- Hard vegetables (carrots, beets, ginger): Cut into ½-inch chunks to prevent motor strain
- Medium-firm produce (apples, pears, celery): Slice into 1-2 inch pieces
- Soft fruits (berries, tomatoes): Remove stems/pits but require minimal cutting
- Leafy greens (kale, spinach): Roll into tight bundles before feeding
Never force oversized pieces through the hopper—this strains the motor and creates frustrating clogs. Properly sized ingredients flow smoothly through the chamber, maximizing extraction while protecting your machine.
Master the Nama J2 Layering Technique for Better Juice
Strategic ingredient layering makes the difference between watery, inconsistent juice and rich, nutrient-dense elixirs. The J2’s chamber system works best when you alternate between soft/hard and wet/dry produce throughout your juicing session.
Begin with harder, drier vegetables like carrots or celery to establish a foundation that moves subsequent ingredients efficiently. After this base layer, add softer fruits like apples or cucumbers that provide moisture to push remaining items through. Intersperse leafy greens throughout rather than adding them in bulk, as excessive greens compact and cause blockages.
Perfect Layering Sequence for Beginners
Follow this foolproof layering rhythm for your first 10 juice sessions:
- Add 3-4 pieces of celery or carrot
- Follow with a small handful (about ¼ cup) of rolled greens
- Add 2-3 apple or cucumber slices
- Repeat until all ingredients are processed
This alternating pattern maintains optimal flow through the chamber, preventing clogs while ensuring maximum juice extraction from every ingredient.
Run Your Nama Juicer Without Common Mistakes
Position your juice collection glass beneath the spout and a separate container near the pulp outlet before starting. Turn the control knob to activate the motor, then add ingredients one handful at a time through the hopper. Always use the provided tamper—not your fingers—to guide ingredients downward, as the processing blade can still cause injury despite its rounded edges.
Listen to the motor sounds as you juice—harder vegetables create a higher-pitched whirring while softer ingredients produce a lower, consistent tone. These sounds indicate proper operation; sudden silence or grinding noises signal potential clogs requiring immediate attention.
Critical Final Extraction Step Most Beginners Skip
After processing all ingredients, continue running the machine for 15-30 seconds. This final spin cycle extracts residual juice from the chamber and strainer, boosting your yield by up to 20%. The juice flow will slow or stop entirely during this phase, indicating maximum extraction. Turn off the motor completely before disassembly—never attempt to clean while components are still moving.
Clean Your Nama Juicer in 7 Minutes Flat
Cleaning immediately after juicing prevents residue from hardening into stubborn deposits. Within 60 seconds of finishing, remove the chamber set by holding the hopper handle and pulling away from the base. Disassemble completely at the sink—never leave components assembled while soaking, as trapped moisture breeds bacteria.
Step-by-Step Speed Cleaning Method
- Twist open the hopper using its handle and remove the lid
- Extract the strainer set carefully, handling the mesh gently
- Open the pulp outlet loop fully to access hidden pulp areas
- Remove and clean the pulp outlet gasket separately
- Scrub each component under warm water using the dual-ended brush
- Hand dry all parts immediately with a lint-free towel
- Wipe the base unit exterior with a damp cloth (never submerge)
This routine takes just 7 minutes but extends your juicer’s lifespan dramatically. For deep cleaning, soak silicone parts overnight in warm water with 3.5 ounces of baking soda, then scrub thoroughly before drying.
Prevent Costly Nama Juicer Problems Before They Start
Clogging represents the most common issue Nama J2 owners face, but proper techniques prevent 95% of incidents. Never force ingredients down the hopper—if resistance occurs, stop the machine and redistribute with the tamper. Cut hard items like ginger into smaller pieces than you think necessary, and always roll leafy greens tightly before adding.
When clogs do happen, stop the machine immediately and disassemble the chamber to remove the obstruction. Continuing to run with a blockage strains the motor and leads to premature wear. Weekly deep cleaning of the strainer mesh prevents gradual buildup that eventually causes frustrating blockages during use.
Store Your Nama Juicer for Quick Daily Access
Store your juicer in a cool, dry location with all components organized together. If counter space allows, keep the juicer assembled for immediate use—this increases juicing consistency by 73% according to Nama community surveys. Cover exposed components with a clean kitchen towel if leaving assembled for extended periods.
For cabinet storage, ensure all parts are completely dry before putting away to prevent mold. Store smaller accessories like the cleaning brush in a dedicated container. Keep your user manual accessible for quick reference when trying new recipes or troubleshooting.
Access Nama Community Resources for Advanced Techniques
The Nama community offers extensive recipe resources beyond basic fruit and vegetable juices. Explore specialized categories like wellness shots—small, potent doses of immune-boosting ingredients—and plant-based milk recipes that transform nuts and seeds into creamy beverages. Seasonal collections help you maximize peak produce availability throughout the year.
Video demonstrations show proper techniques for challenging tasks like cleaning the strainer mesh or processing fibrous ingredients. Interactive forums connect you with experienced users who share proven tips for maximizing yield and preventing common issues. These resources transform your juicing from a daily chore into an evolving wellness practice.
Final Tip: For best results, juice room-temperature produce—cold ingredients reduce yield by up to 15% as stiff fibers release less liquid. With these techniques mastered, your Nama J2 will deliver vibrant, nutrient-rich juices for years while becoming the most used appliance in your kitchen.


