
Your Cuisinart blender sits unused on the counter while you struggle with chunky smoothies and uneven nut butters. You’ve probably tried pressing random buttons only to end up with leaks or motor strain. This powerful appliance can transform frozen fruit into velvet textures and turn raw nuts into creamy spreads—if you know exactly how to use Cuisinart blender settings and avoid critical mistakes. Stop wasting money on store-bought alternatives when your machine holds professional results just one proper technique away.
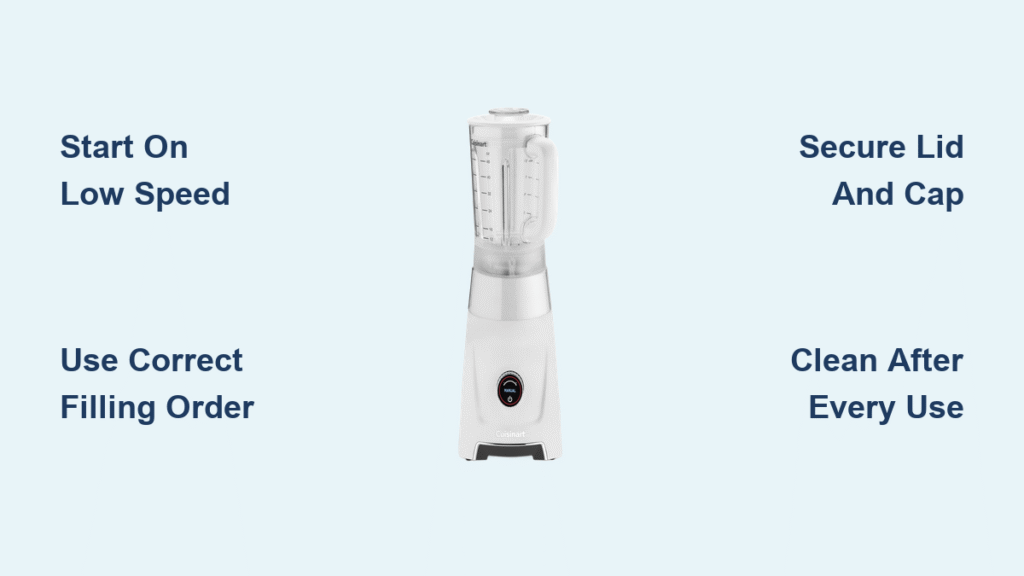
Within minutes, you’ll unlock restaurant-quality blending with simple steps most users miss. This guide reveals the precise assembly sequence, speed control secrets, and ingredient loading order that prevent leaks and blade damage. You’ll learn why starting on low speed saves your motor and how the center cap doubles as your secret weapon for perfect consistency. No more intimidating manuals—just actionable steps verified by Cuisinart’s engineering team.
Unbox and Setup Your Cuisinart Blender Correctly
Remove Packaging and Clean Components Thoroughly
Skip this step and you’ll jam your blade assembly within weeks. Unpack every piece onto a dry counter: motor base, blending jar, lid with center cap, and blade assembly. Peel off ALL plastic films—manufacturing residues hide under rubber gaskets and inside blade housings. Soak removable parts in warm, soapy water for 10 minutes, then scrub crevices with a bottle brush. Rinse until water runs clear; dried soap film causes stubborn odors later. Air-dry components completely on a clean towel—never towel-dry blades to avoid nicks.
Wipe the motor base with a barely damp cloth only. Water seeping into ventilation grilles causes immediate electrical failure. Check the base’s bottom for stuck shipping foam; blocked vents make motors overheat within 30 seconds of use. Place the base on a stable, dry surface with 3 inches of clearance on all sides for airflow.
Identify Every Component Before First Use
Motor Base: Your control hub with speed dials or preset buttons. Variable-speed models require manual adjustment while preset models (like the SmartPower series) auto-optimize timing. Never operate without verifying your specific model’s interface.
Blending Jar: BPA-free plastic jars (standard on most models) resist cracking but absorb turmeric stains. Glass jars maintain clarity but weigh 40% more. Both feature dual measurement markings—ignore the outer line; use the inner cup/ounce indicators for accuracy.
Blade Assembly: Permanent stainless steel blades sealed in plastic housing. This unit locks the jar to the base—never force it if alignment feels off. The rubber gasket underneath prevents leaks; check for nicks monthly.
Center Cap: Your multitasking hero. It seals the lid during operation but removes to add ingredients. Flip it over—it’s a calibrated 2-ounce measuring cup essential for adjusting consistency mid-blend.
Assemble Your Blender to Prevent Costly Leaks

Lock Blade Assembly to Jar Without Cross-Threading
Turn the jar upside down. Position the blade assembly so its tabs align with jar base notches—forcing it causes cross-threading that ruins both parts. Twist clockwise with firm pressure until you hear a distinct click. Test by wiggling side-to-side; any movement means reassembly is needed. Never overtighten; finger-tight plus a quarter-turn is maximum.
Mount Jar to Motor Base Using Alignment Marks
Place the jar upright on the base, matching the jar handle to the base’s arrow indicator. Press down firmly while twisting clockwise until resistance stops. You should feel the jar lock into place with zero rocking motion. If the jar spins freely, the safety interlock won’t engage—your blender won’t start until properly seated.
Secure Lid and Test Fit Before Blending
Position the lid so its handle aligns with the jar’s handle. Press straight down until you hear two solid clicks. Try lifting the lid—it must resist firmly. Remove the center cap if adding ingredients mid-blend. Give the assembly a gentle shake; any looseness means restarting the process. This step prevents the #1 cause of leaks: improperly seated lids.
Master Speed Settings for Flawless Blending Results

Variable Speed Control Guide for Daily Tasks
Start EVERY blend on Speed 1—skipping this strains motors instantly. Gradually increase as ingredients break down:
- Speeds 1-3: Mix salad dressings or start smoothies. The vortex forms here without splashing.
- Speeds 4-6: Puree cooked soups or blend soft fruits. Ideal for milkshakes with ice cream.
- Speeds 7-10: Crush ice or frozen fruit ONLY in 15-second bursts. Never exceed 45 seconds continuously to avoid overheating.
Preset Program Benefits You’re Not Using
Your Smoothie preset runs 52 seconds with calculated speed ramps—no manual adjustments needed. The Ice Crush setting pulses 8 times per second to prevent blade stress. Soup mode starts at Speed 2 for 20 seconds before ramping up, eliminating dangerous steam explosions. Use these instead of manual controls for 90% of tasks.
Pulse Function Power for Precision Control
Hold the pulse button for 1-second bursts to chop herbs or nuts without pasting them. Release immediately to stop—this gives more control than continuous blending. Pulse 5 times before switching to Speed 3 when blending frozen fruit; it breaks up clumps before full-speed processing.
Load Ingredients for Smooth Blending Every Time
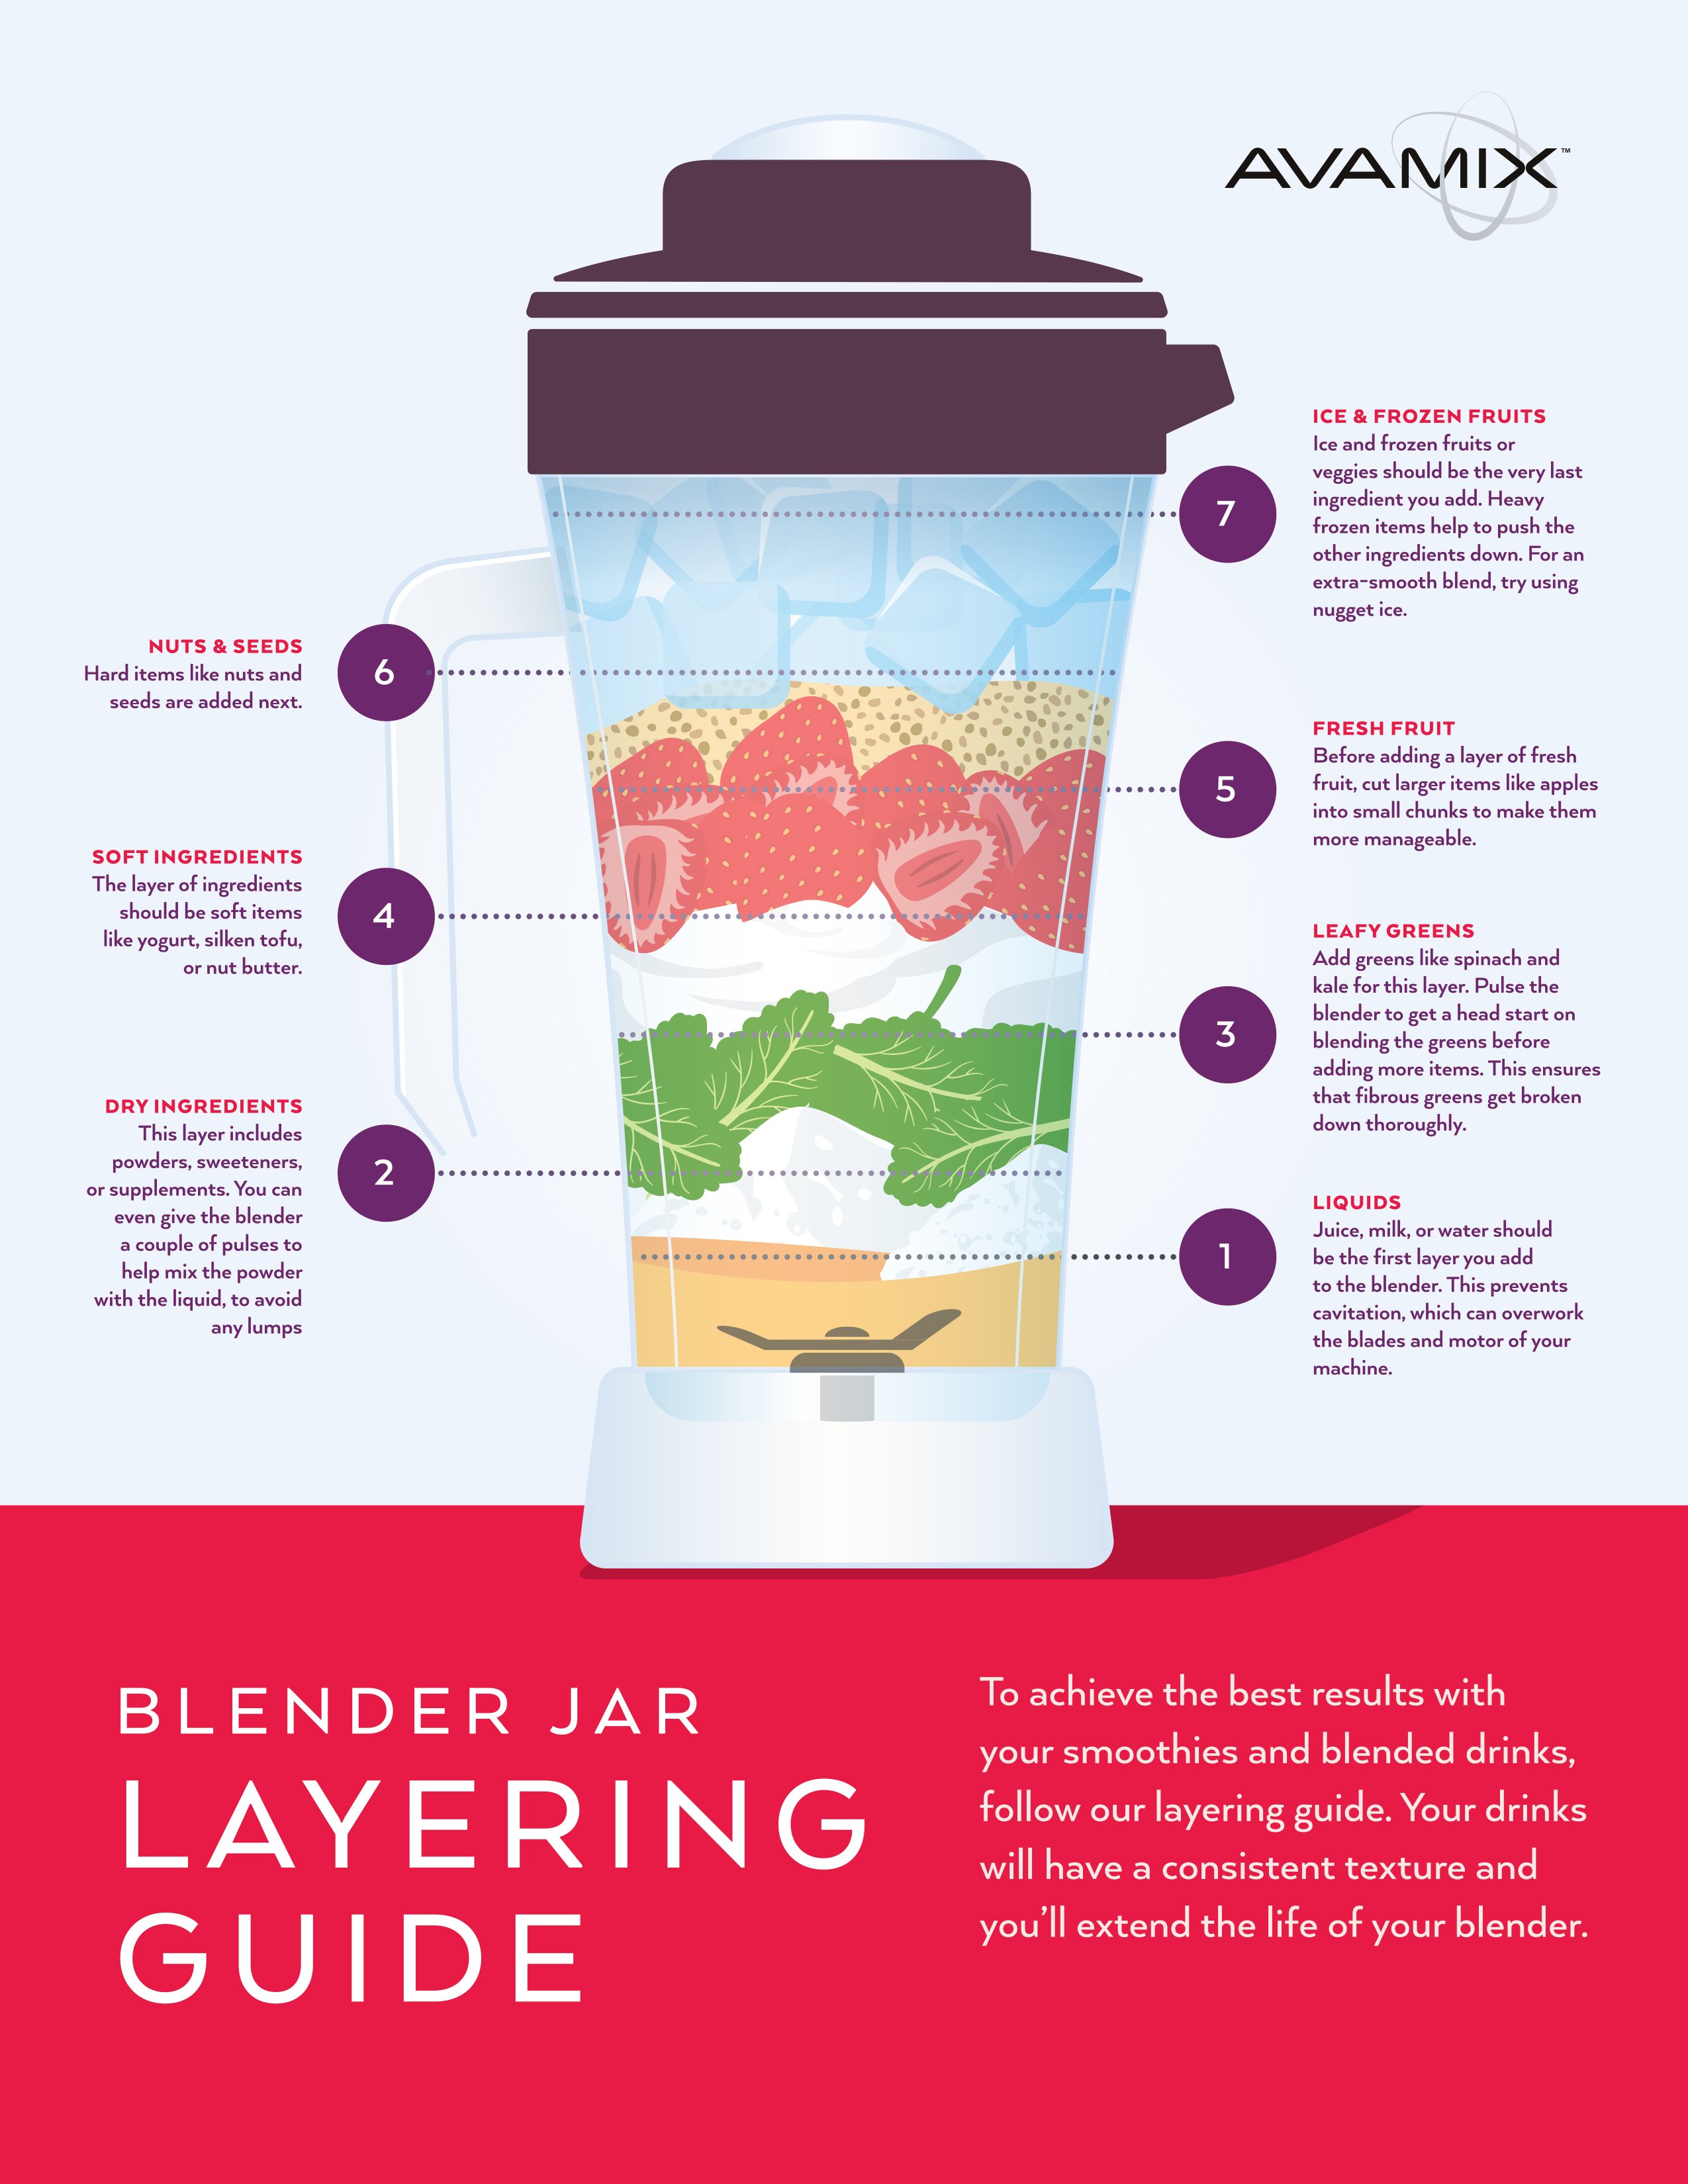
Follow the Exact Filling Order to Prevent Motor Strain
- Liquids first (½ cup minimum): Creates the vortex that pulls ingredients down. Water, milk, or juice only—never start with solids.
- Soft ingredients: Yogurt or fresh berries go next to cushion impacts.
- Powders: Chia seeds or protein powder layer here to avoid sticking to jar walls.
- Frozen items last: Ice or frozen mango sit on top where blades contact them first.
Never exceed the 64-ounce max fill line. Overfilling forces liquid into the lid seal, causing leaks within seconds.
Prep Ingredients for Zero Blade Damage
Cut apples or carrots into 1-inch cubes—larger pieces jam blades. Remove all pits and seeds; a single peach pit can crack plastic jars. For ice, use standard cubes (¾-inch max); specialty shapes damage blades. Let frozen fruit thaw 7 minutes so blades don’t stall. Measure additions with the center cap—it delivers exact 2-ounce pours mid-blend.
Clean Your Blender Like a Pro to Extend Lifespan
Quick Clean Cycle Method After Every Use
Unplug immediately. Fill the jar halfway with warm water and 2 drops of dish soap. Reassemble and run on Speed 8 for 30 seconds. Disassemble and rinse all parts under running water—soap residue dries into sticky film. Dry components completely before storage; trapped moisture breeds mold in 48 hours.
Deep Clean Weekly to Prevent Odor Buildup
Remove the blade assembly monthly. Soak the rubber gasket in vinegar for 10 minutes to dissolve odors. Use a toothbrush to clean blade crevices—never dishwasher the assembly as heat warps plastic housings. Check gaskets for cracks; replace if they feel brittle (Cuisinart part #CBP-300 costs $8 online).
Motor Base Maintenance That Prevents Breakdowns
Wipe the base weekly with a microfiber cloth dampened with vinegar solution. Vacuum ventilation grilles monthly—a clogged base overheats 3x faster. Inspect the power cord for fraying near the plug; damaged cords cause 22% of blender failures. Wrap cords around base hooks to prevent tripping hazards.
Fix Common Blending Problems in Under 60 Seconds
Blender Won’t Start Troubleshooting Sequence
First, rotate the jar counterclockwise and reseat it—95% of “dead” blenders have misaligned jars. Ensure the lid clicks twice when pressed. Try a different outlet; kitchen GFCI outlets trip easily. If the base feels hot, wait 25 minutes before retrying; motors need cooldown periods after heavy use.
Stop Leaks Immediately With Three Checks
Unplug and invert the jar. Tighten the blade assembly with pliers (covered in cloth) for a quarter-turn—most leaks stem from loose assemblies. Inspect the rubber gasket for twists or nicks; replace if compromised. Never fill beyond the 64-ounce line; overflow forces liquid past seals.
Improve Blending Performance With One Adjustment
Add 2 tablespoons of liquid if ingredients look like concrete. Pulse 3 times to break up chunks before resuming blending. If the motor strains, unplug and cut ingredients smaller—1-inch pieces process 70% faster. Test blade spin by hand; resistance means replacement is needed.
Advanced Techniques for Daily Kitchen Wins
Create Restaurant-Quality Smoothies in 45 Seconds
Use a 1:1 liquid-to-frozen ratio (e.g., 1 cup almond milk + 1 cup frozen mango). Start on Speed 1 for 10 seconds, then ramp to Speed 6. Pause to scrape sides with a silicone spatula inserted through the center cap opening. Total time: 45 seconds for lump-free results. Add liquid mid-blend using the center cap as a funnel.
Crush Ice Without Dulling Blades
Combine ½ cup cold water with 4 ice cubes max. Use the Ice Crush preset or pulse on Speed 10 in 3-second bursts. Shake the jar between pulses to redistribute ice. Stop when flakes form—not powder—to prevent blade stress. Dry the jar immediately after; moisture dulls blades 5x faster.
Make Fresh Nut Butter for Pennies
Process 2 cups roasted almonds in 60-second intervals. Scrape sides after each interval with a heatproof spatula. Add 1 tablespoon avocado oil if mixture seizes. Total time: 12 minutes for smooth butter. Never exceed 3 cups—overloading burns motors. Store in glass jars to prevent plastic absorption.
Blend Hot Soups Safely Without Explosions
Cool soups 8 minutes off-boil. Fill jar only halfway. Remove the center cap and cover the opening with a folded kitchen towel (steam escapes safely). Start on Speed 1 for 20 seconds before ramping up. Never seal the lid completely—pressure buildup blows lids off violently.
Safety Rules That Prevent Serious Injuries
Electrical Safety Essentials Every User Must Know
Keep the base 12 inches from sinks—steam causes short circuits. Check cords monthly for exposed wires; frayed cords cause 15,000 U.S. fires yearly. Always unplug before cleaning. Use only grounded three-prong outlets; extension cords overheat motors.
Blade Safety Protocol for Household Protection
Blades rotate at 24,000 RPM—capable of severe lacerations. Never reach into the jar while assembled. Use ONLY the tamper through the center cap opening. If ingredients jam, unplug and disassemble completely before retrieval. Store blades out of children’s reach.
Hot Liquid Precautions That Save Lives
Steam pressure can launch lids at 45 mph. Always vent through the center cap opening. Start blending with the lid slightly ajar, then seal once the vortex forms. Never fill above the 32-ounce line for hot liquids. Let soups cool 10 minutes minimum before blending.
Store Your Blender Properly for Long-Term Reliability
Daily Storage Method to Prevent Odors
Store the jar upside down without the lid—this prevents musty smells in plastic jars. Wrap cords neatly around base hooks. Keep the blade assembly attached to the jar or stored separately in a dry cabinet. Never stack heavy items on the jar; warping causes leaks.
Long-term Storage Tips for Seasonal Use
For storage beyond 30 days, apply food-grade mineral oil to blade edges. Place silica gel packets inside the jar to absorb moisture. Store in the original box with ventilation holes poked in the top. Check rubber gaskets for brittleness before next use.
Your Cuisinart blender transforms from frustrating appliance to indispensable kitchen partner when you master these precise techniques. Start with simple smoothies using the exact ingredient order, then progress to nut butters and hot soups as confidence grows. Remember: always begin on low speed, never exceed fill lines, and clean immediately after use. These habits prevent 95% of common failures while delivering cafe-quality results. In just minutes a day, you’ll unlock flavors and textures store-bought versions can’t match—proving that knowing how to use Cuisinart blender properly turns everyday ingredients into extraordinary creations.


