
Your soup is steaming hot, vegetables perfectly soft, but now comes the risky part—transferring boiling liquid to a countertop blender. One slip and you’ve got third-degree burns and a kitchen disaster. Enter the immersion blender: the handheld hero that purees directly in your pot, saving time, dishes, and your safety.
This versatile kitchen tool transforms chunky soups into silky purees, whips cream in seconds, and creates restaurant-quality emulsions—all without moving your ingredients. Whether you’re a cooking novice or seasoned chef, mastering how to use an immersion blender opens up endless possibilities for quick, professional results. In this guide, you’ll discover techniques that will transform your cooking routine from stressful to seamless.
Master Basic Immersion Blender Operation
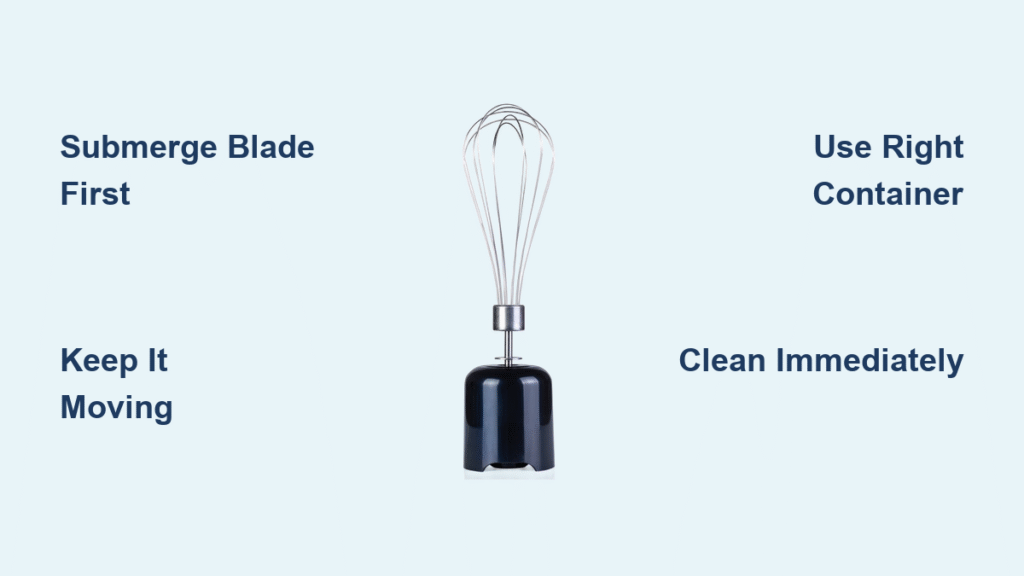
Submerge Before You Start
Never turn on your immersion blender until the blade sits completely under your ingredients. This prevents the dreaded splatter effect that paints your walls with tomato sauce. Hold the handle firmly, position the blade guard about 1 inch from the container’s bottom, then switch it on. Pro tip: For hot liquids, place a kitchen towel over the pot opening to contain any potential splashes while you work.
Keep It Moving
Unlike countertop blenders, your hand controls the action. Move the stick in slow circles, reaching every corner of your container. Think of it as stirring with superpowers—the blade does the work while you guide it. Lift slightly to incorporate floating ingredients, but keep the blade submerged to avoid splashing. For best results, spend about 30 seconds on most soups to achieve perfect smoothness without over-processing.
Control Your Speed
Most models offer variable speeds. Start low for chunky mixtures, then increase speed for smoother results. High speed works best for whipping cream or making mayonnaise, while low speed preserves texture in salsas and pestos. When learning how to use an immersion blender effectively, remember that starting at low speed prevents ingredient ejection while building momentum for thorough blending.
Choose the Right Container Every Time
Size Matters
Your container should be about ⅔ full with all ingredients added. Too empty and ingredients splash; too full and you’ll overflow. For single servings, use a tall, narrow glass that gives your blender enough depth to work properly. The ideal container depth should be at least 3 inches more than your blender’s shaft length to prevent accidental contact with the bottom.
Material Considerations
Avoid non-stick pots unless you’re extremely careful—metal blades can scratch coating. Glass, stainless steel, and ceramic containers work best. When whipping ingredients that expand (like cream), fill containers only halfway to prevent overflow. Warning: Always check your cookware manufacturer’s guidelines before blending directly in specialty pots.
Create Perfect Textures for Every Recipe

Smooth Soups and Sauces
For velvety butternut squash soup or silky tomato sauce, tilt your blender slightly and move it slowly around the pot’s perimeter. This technique ensures even blending without missing chunks. Continue until you achieve the desired consistency—usually 30-60 seconds for most soups. For restaurant-quality results, blend in one direction first, then reverse to catch any overlooked pieces.
Chunky with Smooth Base
Love rustic textures? Hold your blender at a slight angle, pulse for 2 seconds in one spot, then move to another area. Repeat this pattern, leaving intentional chunks throughout your soup or sauce. This technique works beautifully for loaded potato soup or chunky tomato sauces. Expert note: Chef Jose Luis Falcon recommends this method for chunky soups while reserving Vitamix for superfine purees.
Transform Recipes with Professional Techniques
Fix Cooking Mishaps
Separated ganache? Lumpy pastry cream? Your immersion blender rescues these disasters. Simply blend for 10-15 seconds to restore smooth, professional textures without starting over. This trick saves hours of recipe remakes. For stubborn lumps, add a tablespoon of warm liquid and blend again—most issues resolve within 20 seconds of proper blending.
Emulsify Like a Chef
Perfect mayonnaise forms in 60 seconds flat. Combine egg yolks, acid, and seasonings in a tall container. With blender at the bottom, slowly drizzle oil while blending continuously. The blade creates a stable emulsion that won’t break—chef-quality aioli without the arm workout. Pro tip: Start with just a few drops of oil before increasing the flow for foolproof emulsification.
Prevent Common Problems Before They Start
Stop Pot Suction
Suction happens when your blender sits flat against the pot bottom. Prevent this by keeping the blade 1-2 inches above the surface. If stuck, tilt the blender at a 45-degree angle before lifting—never yank straight up. For frequent users, consider investing in a model with anti-suction blade design to eliminate this issue entirely.
Protect Your Cookware
Metal blades scratch non-stick surfaces easily. Angle your blender away from pot sides, or better yet, transfer hot foods to a glass or stainless steel container before blending. This small step preserves expensive cookware and ensures your non-stick surfaces last significantly longer. Warning: Even slight contact with the blade guard can damage delicate coatings over time.
Clean Like a Pro in 30 Seconds

Immediate Rinse Method
Right after use, hold your blender over the sink and run it for 5 seconds to spin off excess food. Rinse the blade guard under hot water immediately—dried food becomes cement that’s nearly impossible to remove. For stubborn residues, fill a shallow container with warm soapy water and blend for 10 seconds to loosen particles.
Deep Clean Process
Unplug and detach the blending arm from the motor unit. Most models feature dishwasher-safe arms, but hand-washing preserves blade sharpness. Use a bottle brush for thorough cleaning around the blade guard’s underside where food accumulates. Expert note: Consumer Reports recommends weekly deep cleaning to prevent buildup that could affect performance.
Master Advanced Applications

Single-Serve Smoothies
Blend directly in your drinking glass for minimal cleanup. Add liquid first, then fruits and ice. Pulse initially to break up frozen ingredients, then blend continuously until smooth. Perfect for busy mornings when every second counts. Pro tip: Fill your glass only halfway to allow room for expansion during blending—overflowing smoothies are messy!
Holiday Gravy Rescue
No more lumpy Thanksgiving gravy. While your turkey rests, blend pan drippings directly in the roasting pan for smooth, lump-free gravy. Add flour slurry and blend continuously as you bring it to a simmer—perfect gravy every time. This technique works so well that many professional chefs now swear by how to use an immersion blender for holiday cooking.
Safety Rules That Save Fingers
Hot Liquid Protocol
When blending hot soups, ensure the blade sits completely submerged before switching on. Use a deep container to prevent splattering, and keep your free hand on the pot handle for stability. Work in batches for large quantities to maintain control. Warning: Never fill containers more than halfway with hot liquids—steam buildup can cause dangerous eruptions.
Electrical Safety
Always unplug before cleaning or changing attachments. Keep the motor unit completely dry—even small amounts of water can cause electrical issues. Ensure your hands are dry when handling the plug and motor housing. For cordless models, store with the protective cover attached and away from moisture sources.
Maintenance Tips for Longevity
Weekly Care
Once weekly, detach the blending arm and soak in warm, soapy water for 5 minutes. Use a soft brush to clean around the blade guard’s ventilation holes where buildup occurs. This prevents overheating and extends motor life. Pro tip: For stainless steel components, a vinegar-water solution helps remove mineral deposits without damaging surfaces.
Storage Best Practices
Store upright in a cabinet if possible, with the blade guard attached. Avoid wrapping the cord tightly around the handle—loose coils prevent cord damage. For cordless models, charge fully before extended storage to maintain battery health. Most manufacturers recommend storing in a dry environment with temperatures between 50-80°F for optimal longevity.
Your immersion blender transforms from intimidating gadget to kitchen essential once you master these techniques. Start with simple soups and smoothies, then gradually explore more advanced applications like making mayonnaise or rescuing broken sauces. The key to how to use an immersion blender effectively lies in understanding its unique capabilities compared to countertop models—its power comes from direct contact with ingredients rather than sheer horsepower.
Within just a few uses, you’ll develop an intuitive sense for speed control, container selection, and movement patterns that deliver perfect results every time. Soon you’ll wonder how you ever cooked without this versatile tool that delivers professional results with minimal effort and cleanup. Keep this guide handy for your first dozen uses, and before long, these techniques will become second nature in your kitchen routine.


