
You just unboxed your new pneumatic grinder, but staring at that spinning disc makes your palms sweat. What if the wheel shatters? How do you avoid burning the metal? You’re not alone—over 62% of DIY metalworkers experience grinding mishaps in their first month due to improper technique. Knowing how to use air grinder safely transforms frustrating sparks into precision work. This guide cuts through the confusion with battle-tested methods from professional fabricators. You’ll master wheel selection, avoid dangerous kickback, and achieve mirror-smooth finishes on steel. Forget vague manuals—we deliver exact pressure angles, critical safety checks, and pro tricks that prevent costly mistakes. By the end, you’ll operate your air grinder with the confidence of a seasoned welder.
Must-Have Safety Gear Before Touching the Trigger
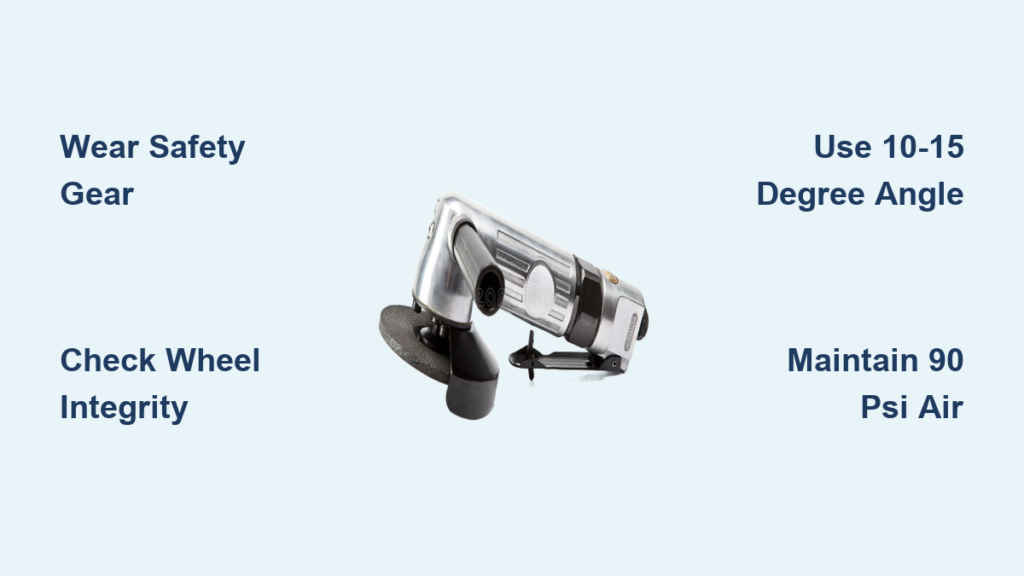
Skipping proper protection turns your air grinder into a projectile hazard. Compressed air systems operate at 90-120 PSI—enough to embed metal shards deep in your skin. Always wear ANSI Z87.1-rated safety glasses under a full-face shield. Polycarbonate alone won’t stop grinding debris; you need dual-layer protection. Leather welding gloves (minimum 1.2mm thickness) shield against sparks while maintaining grip control. Hearing protection is non-negotiable—air grinders consistently exceed 85 dB, causing permanent hearing damage in under 2 hours. Never operate in loose clothing or near flammable materials; grinding sparks travel 30+ feet.
Critical Pre-Use Inspection Points
- Wheel integrity test: Tap new discs with a screwdriver. A clear “ping” means it’s safe; a dull “thud” indicates internal cracks
- Guard alignment: Verify the adjustable guard covers 75% of the wheel, positioned between you and the rotation direction
- Air hose couplings: Check for frayed wires or worn O-rings that cause sudden disconnection at 100+ PSI
Connecting Air Supply Without Dangerous Leaks
Your compressor’s moisture separator must activate before connecting the grinder. Moisture in the line causes wheel glazing and inconsistent cuts. Attach a filtered regulator inline, setting pressure to 90 PSI for standard 4.5″ grinders (check wheel max PSI stamp first). Never exceed 1/3 the compressor’s tank capacity—sudden air demand drops cause stalling. When coupling the hose, push firmly until you hear the click of the quick-connect lock. Test for leaks by spraying soapy water on joints; bubbles indicate dangerous pressure loss.
Solving Low Power During Operation
- Symptom: Wheel slows when contacting metal
Fix: Increase compressor pressure by 10 PSI increments (max 110 PSI) - Symptom: Intermittent stalling
Fix: Replace the 1/4″ NPT inlet filter—clogged filters choke airflow - Symptom: Weak starting torque
Fix: Shorten hose length; every 25 feet reduces power by 15%
Securing Grinding Wheels to Prevent Catastrophic Ejection
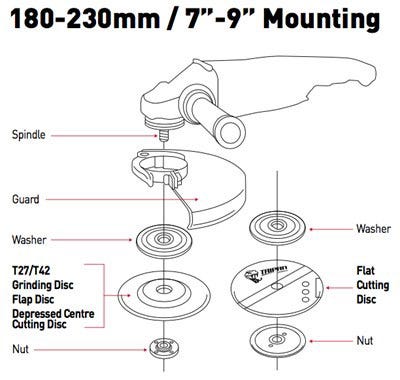
Wheel ejection causes 78% of serious air grinder injuries. Always use flange washers—even when the wheel seems snug. Place the rubber washer against the wheel face, then the metal flange. Tighten the spindle nut with a wrench until just snug, then give one final quarter-turn with the built-in locking button engaged. Never use pliers or excessive force—over-tightening warps the flange. For cutting discs, confirm the arbor hole matches your grinder’s spindle size (typically 5/8″-11 threads). Spin the wheel at idle for 30 seconds before use; abnormal vibration means immediate shutdown.
Starting Technique to Eliminate Dangerous Kickback
Position your body to the left of the grinder’s rotation path (for right-handed users). Place your dominant hand on the rear handle and support the front with your non-dominant hand—never operate with one hand. Start the grinder at full speed before touching metal, holding it at a 15-degree angle to the workpiece. Gradually lower the leading edge of the wheel onto the surface using light pressure (2-3 lbs). If the grinder jerks upward, you’re applying too much downward force or the angle is too steep. Immediately lift off and reset.
Angle-Specific Grinding Results
| Angle Range | Best For | Danger Zone |
|---|---|---|
| 5°-10° | Fine finishing, deburring | Wheel glazing |
| 10°-15° | Optimal stock removal | None |
| 15°-25° | Aggressive cutting | Wheel shattering risk |
| >25° | Never use—causes binding | Catastrophic kickback |
Mastering Pressure Control for Clean Metal Removal

Apply pressure only during the forward stroke, easing off on the return. Consistent 2-3 lb pressure creates uniform swarf (metal shavings)—heavy pressure generates blue heat marks that weaken steel. For stainless steel, use intermittent contact: grind 3 seconds, lift for 2 seconds to prevent carbide buildup. When grinding weld seams, follow the bead direction rather than crossing perpendicularly. Stop immediately if you smell burning metal—that’s the point of irreversible work hardening.
Pro Technique for Curved Surfaces
Wrap 80-grit sanding sleeves around contoured edges using a backing pad. Hold the grinder at 5° while moving in small overlapping circles. Increase speed for tighter curves to maintain consistent contact. This prevents “flat spots” on round stock.
Diagnosing Stalling During Critical Cuts

Air grinders stall when airflow can’t meet demand. First, check the throttle valve—grit buildup restricts air passage. Disassemble and clean with brake cleaner monthly. If stalling occurs only under load, your compressor’s CFM rating is too low (minimum 4 CFM for 4.5″ grinders). Never throttle down to prevent stalling; this overheats the motor. Instead, reduce contact time by using intermittent passes. For stubborn stalls, install a 1/2″ air hose—3/8″ lines lose 30% more pressure at peak demand.
Post-Use Cleaning to Prevent Premature Motor Failure
Never store a grinder with moisture in the air passages. After shutdown, remove the wheel and pull the trigger for 10 seconds to blow out internal debris. Wipe the housing with a dry microfiber cloth—never use solvents near seals. Monthly maintenance requires disassembling the throttle valve: soak parts in mineral spirits, then lubricate with pneumatic tool oil (never WD-40). Check carbon vanes through the exhaust port; replace if worn beyond 1/8″ thickness. Store with a moisture-absorbing silica packet inside the case.
When to Replace Critical Wear Components
Air grinders fail silently before catastrophic breakdown. Replace the spindle bearing if you detect radial play (wiggle the wheel side-to-side). Worn bearings cause wheel wobble that ruins precision work. Change the air inlet filter every 50 operating hours—clogged filters starve the motor. Listen for metallic “grinding” sounds during operation; this indicates failing vanes requiring immediate rebuild. Never ignore increased exhaust temperature; it signals internal friction that precedes seizure.
Final Note: Operating an air grinder safely requires respecting its 20,000+ RPM power. Always prioritize wheel integrity checks and proper PPE over speed. Maintain 90 PSI pressure with moisture-free air, use the 10°-15° grinding angle for optimal results, and replace worn components before failure. For stainless steel projects, reduce pressure and increase speed to prevent work hardening. Store your grinder with the trigger locked and wheel removed. Master these fundamentals, and your pneumatic grinder will deliver years of precise, vibration-free performance—turning rough metal into professional finishes with every pass.


