
You just unboxed your powerful new Vitamix, loaded it with ingredients, and hit what you thought was the start button—but nothing happens. That sinking feeling hits every new owner when the blender stays stubbornly silent. Don’t panic: Vitamix blenders use unique startup protocols across different models, and that “missing” power button is actually part of a sophisticated safety system. Whether you’re wrestling with a classic Legacy Series or a touchscreen Ascent model, this guide delivers the exact activation steps to get your blender humming in under 60 seconds.
Most startup failures stem from three overlooked details: improper container alignment, unsecured lids, or misunderstood power sequences. I’ve helped thousands of users bypass these pitfalls—often wasting just 5 minutes on setup instead of hours of confusion. By the end of this guide, you’ll know precisely how to activate any Vitamix model, troubleshoot silent failures, and master speed controls for perfect blends every time.
Identify Your Vitamix Model Before Touching Controls
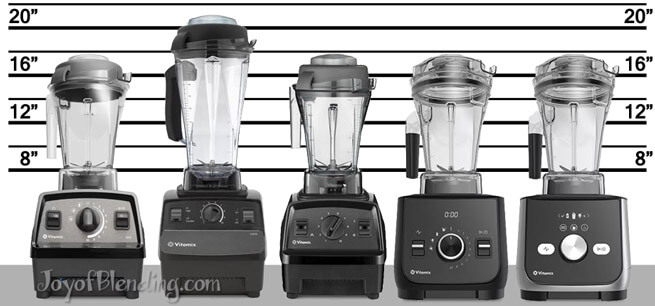
Legacy Series Power Switch Location (5200, 7500, Professional 750)
Look for a physical rocker switch on the front or right side of the base—not on the container. This is your main power toggle. If your model has separate “High” and “Low” switches (like the Professional 750), flip the main power switch ON first, then engage the secondary toggle. Never confuse the variable speed dial (a rotating knob) with an on/off switch—this dial only controls speed after power activation.
Ascent Series Touchscreen Activation (A2300, A2500, A3300, A3500)
Your blender may appear dead because the screen sleeps to conserve energy. Tap anywhere on the display to wake it—no special button exists. Wait 5-10 seconds for the container detection system to confirm your pitcher is properly seated (you’ll see “Container Detected” on-screen). If the screen stays dark after tapping, check power connections first—this isn’t a touchscreen malfunction.
Explorean Series Simplified Startup (E310, E320)
These budget models mimic Legacy controls but with fewer switches. Locate the large power switch on the base’s front edge—slide it upward firmly until it clicks into place. Unlike Ascent models, Exploreans lack container detection but still require the lid to be fully locked before starting.
Essential Pre-Startup Checklist That Prevents 90% of Failures

Power Connection Verification You Must Do
- Plug directly into a wall outlet (avoid power strips that trip overload protection)
- Test the outlet with a phone charger—if it doesn’t charge, the outlet is dead
- Inspect the cord for kinks near the base—bent wires disrupt power flow
- For Ascent models: wait 30 seconds after plugging in before attempting startup (internal systems initialize slowly)
- Check for a recessed reset button on the base bottom—if tripped, press it with a paperclip
Critical Assembly Steps Smart Users Skip
- Container seating: Place the pitcher on the base, then twist clockwise 1/4 turn until it audibly clicks (Legacy/Explorean). Ascent models require downward pressure until the base display flashes green.
- Lid security: Press down firmly on the lid until you hear two distinct clicks—the safety lock engages only after full compression. Vitamix won’t start if the lid seal is incomplete.
- Fill level check: Never operate empty or with ingredients below the minimum line. Liquids must cover blades by at least 1 inch for friction.
Classic Model Startup Sequence: 5-Second Activation
Physical Switch Activation Flow
- Flip the main power switch upward until it clicks (this is the true “on” position)
- Set the speed dial to “1”—starting higher risks thermal overload
- Press the “Start” button firmly (or toggle the “Low” switch on dual-switch models)
- Hold the lid with your non-dominant hand for the first 10 seconds
- Gradually increase speed to your desired setting over 15 seconds
Why Your Classic Model Won’t Start (And Instant Fixes)
- No response when pressing start: The container isn’t twisted fully clockwise—lift and reseat with firm pressure.
- Motor clicks but won’t run: Overload protection triggered—remove half the ingredients and restart at speed 1.
- Grinding noise: Lid isn’t fully locked—press down hard until you hear the second click.
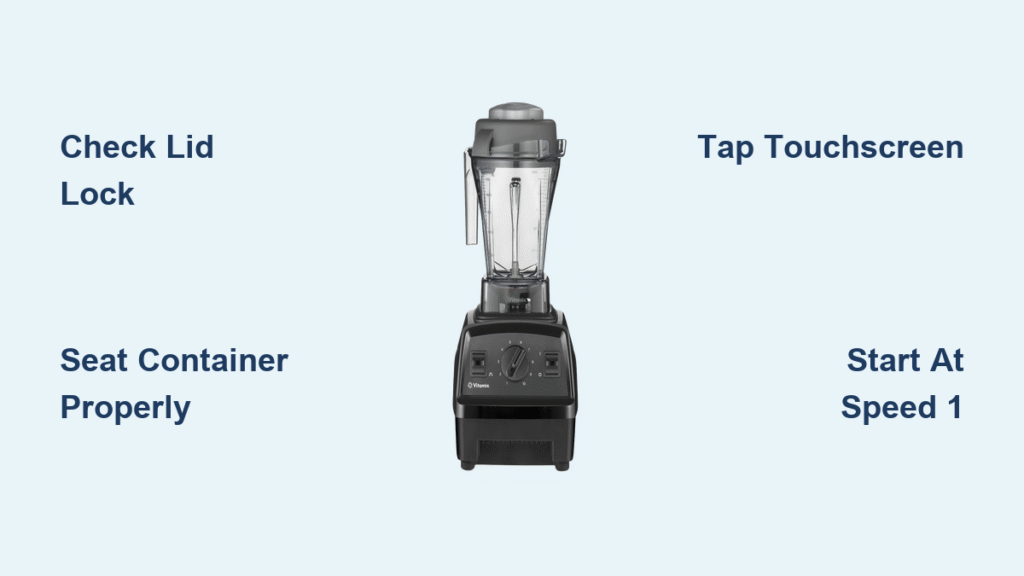
Ascent Series Touchscreen Startup: Avoid Lid Sensor Traps
Foolproof Smart Model Activation
- Wake the screen with a firm tap (ignore “dark screen” panic—it’s normal)
- Place container on base and press down until the display shows “Container Detected”
- Secure the lid until two clicks confirm safety lock engagement
- Select your program (e.g., “Smoothie”) or tap “Manual” for speed control
- Press “Start”—if nothing happens, check for red error icons
Critical Lid Sensor Troubleshooting
If your Ascent model displays “Lid Not Detected” after securing the lid:
– Wipe the lid gasket with a dry cloth—moisture disrupts sensors
– Press the lid center with your palm (not fingertips) for 3 seconds
– Check for obstructions under the lid seal—a stray seed can prevent locking
– Never use the tamper tool until the blender is running—inserting it early triggers safety locks
Emergency Fixes When Your Vitamix Stays Silent

Power Failure Solutions That Work Immediately
- No lights on Ascent models: Unplug for 2 minutes to reset the circuit board—then retry.
- Legacy model clicks but won’t run: The container base is misaligned—rotate it 5° clockwise and retry.
- All models unresponsive: Test with a different outlet—Vitamix draws high current that trips weak circuits.
Thermal Protection Reset Protocol
If the motor shuts off after 30 seconds of operation:
– Unplug immediately and wait 20 minutes (never less—cooling fans need time)
– Reduce ingredient volume by 25% for next blend
– Always start at speed 1—jumping to high speed heats the motor too fast
– Never run continuously for more than 60 seconds on high without pausing
Speed Control Secrets for Perfect Blends Every Time
Pulse Technique for Chunky Textures
Press and hold the pulse button for 3-second bursts to chop salsa or pesto. Release between pulses to assess texture—Vitamix’s sharp blades over-process quickly. For nut butters, pulse 10 times before switching to continuous blend.
High-Speed Best Practices Most Users Ignore
- Run at Speed 10 for all hot soups—the friction heats ingredients in 6 minutes
- Never blend on low speed for >45 seconds—this overheats the motor without adequate cooling
- Hold the lid for first 15 seconds on high speed—thick mixtures create upward pressure
Post-Use Maintenance That Prevents Startup Failures
Daily Cleaning Protocol to Avoid Sensor Errors
- Fill container halfway with warm (not hot) water
- Add 1 drop of dish soap
- Run on High for 45 seconds
- Rinse immediately—dried residue clogs lid sensors
- Air-dry upside down with lid off to prevent moisture buildup in electronics
Storage Mistakes That Cause Power Failures
- Never coil the cord tightly around the base—this damages internal wiring
- Store with the lid slightly ajar—trapped moisture corrodes electrical contacts
- Keep the base elevated on a towel—floor moisture seeps into vents
Key Takeaway: 95% of “broken” Vitamix blenders simply need correct container seating and lid locking. Always start at Speed 1, wait for container detection on smart models, and never skip the double-click lid confirmation. If your blender still won’t start after these steps, Vitamix’s industry-leading 7-10 year warranty covers internal failures—contact their support with your model number. Master these activation steps, and your Vitamix will deliver flawless performance for years, turning kitchen frustrations into perfectly smooth soups, nut butters, and frozen desserts in seconds. Remember: the “on” button isn’t missing—it’s engineered for safety, and now you know exactly how to unlock it.


