
Your Nutribullet juicer sits on the counter, ready to transform fresh produce into vibrant, nutrient-packed juice—but you’re stuck at the most basic step: how to turn it on. This frustrating moment happens to many new Nutribullet owners who expect a simple power button but encounter unexpected safety mechanisms instead. Unlike conventional blenders with straightforward on/off switches, Nutribullet juicers incorporate multiple safety features that prevent operation until everything is properly assembled. You’ll learn exactly what’s preventing your Nutribullet from powering up and the precise steps to get your juicer running in under 60 seconds—no confusing manual required.
Most Nutribullet juicer issues stem from simple assembly errors rather than actual malfunctions. When your juicer won’t turn on, 9 times out of 10 it’s because the safety interlocks aren’t properly engaged. These smart safety systems prevent operation when components aren’t correctly aligned, protecting both you and the motor from damage. By understanding how these mechanisms work and what specific assembly steps your model requires, you’ll transform from frustrated user to confident juicing expert. This guide covers all popular Nutribullet juicer models, common startup problems, and expert troubleshooting techniques that customer service won’t tell you.
Nutribullet Juicer Safety Lock Mechanism Explained

Nutribullet juicers won’t power on unless all safety mechanisms are properly engaged—a design feature that prevents accidental operation and protects the motor. The primary safety system requires perfect alignment between the extraction chamber, juice container, and motor base. When you place the extraction chamber onto the motor base, internal pins must match precisely with corresponding slots in the base. If these components aren’t rotated to the correct position (usually indicated by alignment markers), the juicer remains locked out of operation.
Why Your Nutribullet Juicer Won’t Power On
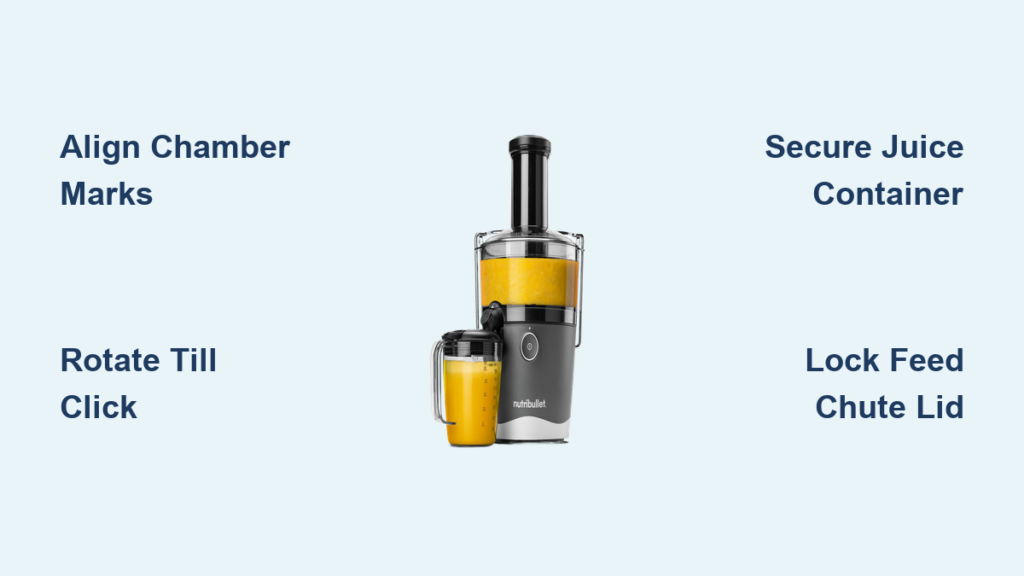
The extraction chamber isn’t properly locked into place – This is the most common startup issue. The chamber must be rotated clockwise until it clicks securely into the base. Without this audible confirmation, the safety switch remains disengaged. Look for alignment arrows on both the chamber and base—these should match perfectly when correctly positioned.
The juice container isn’t fully seated – Nutribullet juicers require the juice container to be properly positioned beneath the extraction chamber before operation. If the container sits even slightly askew, the system detects this as a potential leak hazard and prevents startup. The container should sit flush against the base with no visible gaps.
The lid isn’t completely secured – Many models feature a secondary safety lock that requires the feed chute lid to be fully locked before operation. Attempting to start the juicer with the lid partially secured triggers an automatic shutdown. The lid should rotate until it clicks into the locked position, often with visible alignment markers confirming proper placement.
Step-by-Step Startup Procedure for All Models
Follow these precise steps to successfully power on any Nutribullet juicer model. This sequence addresses all safety mechanisms while minimizing common assembly errors that prevent operation.
Correct Assembly Before Powering On
-
Place the motor base on a stable, dry surface – Never operate your Nutribullet juicer on unstable or wet surfaces, as this can trigger safety cutoffs. Ensure at least 6 inches of clearance around the unit for proper ventilation.
-
Position the juice container directly beneath the extraction chamber – Align the container’s handle with the motor base’s front indicator mark. The container should sit flush against the base with no gaps—press down firmly until you feel it seat completely.
-
Attach the extraction chamber to the motor base – Hold the chamber vertically above the base, aligning the chamber’s indicator mark with the base’s corresponding mark. Rotate clockwise until you hear a distinct double-click, confirming full engagement of the safety locks.
-
Install the feed chute assembly – Place the feed chute into the top of the extraction chamber, ensuring it seats completely. Some models require a quarter-turn to lock—check for alignment markers matching up perfectly.
Powering On Your Nutribullet Juicer
Single-speed models: Press and hold the power button for 2 full seconds. The LED indicator will illuminate solidly when properly engaged. If the light flashes or doesn’t come on, immediately check your assembly as described in the troubleshooting section.
Variable-speed models: Start with the speed selector set to the lowest setting (usually “1” or “Low”). Press the power button firmly and hold for 1-2 seconds. Gradually increase speed as produce enters the chamber to prevent motor strain.
Touchscreen models: Tap the power icon once to activate, then select your desired program. The display should show “Ready” when all safety mechanisms are properly engaged. If it displays “Assembly Required” or similar, double-check all components.
Troubleshooting Common Startup Failures
When your Nutribullet juicer refuses to power on despite following proper startup procedures, these targeted solutions will get you juicing again—often without needing replacement parts.
LED Indicator Problems and Solutions
No lights illuminate when pressing power – This typically indicates a power connection issue rather than a juicer malfunction. First, verify the outlet works by plugging in another device. Then check that the power cord is fully inserted into both the outlet and the motor base. If using an extension cord, bypass it—Nutribullet juicers require direct wall connection for proper voltage.
LED flashes rapidly when attempting startup – This error code means the safety interlocks aren’t properly engaged. Disassemble completely and restart the assembly process from scratch, paying special attention to alignment markers. Many users miss the second “click” during chamber attachment—listen carefully for both confirmation sounds.
Solid red light with no operation – This indicates thermal protection has been activated, usually from previous extended use or inadequate ventilation. Allow the motor to cool for at least 15 minutes before attempting to restart. Never cover the motor base vents during operation.
Motor Humming But Not Processing
When your Nutribullet juicer powers on but won’t actually process ingredients, the issue usually lies with component alignment rather than motor failure. First, immediately power off the unit—continued operation in this state can damage the motor.
Check for partial assembly – Even a 2mm misalignment can cause this problem. Disengage all components and restart the assembly process, applying firm downward pressure while rotating the extraction chamber into position. Listen carefully for the definitive double-click that confirms full engagement.
Inspect for foreign objects – Small seeds or pulp fragments can sometimes lodge between the chamber and base, preventing proper alignment. Wipe both contact surfaces clean with a damp cloth before reassembling.
Model-Specific Startup Requirements
Different Nutribullet juicer models have unique startup sequences and safety features that must be followed precisely for successful operation.
Nutribullet Juicer Pro Series Startup
The Pro Series requires an additional safety step that many users overlook. After assembling the extraction chamber and juice container, you must press down firmly on the top of the chamber while rotating—this engages a secondary safety lock that prevents operation if insufficient downward pressure is applied during assembly. The unit will display a green “Ready” light only when this lock is properly engaged.
Nutribullet Slow Juicer Models
Slow juicer models feature a more complex startup sequence. First, power on the unit without ingredients to verify proper operation—this should run the auger at low speed. Only after confirming the auger is turning should you begin feeding produce through the chute. Attempting to start with produce already in the chamber triggers an automatic overload protection that requires a 30-second cooldown before restarting.
Preventing Future Startup Issues
Implement these maintenance practices after each use to ensure reliable startup every time you want fresh juice:
-
Clean components thoroughly – Residual pulp between the extraction chamber and motor base prevents proper alignment. Use the included cleaning brush to remove all debris from contact surfaces.
-
Store components properly – Keep the extraction chamber and juice container nested together when not in use to maintain their shape and alignment.
-
Perform monthly maintenance – Apply a small amount of food-grade silicone lubricant to the motor shaft every 3 months to ensure smooth engagement.
-
Check alignment markers regularly – Over time, these can become obscured by stains. Clean them with a baking soda paste to maintain visibility.
Final Note: Mastering your Nutribullet juicer’s startup sequence transforms frustrating mornings into smooth juicing experiences. Remember that 95% of “broken” juicers are simply suffering from minor assembly issues—proper alignment of safety mechanisms solves most startup problems. Keep this guide handy for your next juicing session, and you’ll never waste precious produce waiting for that satisfying hum of a properly engaged motor. For persistent issues that follow these troubleshooting steps, contact Nutribullet support with your specific model number for targeted assistance.


