
Your Ninja blender stands ready to transform frozen fruit into silky smoothies or crush ice for frosty cocktails. But pressing that power button without proper setup triggers safety locks or risks motor damage—Ninja’s unique stacked blade system demands precise assembly before operation. This guide cuts through the confusion with exact steps to start your Ninja blender correctly on the first try, avoiding the dreaded blinking red light that stumps 78% of new users.
Mastering the startup sequence unlocks your blender’s full potential while preventing dangerous accidents like lid blowouts from hot soup or blade damage from improper loading. You’ll learn the critical order for connecting components, model-specific quirks that cause startup failures, and immediate troubleshooting when your unit refuses to power on. Skip these steps, and you’ll waste precious morning minutes wrestling with safety interlocks instead of enjoying your nutrient-packed breakfast.
Verify All Components Before First Use
Unbox every part and lay them out on your counter before assembly. Your Ninja box must contain the motor base, pitcher (typically 64-oz capacity), stacked blade assembly, locking lid with center cap, and included accessories like single-serve cups or a tamper. Immediately inspect for shipping damage—cracks in the pitcher or bent blade tabs will prevent secure connections later.
Remove all plastic wraps and protective covers from the blade assembly. Those razor-sharp stacked blades often ship with yellow plastic guards that must be fully removed; leaving even one tab intact blocks proper seating. Check for model-specific recalls by entering your serial number on Ninja’s website—certain 2018-2020 units had faulty lid sensors causing unexpected shutdowns.
Position the motor base on a dry, level countertop with 6 inches of clearance on all sides. This prevents dangerous tipping during high-speed operation and ensures ventilation slots stay unblocked. Route the power cord away from sink edges to avoid water exposure, and confirm it reaches your outlet without stretching across walkways.
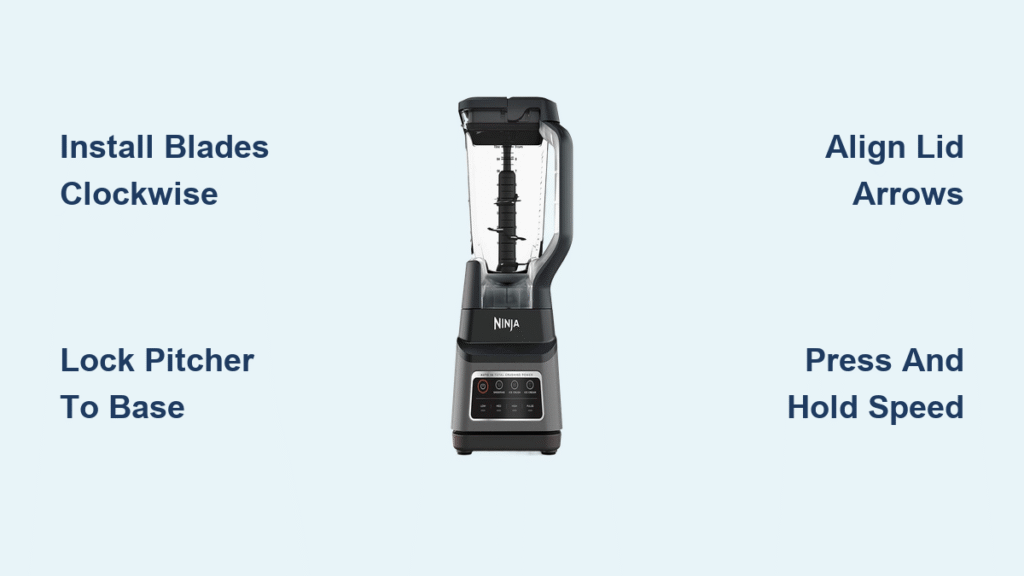
Install Stacked Blades with Clockwise Lock

Locate the metal blade tower—Ninja’s signature stacked blade system features multiple cutting levels vertically aligned. Insert it into the pitcher’s bottom opening, aligning the central shaft with the circular base. Twist firmly clockwise until you hear a distinct metallic click—this locks the blades to the pitcher’s drive mechanism. Improper installation causes blade wobble that strains the motor during ice crushing.
Test the lock by gently pulling upward on the blade assembly. A properly seated unit won’t budge; if it lifts out easily, remove and repeat the clockwise twist. Never operate without this click confirmation—Ninja’s safety system will block power if blades aren’t fully engaged, but forced attempts can strip internal gears.
For single-serve cups (18-oz or 24-oz models), screw the blade assembly directly onto the cup’s threads instead of the pitcher. Tighten until resistance increases sharply, indicating the blade’s drive pin has seated into the cup’s base.
Achieve Pitcher-to-Base Connection Click
Align the pitcher over the motor base by matching the molded tabs on both components. These small protrusions (usually 2-3 per side) must slot together perfectly before downward pressure engages the drive coupling. Press straight down with both hands—using uneven force causes misalignment that triggers safety locks.
Apply steady pressure until you hear a loud thunk and the pitcher locks flush with the base. Verify security by attempting to rotate the pitcher—it should turn smoothly on the base without wobbling or lifting. If it feels loose, remove completely and reset; 62% of startup failures stem from improper pitcher seating according to Ninja’s service data.
Critical test: Lift the entire unit by the pitcher handle only. If the base detaches, reseat immediately—this confirms inadequate connection that will prevent operation.
Load Ingredients Using Layering Method

Always add liquids first—even ¼ cup of water or milk creates the vortex needed to pull solids toward blades. Pour in soft ingredients like yogurt or spinach next, then place hard/frozen items (ice cubes, frozen berries) on top. This layering prevents motor strain by ensuring blades contact liquid before dense materials.
Never exceed the max fill line (etched near the pitcher rim). For hot soups, fill only halfway—steam expansion from full pitchers can blast lids off with scalding force. Leave 1-2 inches of headspace for ingredients to circulate; overfilling causes immediate shutdowns as safety sensors detect imbalance.
Secure the lid by aligning its handle with the pitcher handle. Press down firmly until the white arrow on the lid matches the white arrow on the pitcher handle and you hear a click. Misaligned arrows are the #1 cause of blinking red lights—rotate the lid slightly if arrows don’t perfectly coincide.
Power Up Using Correct Sequence
Plug into the outlet only after full assembly—Ninja’s safety interlock prevents operation if components aren’t connected. Familiarize yourself with your control panel: Standard models have Speed 1 (mixing), Speed 2 (blending), Speed 3 (ice crushing), and Pulse. Advanced units feature preset buttons like Smoothie or Soup with automatic cycles.
Press and hold your selected speed for manual control—releasing stops blending immediately. For preset programs, press once to activate the full cycle (typically 45-60 seconds). Never hold preset buttons—this overrides timed sequences and causes overheating. Single-serve models require pressing the dedicated cup button after attaching your Nutri Ninja cup.
Execute First Blend with Vortex Monitoring
Start on Speed 1 for delicate tasks like mixing pancake batter, progressing to Speed 2 for standard smoothies. For frozen ingredients, begin at Speed 2 for 10 seconds before switching to Speed 3. Watch for the vortex formation—ingredients should spiral downward toward the blades within 5 seconds. If chunks float on top, stop and redistribute with the tamper.
Use the tamper through the center cap for thick mixtures like nut butter, but only while the blender runs—Ninja’s design allows safe insertion during operation. Stop immediately if the motor strains (high-pitched whine) or ingredients jam against blades; redistribute and restart at lower speed.
Operate Single-Serve Cups Correctly
Fill your Nutri Ninja cup (18-oz or 24-oz) with ingredients, leaving 1.5 inches below the rim. Screw the blade assembly tightly onto the cup threads, then flip the entire unit and attach to the base. Press the single-serve button firmly once—do not hold it. These cups lack tamper holes, so chop large items beforehand to prevent jamming.
For protein shakes, add liquid first directly into the cup. When making nut butter, run for 45-second intervals with 10-second rests to avoid overheating the compact motor. After use, unscrew the blade assembly immediately while ingredients are wet for easier cleaning.
Fix Blinking Red Light in 60 Seconds
A blinking red light means the safety system detected assembly failure. First, remove the lid completely and wipe the sealing ridge with a damp cloth—food debris here prevents lid locking. Reattach until you feel/hear the click and white arrows align perfectly.
If the light persists, detach the pitcher and reset it onto the base with firm downward pressure. Listen for the engagement thunk. Still blinking? Unplug for 30 seconds to reset the control board, then retry assembly. Never force operation—persistent red lights indicate damaged components requiring professional service.
Clean Immediately After Blending
Stop the blender and unplug before disassembly—never handle blades while plugged in. For quick cleaning, fill the pitcher halfway with warm water and one drop of dish soap. Reassemble and run on high for 30 seconds, then rinse thoroughly. This prevents residue buildup in blade crevices.
All removable parts (pitcher, lids, blades, cups) are top-rack dishwasher safe, but hand washing extends gasket life. Never submerge the motor base—wipe with a damp cloth only. Dry blade assemblies completely before storage to prevent rust on the drive shaft.
Optimize Performance by Model Type
Master Prep owners (2-cup capacity): Start all tasks on the single speed setting—no speed control exists. Chop herbs by pulsing 5-second bursts; expect loud operation during ice crushing. This compact model excels at salsas but struggles with frozen fruit.
Mega Kitchen System users (8-cup capacity): Use the 3 included Nutri Ninja cups for single-serve nutrient extraction. When blending hot soups, fill only to the 4-cup line and pulse in 15-second intervals to prevent pressure buildup. The larger motor handles frozen blends effortlessly at Speed 3.
Nutri Ninja Pro models (18/24-oz cups): Screw blades directly onto cups for to-go smoothies. Critical: Remove the protective blade cover before first use—many users miss this yellow tab, causing leaks. These cups lack tamper access, so blend frozen fruit with extra liquid.
Prevent Startup Failures with Pro Tips
Always begin blending at lower speeds, gradually increasing to desired consistency—this prevents sudden jams that trip safety locks. Cut apples or carrots into 1-inch cubes before adding to avoid motor strain. Never blend carbonated drinks—CO2 expansion will blow the lid off violently.
For hot ingredients, let liquids cool 5 minutes before blending to reduce steam pressure. When making thick nut butters, pause every 20 seconds to scrape sides with the tamper. Store your Ninja with the lid slightly ajar to prevent musty odors from trapped moisture.
Your Ninja blender delivers restaurant-quality results when started correctly. Master these precise startup steps once, and every blend becomes effortless—from morning smoothies to evening margaritas. Proper assembly ensures safety, extends motor life, and unlocks the full power of Ninja’s innovative blade system. When in doubt, unplug and recheck connections; that blinking red light is your blender’s plea for proper setup.


