
Your morning espresso suddenly tastes flat. The grind looks uneven—one batch powdery, the next full of chunks. You’ve cleaned the grinder, adjusted the settings, but nothing fixes that gritty texture. That sinking feeling hits: your coffee grinder burrs might be dull. While most home grinder owners assume burrs must be replaced when performance drops, the truth is more nuanced. How to sharpen coffee grinder burrs is a specialized skill that could save you $50-$200 in replacement costs—but only if your specific grinder model allows it. This guide cuts through the misinformation to show exactly when sharpening works, when replacement is unavoidable, and the precise steps to restore your grinder’s performance without damaging critical components.
Why Most Home Grinder Burrs Can’t Be Sharpened
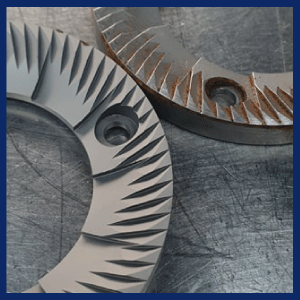
Coffee grinder manufacturers design consumer models with cost-effective burrs that wear out rather than dull gradually. Unlike commercial grinders with hardened steel burrs, home units typically use softer alloys that erode unevenly after 500-1,000 pounds of beans. Attempting DIY sharpening often creates micro-fractures that worsen performance. You’ll know your burrs are truly worn (not just dirty) when:
- Grind consistency stays poor even after deep cleaning
- Coffee extraction time increases by 30% or more
- Visible pitting appears on the burr edges under magnification
- Unusual grinding noises persist after removing foreign debris
Critical reality check: Brands like Baratza, Breville, and De’Longhi explicitly void warranties if users attempt sharpening. Their burrs are precisely calibrated—any alteration destroys the factory-set gap tolerances measured in microns. Unless you own a commercial-grade grinder (Mazzer, Mahlkönig, Anfim), replacement is almost always the safer, more cost-effective solution.
When Professional Burr Sharpening Makes Sense

Commercial Grinder Owners: The 3-Step Sharpening Process
If you operate a commercial espresso grinder, professional sharpening extends burr life by 2-3 years. Here’s what happens at certified service centers:
- Precision Measurement: Technicians use laser calipers to map each burr’s wear pattern, identifying areas needing 0.02-0.05mm material removal
- CNC Resurfacing: Burrs mount on computer-controlled grinding wheels that restore the original bevel angle (typically 30-45 degrees) without altering critical dimensions
- Laser Balancing: Post-sharpening weight distribution checks ensure no vibration during high-RPM operation
Time/cost reality: This process takes 3-5 business days and costs 40-60% of new burrs ($120-$180). Factor in shipping both ways—it only makes financial sense for grinders over $800 retail.
Home Grinder Exceptions Worth Considering
Two scenarios where sharpening might work for home units:
- High-end manual grinders (e.g., Kinu M47, Timemore C2): Their stainless steel burrs maintain bevel integrity longer. A single professional sharpening can add 500+ pounds of grinding life.
- Vintage commercial units (e.g., older EK43s): If replacement burrs cost $300+, sharpening at $150 becomes viable.
Red flag test: Tap your grinder’s burr gently with a screwdriver. A dull thud means eroded metal (replace). A clear ping suggests it might still be sharpenable.
DIY Burr “Sharpening” Methods That Actually Work (With Caveats)
The Abrasive Paste Method for Manual Grinders
Warning: This only applies to conical burr manual grinders. Never attempt on flat burrs or electric models.
What you’ll need:
– 15ml ceramic sharpening paste (600-800 grit)
– Small stiff-bristle brush
– Isopropyl alcohol and lint-free cloths
Step-by-step:
1. Remove burrs according to your grinder’s manual (photograph assembly positions first)
2. Apply paste to the outer edge of the stationary burr, focusing on the grinding teeth
3. Reassemble grinder and grind 50g of unroasted wheat berries (not coffee beans!)
4. Disassemble and inspect: Paste residue should show even wear patterns
5. Repeat 2-3 times until paste turns uniformly gray
6. Clean meticulously with alcohol—any residue ruins coffee flavor
Critical mistake to avoid: Over-aggressive grinding. Limit sessions to 50g increments. Stop when paste color change slows—excessive removal creates flat spots causing inconsistent grinding.
When This Fails: The 72-Hour Test
After “sharpening,” run this diagnostic:
– Grind 50g of beans at your usual setting
– Sieve results through 200-400 micron screens
– If fines exceed 35% or boulders exceed 15%, burrs are too eroded—replace immediately
Why Burr Replacement Beats Sharpening for 95% of Home Users
The Hidden Cost of “Free” Sharpening
Attempting DIY sharpening on modern home grinders often triggers these expensive consequences:
– Calibration loss: Burrs require exact parallel alignment. Even 0.01mm misalignment creates channeling in espresso puck
– Increased heat: Uneven surfaces generate friction heat, scorching coffee oils
– Motor strain: Dull burrs force motors to work 20-30% harder, shortening lifespan
Time/cost comparison:
| Solution | Cost | Time Required | Performance Restoration |
|———-|——|—————|————————–|
| Professional sharpening | $150+ | 1 week | 70-85% |
| New burrs (home grinder) | $45-$90 | 20 minutes | 100% |
| New grinder | $150+ | 5 minutes | 100% |
Step-by-Step Burr Replacement Guide
Most home grinder burrs install in under 20 minutes. Here’s the universal process:
- Unplug and empty the grinder completely
- Remove hopper and upper burr carrier (usually 3-6 screws)
- Lift out upper burr—note its orientation marking
- Clear residual grounds from lower burr chamber with soft brush
- Install new upper burr matching original position
- Reassemble carrier and tighten screws in star pattern
- Run calibration test: Grind 10g coarse → fine. Should transition smoothly without grinding noise
Pro tip: Before final reassembly, rub a raw potato through the burrs. Starch residue reveals alignment issues as uneven streaks.
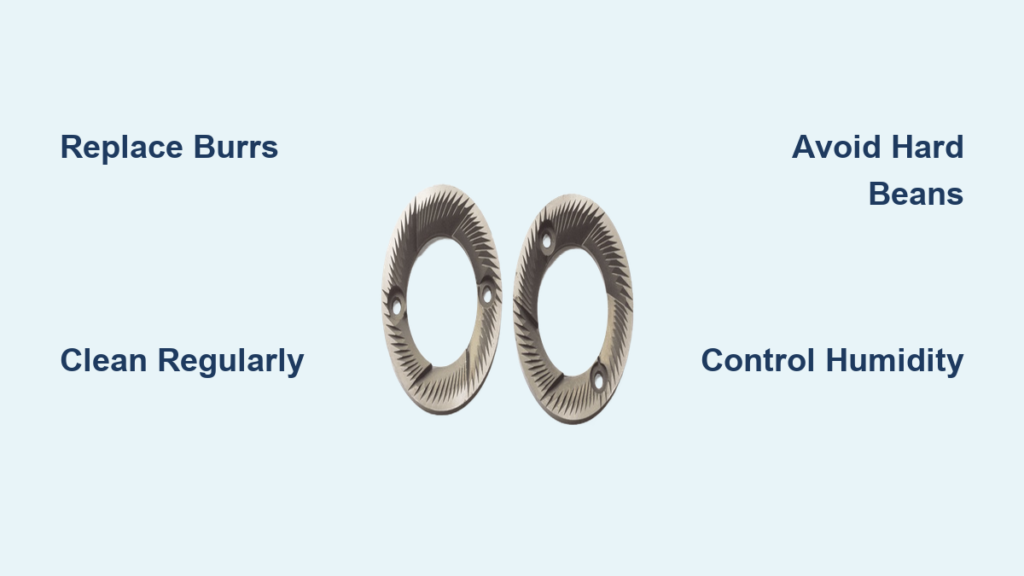
Extending Burr Life: The 4 Preventable Wear Causes
Coffee Bean Selection Mistakes
Hard beans accelerate wear 3x faster than soft beans:
– Avoid: Ethiopian Yirgacheffe (high density), aged beans (brittle fragments)
– Choose: Brazilian Santos, Sumatran Mandheling
– Never grind: Flavored beans (sugars coat burrs), oily dark roasts
Moisture Control Protocol
Humidity causes microscopic rust pits on steel burrs:
– Store grinder in climate-controlled space (<50% humidity)
– Run 5g dry rice monthly to absorb internal moisture
– Never clean with water—use only dry brushes and compressed air
The Grind Setting Sweet Spot
Operating at extreme settings wears specific burr zones:
– For espresso: Stay between settings 15-25 (avoid 5-10 or 30+)
– For pour-over: Use 30-40 range
– Weekly rotation: Shift setting by 2 increments to distribute wear
Cleaning Schedule That Prevents Premature Wear
| Grinder Usage | Cleaning Frequency | Critical Step |
|---|---|---|
| Daily (1-2 shots) | Monthly | Remove static guard for brush access |
| Heavy (3+ shots) | Bi-weekly | Disassemble burr carrier completely |
| Commercial | Daily | Inspect burr alignment with feeler gauges |
When to Replace Your Entire Grinder
Burr wear often signals broader deterioration. Replace your grinder if:
– Motor hums louder than before (bearing wear)
– Grind time increased by 50% despite burr replacement
– Static causes 20%+ grounds to cling to hopper
– Visible rust on internal shaft components
Cost-per-cup analysis: If maintenance costs exceed 15% of your grinder’s value, upgrade. For grinders under $200, replacement burrs cost 25-50% of a new entry-level model—making new units financially smarter.
Final Takeaway: While how to sharpen coffee grinder burrs is valuable knowledge for commercial operators, home users should prioritize replacement over sharpening 95% of the time. The precision required for effective sharpening simply doesn’t align with consumer-grade grinder design. Focus instead on extending burr life through smart bean selection, humidity control, and proper cleaning. When performance declines, new burrs installed correctly will restore 100% functionality in under 20 minutes—saving you money while guaranteeing perfect espresso. For those rare compatible models, seek certified sharpening services rather than risking DIY methods that often do more harm than good. Your morning cup deserves the precision only factory-calibrated burrs can deliver.


