
Nothing beats the taste of fresh orange juice made at home, yet many people struggle with the simple question of how to put an orange in a juicer properly. Getting this process right makes the difference between a smooth, efficient juicing session and a frustrating mess that wastes precious fruit. This guide reveals the exact techniques professionals use to maximize juice yield, protect their equipment, and enjoy perfect fresh-squeezed orange juice every time. Whether you’re using a centrifugal or masticating juicer, mastering these fundamental steps transforms your morning routine with minimal effort and maximum results.
Choose the Right Oranges for Maximum Juice Yield
The foundation of great orange juice starts long before you put an orange in a juicer—selecting the proper variety directly impacts both flavor and quantity. Navel oranges deliver exceptional sweetness and convenience with their seedless interior, making them ideal for quick morning juicing. Their distinctive navel-shaped protrusion (actually a secondary undeveloped fruit) helps identify them at the market. Available primarily from winter through early spring, these oranges separate easily into segments during juicing, producing bright, balanced juice perfect for beginners.
Valencia oranges represent the professional’s choice for serious juicing enthusiasts. These late-season varieties contain significantly higher juice content and offer a superior balance of sweetness and acidity that creates more complex flavor. With thinner rinds and fewer internal membranes than navels, Valencias produce smoother juice without bitter compounds. Their growing season extends through summer, allowing you to enjoy excellent juice quality year-round by switching between these two primary varieties as seasons change.
Prepare Oranges Properly Before Juicing

The Essential Washing Step You Can’t Skip
Before you put an orange in a juicer, thorough cleaning prevents contaminants from compromising your juice quality and safety. Hold each orange under cool running water while rubbing the surface vigorously with your hands—this removes visible dirt, environmental residue, and potential pesticide traces. For waxed or particularly dirty oranges, use a soft vegetable brush to gently scrub the rind without damaging the peel. Skipping this step risks transferring bacteria from the peel to your juice during cutting, even if you plan to peel the fruit completely.
Pro Tip: Always dry washed oranges thoroughly with a clean cloth. Wet fruit becomes slippery during cutting, increasing accident risk, and surface moisture can dilute your juice and affect the juicer’s grip on the fruit.
Create Optimal Cuts for Efficient Juicing
Cutting technique dramatically affects how effectively you can put an orange in a juicer. Start by removing both the stem end and blossom end with quarter-inch slices—this creates stable, flat surfaces that prevent wobbling during processing. These flat bases allow the orange to stand upright in the feeding chute, ensuring consistent pressure and maximum juice extraction.
You have two effective preparation methods depending on your juicer model:
-
Complete Peeling Method: Remove all rind and white pith with a sharp knife. This prevents bitter flavors and reduces clogging risk, especially in juicers with narrow chutes.
-
Segment Method: Slice oranges into wedges that fit your feeding chute. Modern high-powered juicers can process these segments with minimal pith remaining, significantly speeding up preparation.
Warning: Never feed whole uncut oranges into standard home juicers—this strains the motor and creates dangerous jamming situations.
Set Up Your Juicer for Safe, Efficient Operation

Proper assembly before you put an orange in a juicer ensures both safety and optimal performance. Begin by selecting a stable, flat surface near an electrical outlet with ample space for your juicer, prepared fruit, juice container, and serving glass. Lay down newspaper or a cutting mat to simplify cleanup of inevitable drips and splatters.
Follow this assembly sequence for most electric juicers:
1. Place the motor base securely on your counter
2. Attach the juice collection container beneath the spout
3. Insert the filter basket, ensuring proper alignment
4. Secure the feeding chute to the top of the unit
5. Verify the pusher moves freely through the chute
Critical Safety Check: Before plugging in, confirm all components are clean, dry, and properly locked. Most juicers have safety interlocks that prevent operation if incorrectly assembled—a vital feature that protects you from serious injury.
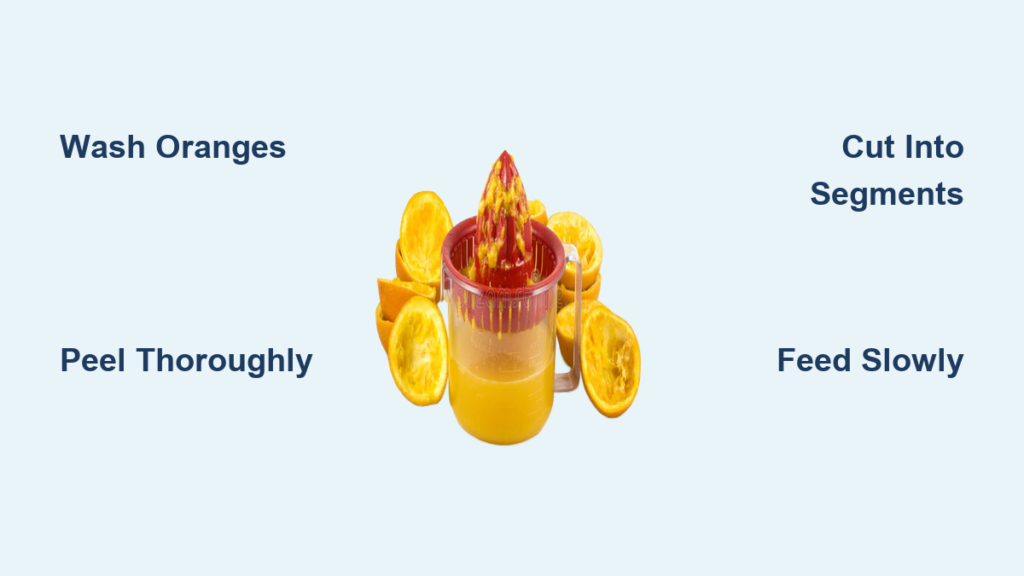
Feed Oranges Into Your Juicer Correctly
The technique you use to put an orange in a juicer determines both juice yield and equipment longevity. Always feed prepared orange segments one at a time, using the pusher tool—not your fingers—to guide them through the chute. Overloading the feeding tube strains the motor and reduces juice extraction efficiency. Maintain steady, moderate pressure as you feed; the pusher should move smoothly without requiring excessive force.
For juicers with larger chutes (typically 3 inches or wider), whole peeled oranges can sometimes be processed without segmenting. If attempting this method, ensure your manufacturer’s guidelines permit whole-fruit feeding and watch carefully for signs of motor strain. Listen for changes in motor sound that indicate developing jams—when you hear the motor struggling, immediately reduce your feeding rate.
Time-Saver: Feed segments at a consistent pace of one every 3-5 seconds. This rhythm allows the motor to process each piece completely while maintaining efficient workflow. Rushing leads to jams; waiting too long creates uneven processing.
Operate Your Juicer for Maximum Juice Extraction
Start your juicing session by allowing the motor to reach full speed before introducing any fruit—this brief waiting period protects your investment and ensures optimal extraction. Position your glass or pitcher directly beneath the juice spout before beginning to avoid mid-process adjustments that could cause spills.
Fresh orange juice develops off-flavors quickly due to oxidation, so serve immediately for peak flavor and nutrition. A single medium orange typically yields 4-6 ounces of juice, so plan quantities accordingly—calculate two to three oranges per serving when juicing for multiple people. If you prefer pulp-free juice, strain through a fine mesh sieve as you pour, or let the juice rest for one to two minutes to allow foam to rise to the surface.
Pro Tip: Room-temperature oranges yield up to 20% more juice than cold ones. If your oranges have been refrigerated, let them sit at room temperature for 30 minutes before juicing for optimal results.
Clean Your Juicer Immediately After Use
Proper cleaning after you put an orange in a juicer and complete your session prevents dried residue that becomes difficult to remove. Always unplug the unit first, then carefully dismantle components in reverse order of assembly. Rinse all removable parts immediately under warm water—don’t wait until pulp dries and bonds to surfaces.
Pay special attention to the filter basket, using the provided cleaning brush in circular motions to remove all trapped pulp fibers. For stubborn residue, soak components in warm, soapy water for 10-15 minutes before scrubbing. Never immerse the motor base in water—wipe it with a damp cloth only. Dry all parts completely before reassembling to prevent mold growth and odor retention.
Troubleshoot Common Juicing Problems
Low juice yield often stems from using cold oranges or failing to remove sufficient pith during preparation. Bitter taste typically indicates some peel or pith entered the processing stream—review your peeling technique to ensure complete removal of white pith. Motor straining usually means you’re feeding pieces too large for your juicer’s capacity or working too quickly.
Quick Reference Fixes:
– Low Yield? Warm oranges to room temperature and ensure thorough peeling
– Bitter Juice? Remove all white pith and avoid processing any peel
– Motor Straining? Reduce piece size and slow your feeding rate
– Clogged Filter? Clean during juicing if processing large quantities
Essential Safety Practices for Orange Juicing
Electrical and operational safety must remain your priority when learning how to put an orange in a juicer. Never use a juicer with a damaged cord or plug, and always unplug before cleaning or maintenance. Keep all electrical components away from water sources, and never reach into the feeding chute while the unit is plugged in—even when the motor seems off.
During operation, use only the provided pusher for guiding fruit, and never bypass safety interlocks designed to prevent operation without proper assembly. Keep hair, clothing, and jewelry clear of moving parts, and supervise children and pets whenever the juicer operates. These precautions prevent accidents that could cause serious injury or damage your equipment.
Mastering how to put an orange in a juicer properly transforms a simple task into an efficient process that delivers delicious, nutritious juice consistently. By selecting appropriate oranges, preparing them correctly, operating your juicer safely, and maintaining your equipment properly, you’ll enjoy fresh orange juice whenever you want while protecting your investment in quality kitchen equipment. The perfect glass of fresh-squeezed orange juice is just minutes away—now that you know exactly how to put an orange in a juicer the right way.


