
That jar of store-bought walnut butter costing $20 while sitting half-empty in your pantry? You can transform raw walnuts into silky, pourable walnut butter in your blender for just $5—packing 113% of your daily omega-3s per serving. When you learn how to make walnut butter in a blender, you unlock a heart-healthy spread that flows like canola oil, costs 75% less than store brands, and avoids preservatives. This guide delivers the exact technique to achieve that coveted runny texture whether you’re using roasted walnuts for deep flavor or raw nuts for maximum nutrition—all without burning out your blender motor.
Fix Overheating Blender Motor During Walnut Processing

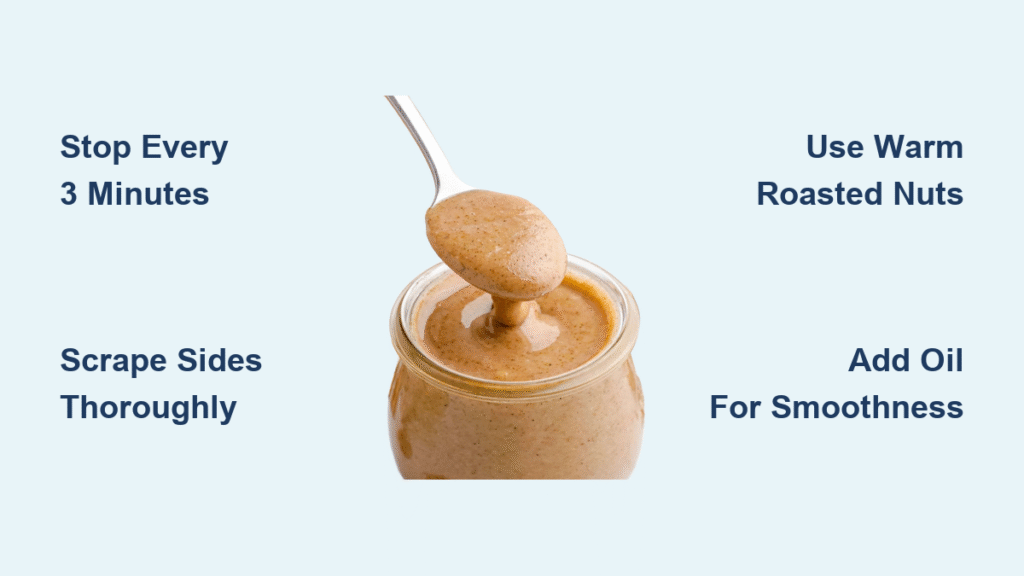
Stop Your Blender Every 3 Minutes to Prevent Motor Burnout
Raw walnuts require 10-20 minutes of continuous processing—a major strain on smaller blenders. High-speed models like the Vitamix 5200 handle this best, but even they need breathing room. When you make walnut butter in a blender, implement mandatory rest periods: blend 3-4 minutes, then stop for 1-2 minutes. You’ll hear the motor strain when it’s overheating—shut it off immediately if you detect that high-pitched whine. Smaller 7-cup processors need 2-5 extra minutes per cycle compared to 11-cup models.
Scrape Sides Thoroughly Before Each Blend Cycle
Walnut paste clings stubbornly to blender walls, forcing the motor to work harder. Use a rubber spatula to scrape down every surface between cycles. For raw walnuts, this scraping step is non-negotiable—skip it, and you’ll end up with a gritty paste instead of smooth butter. Warm nuts release oils faster, so process immediately after roasting while they’re still at 120°F.
Roast Walnuts for Deep, Toasty Flavor in 12 Minutes
Achieve Perfect Roast at 350°F Without Burning
Spread walnuts in a single layer on a parchment-lined baking sheet—crowding causes uneven toasting. Roast at 350°F for exactly 8-12 minutes until they turn golden brown and smell like warm autumn air. The critical visual cue? When you press a walnut half, it should leave a slight indentation but not crumble. Over-roasting creates bitter notes that ruin your butter, while under-toasting leaves raw, grassy flavors.
Skip Roasting Only If You Have 20 Minutes to Spare
Raw walnuts yield milder-tasting butter but demand serious patience. Expect 15-20 minutes of processing time versus just 2-3 minutes for roasted nuts. If you’re short on time, skip this step—but never rush raw walnut processing. Pushing your blender beyond its limits risks permanent motor damage. For first-time makers, roasted walnuts are the fail-safe path to success.
Blend Walnuts to Canola-Oil Consistency in 3 Minutes
Process Roasted Walnuts Until Spoon Test Passes
Load warm roasted walnuts into your blender. Start on low speed for 30 seconds, then increase to high. At the 1-minute mark, you’ll see a thick, crumbly paste. Scrape down sides completely, then blend another 60-90 seconds. Your walnut butter is ready when it coats the back of a spoon and drips steadily like canola oil. If it’s still thick, add 1 tablespoon of walnut oil and blend 30 seconds more.
Recognize the Raw Walnut Texture Progression
Raw nuts follow a predictable transformation:
1. 0-4 minutes: Coarse meal (like cornmeal)
2. 5-12 minutes: Thick cookie dough (clumps when squeezed)
3. 13-20 minutes: Silky, pourable butter (flows off spatula)
Stop blending prematurely at the cookie-dough stage if you prefer thicker spreadable butter for toast. For pourable applications like smoothies, keep processing until oil visibly separates from solids.
Add Flavor Without Ruining Texture
Incorporate Sweeteners During Final 60 Seconds
Adding maple syrup too early creates a sticky mess that gums up blades. Wait until the butter reaches its oil-like consistency, then pour in 2 tablespoons of maple syrup or honey. Blend just 45-60 seconds—over-processing can cause separation. For salted versions, use ¼ teaspoon sea salt to enhance nuttiness without overpowering. Vanilla extract (½ tsp) works best added at this stage too.
Avoid Water When Fixing Thick Butter
Many beginners mistakenly add water to thin seized walnut butter. This creates a gummy paste that never achieves true creaminess. Instead, add walnut oil—one teaspoon at a time—while blending. Each addition should visibly loosen the mixture within 10 seconds. Never exceed 3 tablespoons total, or your butter will become greasy.
Store Walnut Butter to Prevent Rancidity
Freeze Portions for 6-Month Freshness
Refrigeration only preserves walnut butter for 4 weeks before oxidation turns it bitter. For long-term storage, portion into ice cube trays, freeze solid, then transfer cubes to airtight glass jars. The high fat content prevents complete freezing—you’ll get semi-solid cubes perfect for single servings. Thaw overnight in the fridge; never microwave as it destroys delicate omega-3s.
Stir Separated Oil Immediately Before Use
Natural oil separation occurs within hours of making walnut butter. Don’t discard the golden liquid layer—that’s where 70% of the omega-3s reside. Stir vigorously with a fork until fully reincorporated. If the butter has been refrigerated, let it sit at room temperature for 15 minutes first for easier mixing.
Use Walnut Butter Beyond Toast
Boost Smoothies with Omega-3 Power
Add 2 tablespoons to morning smoothies for a protein and healthy fat boost that keeps you full until lunch. Unlike almond butter, walnut butter blends instantly without clumping. Try it with banana, spinach, and almond milk—the earthy notes disappear completely. One serving delivers 5g plant protein and 21g heart-healthy fats.
Replace Almond Butter in Baking
Swap walnut butter 1:1 for almond butter in cookies, muffins, or granola. It creates richer, darker baked goods with superior moisture retention—ideal for pumpkin bread or oatmeal raisin cookies. Avoid using it in white cakes where color matters, but embrace the nutty depth in chocolate recipes. For streusel toppings, mix ¼ cup walnut butter with oats and brown sugar.
Troubleshoot Grainy or Bland Butter

Rescue Under-Processed Raw Walnut Butter
If your raw walnut butter remains gritty after 15 minutes, your blender likely needs rest. Let it cool 5 minutes, then blend in 90-second bursts with scraping in between. The critical mistake? Stopping too soon out of impatience. Raw walnuts must hit the 18-minute mark for full oil release. If motor strain occurs, add 1 tablespoon walnut oil to lubricate the process.
Fix Bland Flavor With Salt and Toasting
Bland butter usually means under-toasted walnuts. Next batch, increase roasting time by 2 minutes. For immediate improvement, stir in ⅛ teaspoon sea salt—it amplifies existing nuttiness without making it salty. A dash of cinnamon (¼ tsp) also tricks your palate into perceiving deeper flavor. Never add salt during blending—it can create uneven pockets of saltiness.
Clean Your Blender After Sticky Residue
Remove Walnut Paste Before It Hardens
Walnut butter dries into concrete-like residue if left overnight. Rinse the blender jar immediately with warm water while residue is still warm. Fill halfway with hot soapy water, add one drop of dish soap, and pulse 10 seconds. Wipe stubborn spots with a sponge—never use abrasive pads that scratch blender surfaces. Pay special attention to the rubber seal where paste hides.
Prevent Future Motor Strain With Proper Maintenance
After processing nuts, run your blender with 2 cups warm water and 1 teaspoon vinegar for 30 seconds to clean internal components. Dry the base thoroughly before storage—moisture corrodes motor connections. For heavy users, replace rubber scraper blades annually; worn blades increase processing time by 25%.
Making walnut butter in a blender transforms $5 of walnuts into liquid gold—creamy, pourable, and packed with heart-healthy fats. Master these precise techniques to avoid motor burnout while achieving that elusive oil-like texture. Store your creation properly, and you’ll have a kitchen staple ready for smoothies, baking, or spreading on toast—knowing you saved 75% versus store-bought versions while controlling every ingredient. The first spoonful of your homemade batch, dripping steadily like premium olive oil, proves this simple process delivers extraordinary results.


