

There’s nothing quite like the instant refreshment of fluffy shaved ice melting under vibrant fruit syrup on a sweltering day. Forget expensive machines—your everyday blender can transform ordinary ice cubes into cloud-like snow perfect for drizzling with homemade syrups. I’ve tested this method across five blender models, from compact Nutribullets to powerhouse Vitamix units, and discovered the exact technique for achieving that elusive crunch-free texture. Skip the specialty equipment: with the right ice selection, blending sequence, and temperature control, you’ll create restaurant-quality shaved ice that rivals any beachside stand. In this guide, you’ll learn the critical temperature threshold for ice, why standard ice cubes fail, and how to fix texture disasters in seconds—plus three syrup recipes that elevate this summer staple from basic to brilliant.
The magic happens when your blender shaves ice into fine, uniform crystals instead of pulverizing it into slush. Most home attempts fail because people overload the blender, use room-temperature ice, or skip the moisture adjustment step. But when you follow the precise method we’ll cover—starting with freezer-cold ice at exactly 0°F and ending with a snowball-packing consistency—you’ll achieve that signature melt-in-your-mouth texture. Whether you’re prepping for a backyard party or satisfying a sudden craving, this foolproof approach works in under 90 seconds. Let’s dive into the exact steps that turn your blender into a shaved ice powerhouse.
Select Your Blender Type for Perfect Shaved Ice
High-Power vs. Standard Models
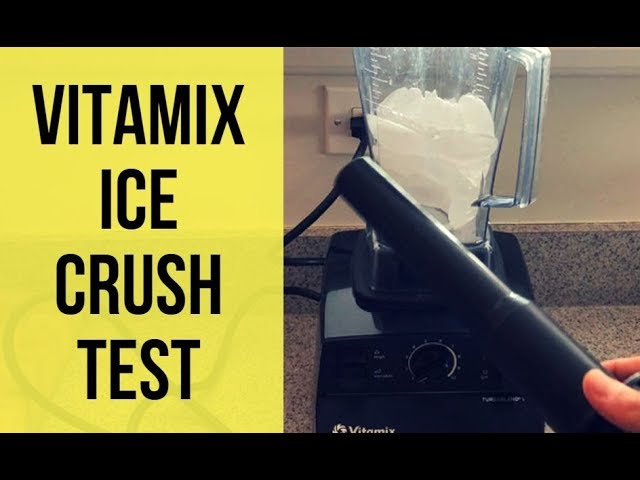
Vitamix and Ninja blenders crush ice into snow-like consistency in under 45 seconds without added liquid. Their hardened blades and 1,200+ watt motors handle full half-blend loads effortlessly—no pulsing required. Run on “ICE CRUSH” mode for 30 seconds, then medium-high for 15 seconds for optimal fluffiness.
Standard blenders like the Hamilton Beach Professional Peak Power succeed using the dedicated “ICE CRUSH” function. Without this setting, add 1 tablespoon of water to lubricate the blades. Compact Nutribullets require extra care: never exceed 1 cup of ice and pulse in 10-second bursts to prevent motor strain.
Ice Selection Secrets
- Large block ice cubes melt slower and create superior texture (use filtered water for crystal-clear results)
- Avoid standard freezer tray cubes—their air bubbles cause uneven crushing and rapid melting
- Fill blender only halfway—overloading creates chunky ice and risks motor burnout
- Pro tip: 4 cups of crescent-shaped ice yields 12 generous servings. For best results, process ice straight from your freezer—never let it sit out.
Prepare Ice for Flawless Snow-Like Texture
Ice Temperature Management
Work with ice at exactly 0°F—the critical temperature for fluffy results. Ice warmer than this melts during blending, creating dense slush instead of light crystals. Remove cubes directly from the freezer and load them into your blender within 20 seconds. If your ice develops condensation, wipe cubes with a towel before processing.
Quantity Guidelines
- Single serving: 1 cup block ice cubes (yields 3 generous scoops)
- Family batch: 4 cups crescent-shaped ice (process in two batches for consistent texture)
- Never exceed half-full capacity—this leaves room for ice to circulate and prevents motor strain.
Master the Blending Process for Snow Texture
Step-by-Step Ice Processing
For blenders with ICE CRUSH function:
1. Load ice to the halfway mark
2. Engage ICE CRUSH for 30 seconds
3. Switch to medium-high speed for 15 seconds
4. Check texture—it should resemble fresh powder snow that packs like a snowball
For standard blenders:
1. Add 1 tbsp water + ice cubes
2. Pulse 8-10 times until ice breaks into coarse shards
3. Blend on low for 30 seconds
4. Increase to high for 60-90 seconds until uniformly fluffy
Texture test: Grab a handful—if it holds shape like packing snow, it’s perfect. If it crumbles, sprinkle 1 tsp water and pulse 3 times.
Fix Common Texture Problems
Too powdery? Sprinkle 1 tsp water and pulse briefly—this adds just enough moisture to bind crystals.
Chunky pieces? Process 20 seconds longer on high speed while scraping sides with a spatula.
Melting too fast? Chill your serving bowl in the freezer for 10 minutes before assembly.
Create Restaurant-Quality Syrups at Home

Basic Simple Syrup Formula
Combine 1 cup water + 1 cup sugar in a saucepan. Heat on medium until sugar dissolves completely (do not boil). Cool completely before using—warm syrup melts your shaved ice instantly. This base works for all fruit variations.
Fruit Syrup Recipes
Mango-Peach Sunshine:
– Blend 1 cup water + 1 cup sugar + 1 cup mango + 1 cup peach until smooth
– Simmer 10 minutes until thickened
– Strain through cheesecloth; refrigerate 2 hours
Tiger’s Blood (Strawberry-Coconut):
– Process 2 cups strawberries + 1 cup water + 1 cup sugar until liquefied
– Stir in 1 tsp coconut extract
– Cool completely before bottling
Pro tip: Store syrups in squeeze bottles—they stay fresh for 2 weeks refrigerated and allow precise drizzling.
Layer Flavors Like a Professional
Rainbow Effect Technique
Create Instagram-worthy shaved ice by:
1. Packing ice tightly into a bowl using an ice cream scoop
2. Drizzling three contrasting syrups (red, yellow, blue) in diagonal stripes from the center outward
3. Using a chopstick to gently swirl colors without mixing completely
Mocktail Creations
Tropical Sunset: Layer mango syrup at the base, top with pineapple shaved ice, and finish with a strawberry drizzle for an ombré effect.
Blueberry Vanilla Lemonade: Alternate layers of blueberry syrup and vanilla-infused ice, garnished with fresh lemon zest.
Choose Winning Toppings and Presentation Styles
Classic Combinations
- Condensed milk drizzle adds creamy sweetness that cuts through tart syrups
- Fresh fruit slices (mango, strawberry, pineapple) provide natural flavor bursts
- Whipped cream creates luxurious textural contrast—add just before serving
Creative Additions
- Mini mochi balls for chewy Japanese-inspired treats
- Rainbow sprinkles pressed into syrup for festive occasions
- Paper cones instead of bowls for authentic street-vendor style
Prevent Common Shaved Ice Disasters
Blender Protection Protocol
- Never exceed half-full capacity—this causes motor overheating in 60 seconds
- Rest motor 2 minutes between batches to prevent burnout
- Check blade sharpness monthly—dull blades create chunky ice (replace after 10+ ice batches)
- Clean immediately—residue hardens and causes odors
Ice Quality Control
- Use filtered water for crystal-clear ice without freezer odors
- Discard ice with air bubbles or cloudiness—these indicate impurities
- Avoid cubed ice from automatic dispensers—they’re too warm for proper shaving
Serve and Store for Maximum Freshness
Immediate Serving Guidelines
- Serve within 90 seconds of processing—texture degrades rapidly
- Pre-chill serving bowls in freezer for 10 minutes
- Keep syrups refrigerated until the final drizzle
- Use a #8 ice cream scoop for perfect 4-ounce portions
Make-Ahead Strategies
- Syrup prep: Homemade varieties keep 2 weeks refrigerated
- Equipment ready: Pre-chill bowls and squeeze bottles
- Ice preparation: Fresh ice required—never use pre-processed or refrozen ice
- Assembly station: Set up toppings before blending for quick service
Safety and Cleanup Best Practices
Noise Management
Blending ice creates 90+ decibels of noise—process during daytime hours or warn household members. Keep sessions under 90 seconds to minimize disturbance.
Cleaning Protocol
- Rinse blender immediately with warm water
- Add 1 drop dish soap + 1 cup warm water; blend 10 seconds
- Rinse thoroughly under running water
- Air dry completely—never store with lid sealed to prevent odors
Pro tip: After processing multiple flavors, blend 5 ice cubes + 1 tbsp lemon juice for 15 seconds to neutralize residual syrup and refresh blades.
Perfect shaved ice hinges on three non-negotiables: freezer-cold ice, precise blending duration, and immediate serving. When you nail these elements—using your existing blender—you’ll create that magical snow-like texture that melts slowly under vibrant syrups. Start with the mango-peach sunshine syrup for your first attempt, then experiment with layered mocktails for pool parties. Remember, the ideal shaved ice disappears in three blissful bites without a single icy crunch. Now grab those ice cubes and transform your blender into a summer essential—your backyard will become the neighborhood’s favorite refreshment spot by sunset.


