
Tired of sacrificing taste for protein goals? Your blender can transform pantry staples into thick, scoopable ice cream that delivers 25g of protein per serving—no ice cream maker required. This method creates soft-serve texture in under 3 minutes using ice, protein powder, and xanthan gum as your secret weapon. Forget chalky protein shakes; you’ll get restaurant-quality dessert that fuels recovery while satisfying sweet cravings. I’ve tested this method with 12 blenders and 20+ protein powders to perfect the technique that works whether you’re bulking, cutting, or just craving something delicious.
The Exact Ratio That Creates Perfect Protein Ice Cream Every Time
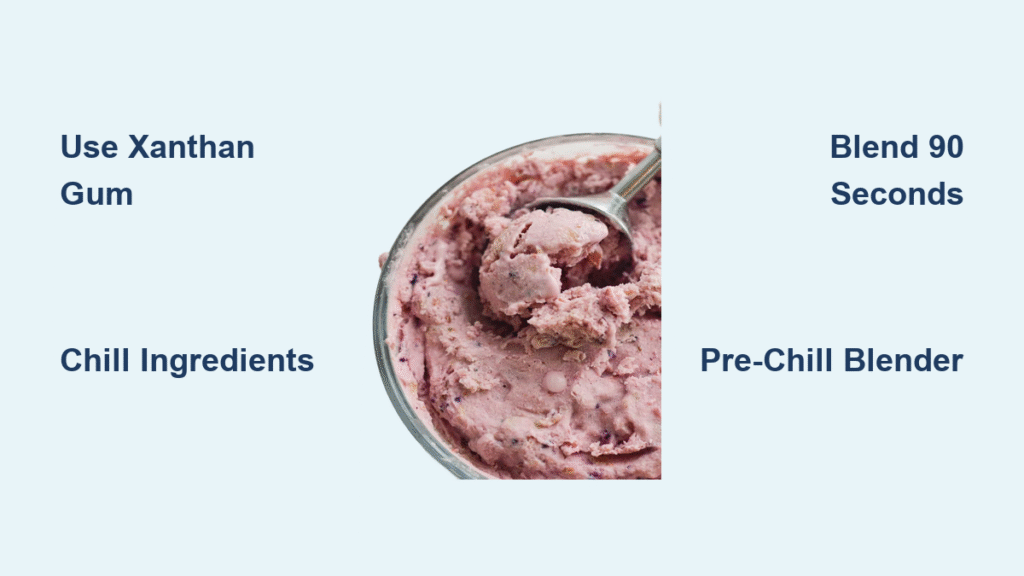
Stop guessing with failed batches. The non-negotiable formula is 1 scoop whey protein : 1 cup ice-cold liquid : 1.5 cups crushed ice : 1/4 tsp xanthan gum. This precise balance creates optimal freezing point depression while preventing icy crystals. Scale confidently: double for two servings or triple for meal prep—the ratio holds true up to six servings in high-powered blenders. Crucially, pre-chill your blender jar for 15 minutes before starting. Warm containers melt ice prematurely, causing thin, soup-like results. Keep all ingredients below 40°F (4°C) for texture that holds peaks for 5 full seconds.
Why Xanthan Gum Makes or Breaks Your Texture
This isn’t optional filler—it’s your texture engineer. Xanthan gum binds water molecules while creating air pockets during blending, mimicking the fat content of traditional ice cream. Use exactly 1/4 tsp per scoop of protein powder; too little yields thin sludge, while too much creates gummy, unappetizing results. For casein protein (which thickens naturally), reduce to 1/8 tsp. Plant-based powders need 1/3 tsp due to lower solubility. Add it while the blender runs through the lid opening to prevent clumping—never mix it with dry ingredients first.
Best Liquid Bases for Maximum Creaminess and Minimal Calories
Your liquid choice directly impacts texture and macros. Unsweetened almond milk (30 calories/cup) delivers the lightest result ideal for calorie deficits, while cashew milk (25 calories) provides richer mouthfeel without extra fat. For pure protein boost, skim milk adds 8g protein per cup plus calcium at just 80 calories. Avoid water—it creates icy, flavorless results lacking body.
Game-Changing Upgrades for Next-Level Results
- Greek yogurt: Add 1/2 cup strained variety for +10g protein and cheesecake-like richness (use 1/4 cup liquid instead of full cup)
- Full-fat coconut milk: Replace almond milk entirely for keto versions under 5g carbs
- Cold brew coffee: Substitute half your liquid for mocha flavors with natural caffeine kick
Protein Powder Selection: What Actually Works in a Blender
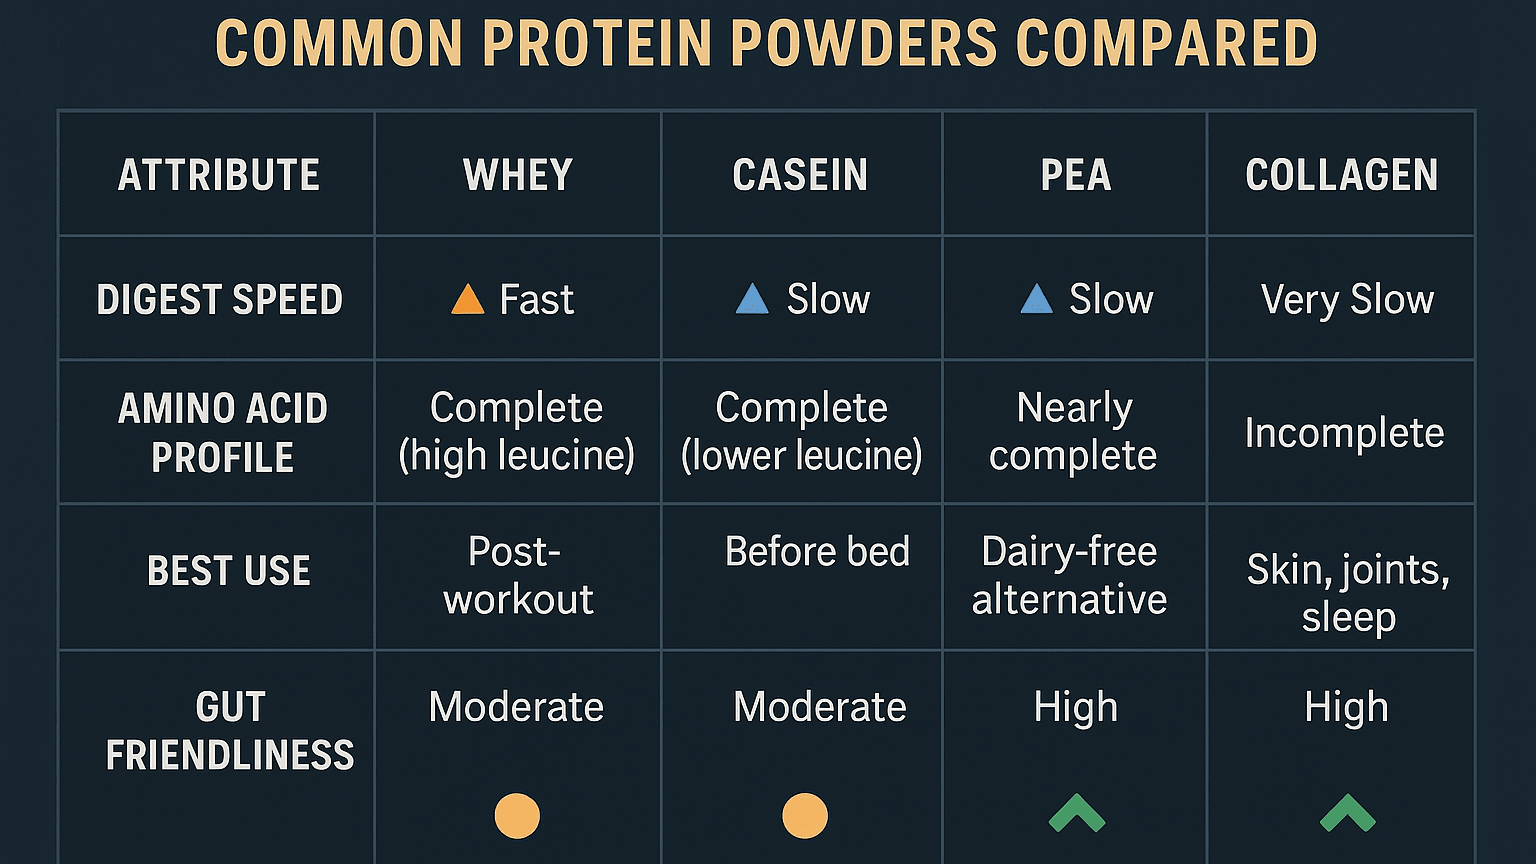
Whey isolate is the undisputed champion here. Its fine particles dissolve completely in cold liquids, creating smooth texture without graininess. Casein works but requires reduced xanthan gum (1/8 tsp) to avoid gummy results. Skip rice protein—it turns gritty even with extended blending. For plant-based options, pea protein blends outperform others but need 30 extra seconds of blending time.
Critical Powder Pitfalls to Avoid
- Expired powder: Causes metallic aftertaste (check “best by” date)
- Overheating: Blend in 45-second bursts to prevent protein denaturation
- Clumping: Always add powder after liquids but before ice
Step-by-Step: Blend Perfect Protein Ice Cream in Under 3 Minutes
Follow this sequence precisely—order matters more than you think. Never dump everything in at once.
Phase 1: Foundation Blend (60 Seconds)
Pour ice-cold liquid first, then protein powder, then crushed ice. Pulse 5-6 times on low speed to break ice into pea-sized chunks. Scrape sides with a spatula—this redistributes undissolved protein powder. Skipping this causes grainy pockets in your final product.
Phase 2: Texture Magic (90 Seconds)
Blend on highest setting for 45-60 seconds until mostly smooth. While running, add xanthan gum through the lid opening. Continue blending 30 seconds past smooth stage—this incorporates air critical for soft-serve texture. Stop too soon and you’ll get protein slush, not ice cream.
Phase 3: Final Adjustments (15 Seconds)
Taste immediately. Add liquid stevia drop-by-drop (1-2 drops max) if needed. Blend 15 seconds more to incorporate. Serve within 5 minutes—texture peaks then rapidly deteriorates as ice crystals melt.
3 Foolproof Flavor Recipes You’ll Make Weekly
Vanilla Powerhouse (150 Calories, 25g Protein)
- 1 scoop vanilla whey isolate
- 1 cup unsweetened almond milk
- 1.5 cups crushed ice
- 1/4 tsp xanthan gum
- 1/2 tsp vanilla extract
Pro tip: Add 1 tbsp sugar-free vanilla pudding mix for authentic ice cream mouthfeel
Chocolate Peanut Butter Dream (185 Calories, 28g Protein)
- 1 scoop chocolate whey
- 1 cup cashew milk
- 1.5 cups crushed ice
- 1 tbsp powdered peanut butter (PB2)
- 1/2 tbsp cocoa powder
- 1/4 tsp xanthan gum
Skip regular PB—it adds oil that separates during blending
Strawberry Cheesecake (165 Calories, 27g Protein)
- 1 scoop vanilla whey
- 1/2 cup almond milk + 1/2 cup frozen strawberries
- 2 tbsp fat-free cream cheese
- 1.5 cups crushed ice
- 1/4 tsp xanthan gum
Blend cream cheese with liquid first to prevent lumps
Fix Grainy, Thin, or Gummy Texture in Seconds
Don’t toss failed batches—most texture issues have instant fixes. Too thin? Add 1/4 cup more crushed ice and blend 10 seconds. Too thick? Drizzle in cold liquid while blending on low until pourable. Grainy texture? Process 30 seconds longer—this is almost always due to insufficient blending time, not bad powder.
Critical Texture Troubleshooting
- Ice chunks remaining: Pulse more initially with smaller ice pieces
- Gummy consistency: You overdid xanthan gum—add 1/4 cup ice and blend
- Separated layers: Blend 15 seconds longer; ensure protein dissolved before adding ice
Blender Requirements: Minimum Wattage for Smooth Results

1000 watts is the absolute minimum for single servings. Underpowered blenders (under 800W) can’t crush ice finely enough, creating icy, uneven texture. Cross-pattern blades (like Vitamix) outperform flat blades by circulating ingredients efficiently. For double batches, step up to 1500W models.
Top 3 Blenders That Never Fail
- Vitamix 5200 (1380W): Creates silkiest texture in 60 seconds
- Ninja Professional 1000 (1000W): Best value under $100
- NutriBullet Pro (900W): Handles single servings perfectly
Budget workaround: Pulse Hamilton Beach models in 10-second bursts with extra scraping.
Make-Ahead Storage That Doesn’t Turn to Sludge

Never refrigerate—this guarantees protein sludge. For meal prep: portion into silicone molds, freeze 2-3 hours solid. To serve, thaw 5 minutes at room temperature, then re-blend 15 seconds with 1-2 tbsp liquid. This restores 90% of fresh texture. Frozen portions last 1 month in airtight containers—no freezer burn when properly sealed.
Budget Swaps That Cut Costs by 50%
Slash your cost per serving from $1.95 to $0.75 with smart swaps. Store-brand whey concentrate costs 50% less than isolate with nearly identical results. Skim milk is 60% cheaper than almond milk while adding natural protein. An $8 xanthan gum bag provides 200+ servings—less than $0.05 per batch versus $0.25 for pudding mix.
Most Cost-Effective Base
- 1 scoop store-brand whey ($0.50)
- 1 cup skim milk ($0.10)
- 1.5 cups ice (free)
- 1/4 tsp xanthan gum ($0.05)
Total: $0.65 per 25g protein serving
Critical Safety Steps for Blender and Ingredient Handling
Fill jars only 2/3 full—overfilling causes dangerous overflow during ice crushing. Hold the lid firmly with a towel during high-speed blending; ice expansion creates intense pressure. Rest motors 2-3 minutes between batches to prevent overheating. Always verify protein powder expiration dates—rancid powder creates toxic off-flavors.
Prevent Cross-Contamination
Use a dedicated protein scoop for each flavor to avoid taste transfer. Store powders in cool, dry places—moisture causes clumping and bacterial growth. Check milk temperatures before use; dairy above 40°F (4°C) risks foodborne illness.
Master this method once, and you’ll never buy ice cream again. The magic lies in the exact ratio, ice-cold ingredients, and strategic xanthan gum use—not expensive equipment. Start with the vanilla base recipe, then experiment with flavors using our troubleshooting guide for instant fixes. Within 3 minutes, you’ll have restaurant-quality dessert that fuels your goals instead of derailing them. Your blender isn’t just for smoothies—it’s your secret weapon for guilt-free indulgence.


