
Picture this: You’re sweating through a 95°F afternoon, desperately craving that iconic pineapple swirl from Disney’s Aloha Isle—but the nearest theme park is 500 miles away. Good news: You can recreate that legendary tropical treat in your own kitchen using just a blender and five pantry staples. This guide reveals exactly how to make Dole Whip in a blender with Disney-level authenticity, from achieving the perfect creamy texture to piping those signature swirls. No specialty machines required—just your everyday blender and frozen pineapple.
Forget expensive theme park trips or store-bought versions that never quite match the magic. Within 20 minutes, you’ll transform simple ingredients into that nostalgic, tangy-sweet soft-serve that made Dole Whip a cult phenomenon since its 1986 Disneyland debut. You’ll master the dairy-free vegan formula Disney now uses, troubleshoot texture issues, and even unlock pro techniques for Instagram-worthy presentation. Let’s turn your blender into a Disney dessert powerhouse.
Blender Power Requirements for Perfect Texture
High-Powered Blender Must-Haves
Your blender’s horsepower directly determines whether you get smooth Disney magic or fibrous chunks. Vitamix, Ninja, or Blendtec models pulverize frozen pineapple effortlessly, mimicking the soft-serve machines used at EPCOT’s refreshment outpost. These handle -18°C (0°F) frozen chunks without straining motors—a non-negotiable for authentic texture. If your blender stalls mid-blend, immediately pause to prevent burnout; overworked motors heat ingredients, causing icy separation.
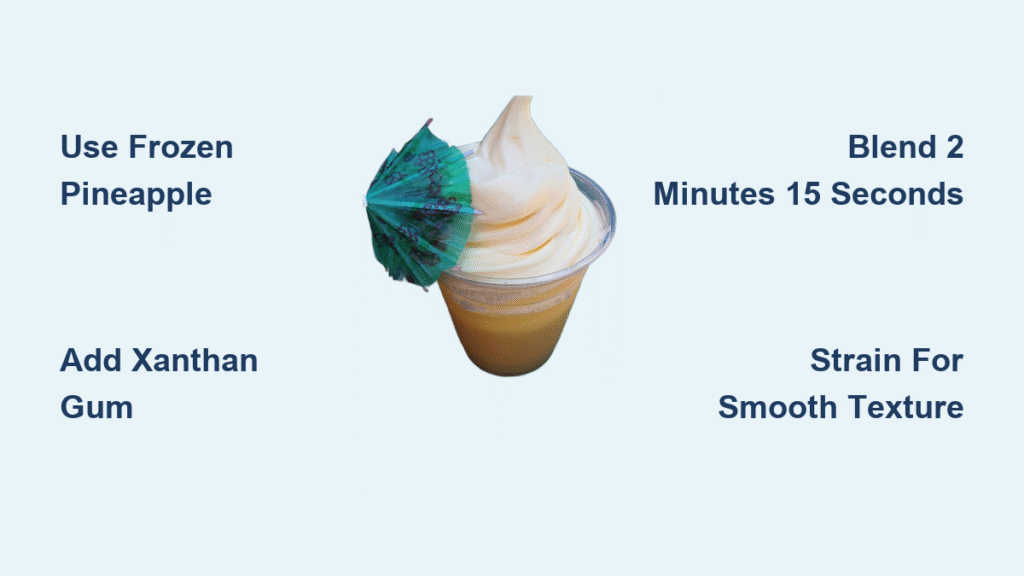
Standard Blender Hack: Let frozen pineapple sit unopened at room temperature for exactly 10 minutes before blending. This slight thaw (without melting ice crystals) reduces strain while maintaining firmness. Always use your tamper tool aggressively—pressing ingredients downward every 15 seconds prevents air pockets that create grainy results. Never skip this step: uneven pressure causes inconsistent texture.
Food Processor Alternative Tactics
No high-powered blender? A 7-cup food processor delivers surprisingly close results. Pulse frozen pineapple in 30-second bursts (scraping sides twice) before adding liquids. The wider blade base prevents overheating but requires manual intervention—stop every 20 seconds to redistribute ingredients. Expect slightly more fibrous texture than blender versions, but straining through a fine-mesh sieve post-blending eliminates any stringiness. Processors work best for single servings; larger batches overwhelm smaller bowls.
Exact Ingredients for Disney-Style Authenticity
Traditional Pineapple Formula (Dairy Version)
- 16 oz frozen pineapple chunks (keep frozen until use—fresh pineapple adds excess water causing iciness)
- 1 cup pineapple juice (canned ensures consistent sweetness; avoid “no sugar added” versions)
- 1 cup vanilla ice cream (heaping scoop for creamy richness; measure after scooping)
- 1½ tsp fresh lime juice (bottled works in a pinch but lacks brightness)
- ½ tsp xanthan gum (secret weapon preventing ice crystals—skip only if unavailable)
Critical Timing Tip: Add xanthan gum before frozen fruit. This hydrocolloid binds moisture instantly, avoiding clumps that create gritty patches. Without it, texture degrades after 24 hours in the freezer.
Vegan Dairy-Free Disney Copycat
Ditch dairy without sacrificing authenticity. Blend 2 cups frozen pineapple with ¼ cup full-fat coconut milk (shake can first for creaminess), 2 tbsp pure maple syrup, 2½ tsp lemon juice, and 1/16 tsp salt. The salt amplifies pineapple flavor while coconut milk mimics Disney’s current non-dairy creamer base. For sugar-free versions, replace syrup with 15 drops liquid stevia—but expect slightly less body.
Texture Warning: Vegan versions freeze harder than dairy versions. Always thaw 8 minutes before serving (vs. 5 for traditional) to regain soft-serve consistency.
Step-by-Step Blender Technique
Strategic Ingredient Layering Sequence
Order matters more than you think. Load ingredients in this sequence:
1. Pineapple juice + citrus juice (creates liquid base for smooth blending)
2. Xanthan gum (sprinkle evenly over liquid to prevent clumping)
3. Ice cream or coconut milk (soft components coat blades before frozen items)
4. Frozen pineapple chunks (placed on top to prevent jamming)
Blending out-of-order causes immediate stalling. Standard blenders must follow this sequence—deviating risks motor burnout within 30 seconds.
Precision Blending for Creamy Results
Start on low speed for 15 seconds to incorporate ingredients, then ramp to max speed immediately. Blend continuously for 2 minutes 15 seconds—no more, no less. Over-blending melts frozen fruit, creating soup-like consistency. Under-blending leaves fibrous chunks. Use your tamper constantly: Apply downward pressure at a 45-degree angle, circling the blade assembly.
Visual Texture Check: Perfect mixture coats the back of a spoon thickly but drips slowly. Too thick? Add juice 1 tbsp at a time. Too thin? Freeze additional pineapple chunks for 1 hour, then blend in. Never add ice—it dilutes flavor and creates icy shards.
Pipe-Perfect Swirl Presentation
Freeze Timing for Ideal Piping Consistency
Transfer blended mixture to an airtight container—glass works best for rapid chilling. Freeze exactly 35 minutes for soft-serve texture (ideal for immediate piping). Freeze 60 minutes for firmer ice cream consistency that holds intricate swirls. Under-freezing causes collapse; over-freezing makes piping impossible.
Pro Container Tip: Line the container with parchment paper. This prevents freezer burn on exposed surfaces and lets you lift the entire block for easy scooping.
Disney-Style Swirl Execution
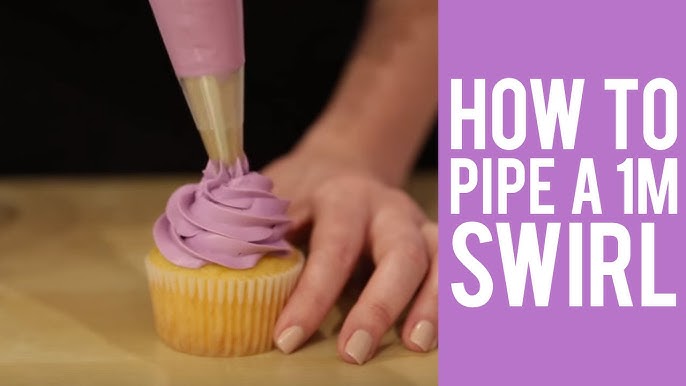
Fit a piping bag with a 1M open star tip (the large fluted nozzle used at Aloha Isle). Scoop chilled mixture into the bag, twist tightly, and wrap the bag base in a damp towel to prevent hand-freezing. Hold the bag perpendicular to your bowl, starting at the center point. Pipe upward in a continuous spiral motion while slowly lifting the bag—this creates the iconic ridged peaks.
Shape Preservation Trick: After piping, freeze servings exactly 20 minutes before serving. This sets the swirl permanently without hardening the interior. Serve immediately after this final freeze for maximum visual impact.
Texture Troubleshooting Secrets

Why Homemade Differs from Theme Park Versions
Disney’s soft-serve machines inject air during freezing, creating a lighter texture. Your blender version will be denser and richer—a trade-off for intense pineapple flavor. Adding xanthan gum bridges this gap by mimicking commercial stabilizers, yielding 90% of Disney’s airiness. Without it, expect a denser, sorbet-like result.
Eliminate Fibrous Bits Permanently
Even high-powered blenders leave faint pineapple fibers. For truly smooth texture: Strain mixture through a fine-mesh sieve immediately after blending. Press with a spatula to extract all liquid—discard fibrous solids. This extra 60 seconds eliminates any grittiness, especially crucial for standard blenders. Never skip straining if using food processors.
Flavor Variations That Actually Work
Mango Tropical Dole Whip
Replace pineapple with 2 cups frozen mango chunks and juice with 1 cup mango nectar. Add 1 tbsp toasted coconut flakes post-blending for authentic Polynesian flair. This version requires only 25 minutes freezing time—mango’s lower fiber content sets faster.
Strawberry Dole Whip Float
Blend 2 cups frozen strawberries with 1 cup strawberry juice and 1 cup vanilla ice cream. For the float: Pour ½ cup pineapple juice into a glass, top with piped whip, and add a maraschino cherry. The juice’s acidity balances strawberry’s sweetness perfectly.
Storage & Serving Mastery
Long-Term Freezer Storage
Store leftovers in airtight containers with parchment pressed directly against the surface. This prevents crystallization and extends freshness to 3 months (vs. 2 weeks without parchment). Always thaw 5-10 minutes at room temperature—microwaving destroys texture.
Revival Technique: If texture becomes icy after storage, pulse in blender for 10 seconds with 1 tsp pineapple juice. Never re-blend fully—this incorporates excess air and creates foam.
Instagram-Worthy Presentation
- Pineapple Boat: Hollow a fresh pineapple, fill with Dole Whip, and garnish with mint
- Tropical Sundae: Layer whip with toasted coconut, fresh pineapple chunks, and a drizzle of coconut cream
- Adult Version: Swirl in 1 oz dark rum pre-freezing for a “Zombie Whip” cocktail float
Critical Mistakes That Ruin Texture
Skipping the 10-Minute Thaw for Standard Blenders: Blending rock-solid pineapple without slight thawing overheats motors and creates uneven texture. Always time this step.
Using Fresh Pineapple: Its 86% water content forms large ice crystals when frozen post-blending. Frozen chunks are essential—their smaller ice crystals create creaminess.
Over-Processing: Blending beyond 2:30 creates friction heat that melts ingredients. Set a timer—your blender’s sound changes from “whirr” to “slosh” when done.
Final Pro Tips for Theme Park Magic
Master these three details to elevate your how to make Dole Whip in a blender results: First, freeze your piping bag tip for 2 minutes before filling—this prevents premature melting during piping. Second, use canned pineapple juice from Hawaii (marked “Dole” on the label) for identical Disney flavor chemistry. Third, always pipe onto chilled plates—room-temperature surfaces melt the base instantly.
The real magic? You control the recipe. Add extra lime for tang, boost sweetness for kids, or go fully vegan without sacrificing authenticity. Unlike Disney’s $7 cups, your homemade version serves four for under $5. So next time heatwave cravings hit, skip the theme park lines and reach for your blender—your personal gateway to pineapple paradise is just 20 minutes away.


