

Ever stared at artisanal butter prices and wondered how to make butter in a ninja blender for a fraction of the cost? Your countertop powerhouse can transform ordinary heavy cream into velvety, restaurant-quality butter in under two minutes—no churner required. Skip the preservatives and hidden additives of store brands while unlocking total flavor control. Whether you need garlic-herb spread for crusty bread or honey-cinnamon butter for weekend pancakes, your Ninja blender becomes a dairy alchemist’s dream.
This method delivers two premium products from one ingredient: rich butter plus fresh buttermilk for baking. Forget complicated techniques—just pour, blend, and customize. You’ll learn exactly why room-temperature cream matters, how to spot the critical separation moment, and why washing butter extends its life from days to weeks. No culinary degree needed, just a Ninja blender and five minutes of your time.
Select Cream That Works for Ninja Blender Butter
Fat percentage determines success. Grab heavy cream labeled 35% fat minimum—standard whipping cream or heavy cream fits perfectly. European-style cream (82-86% fat) yields richer, silkier butter than American-style (80% fat), but both work. Avoid light cream or half-and-half; they lack sufficient fat for separation.
Temperature control prevents churning disasters. Let cream sit at room temperature for 30 minutes before starting. Cold cream forces your Ninja blender to work harder, extending processing time up to 10 minutes and risking motor strain. Room-temperature cream separates faster and more cleanly.
Critical equipment checklist:
– Ninja blender (any high-powered model—BL660, Auto-iQ, or Foodi work best)
– 1 pint heavy cream (minimum ½ cup, but never fill blender past halfway mark)
– Fine-mesh strainer or cheesecloth for buttermilk separation
– Glass bowl to catch liquid gold
– Airtight storage containers (mason jars or parchment paper)
Pro warning: Overfilling causes splatters and overheating. Stop blending immediately if you smell burning—let the motor rest 30 seconds before resuming.
Churn Cream into Butter in Under 2 Minutes
Start blending at medium-high speed immediately. Watch for these three visual phases that signal progress:
Phase 1: Whipped Cream Stage (30 seconds)
Cream doubles in volume, turning light and fluffy. This confirms proper agitation—don’t stop yet.
Phase 2: Grainy Texture Warning (45 seconds)
The mixture suddenly deflates and turns coarse, like wet sand. Keep blending—this means separation is imminent.
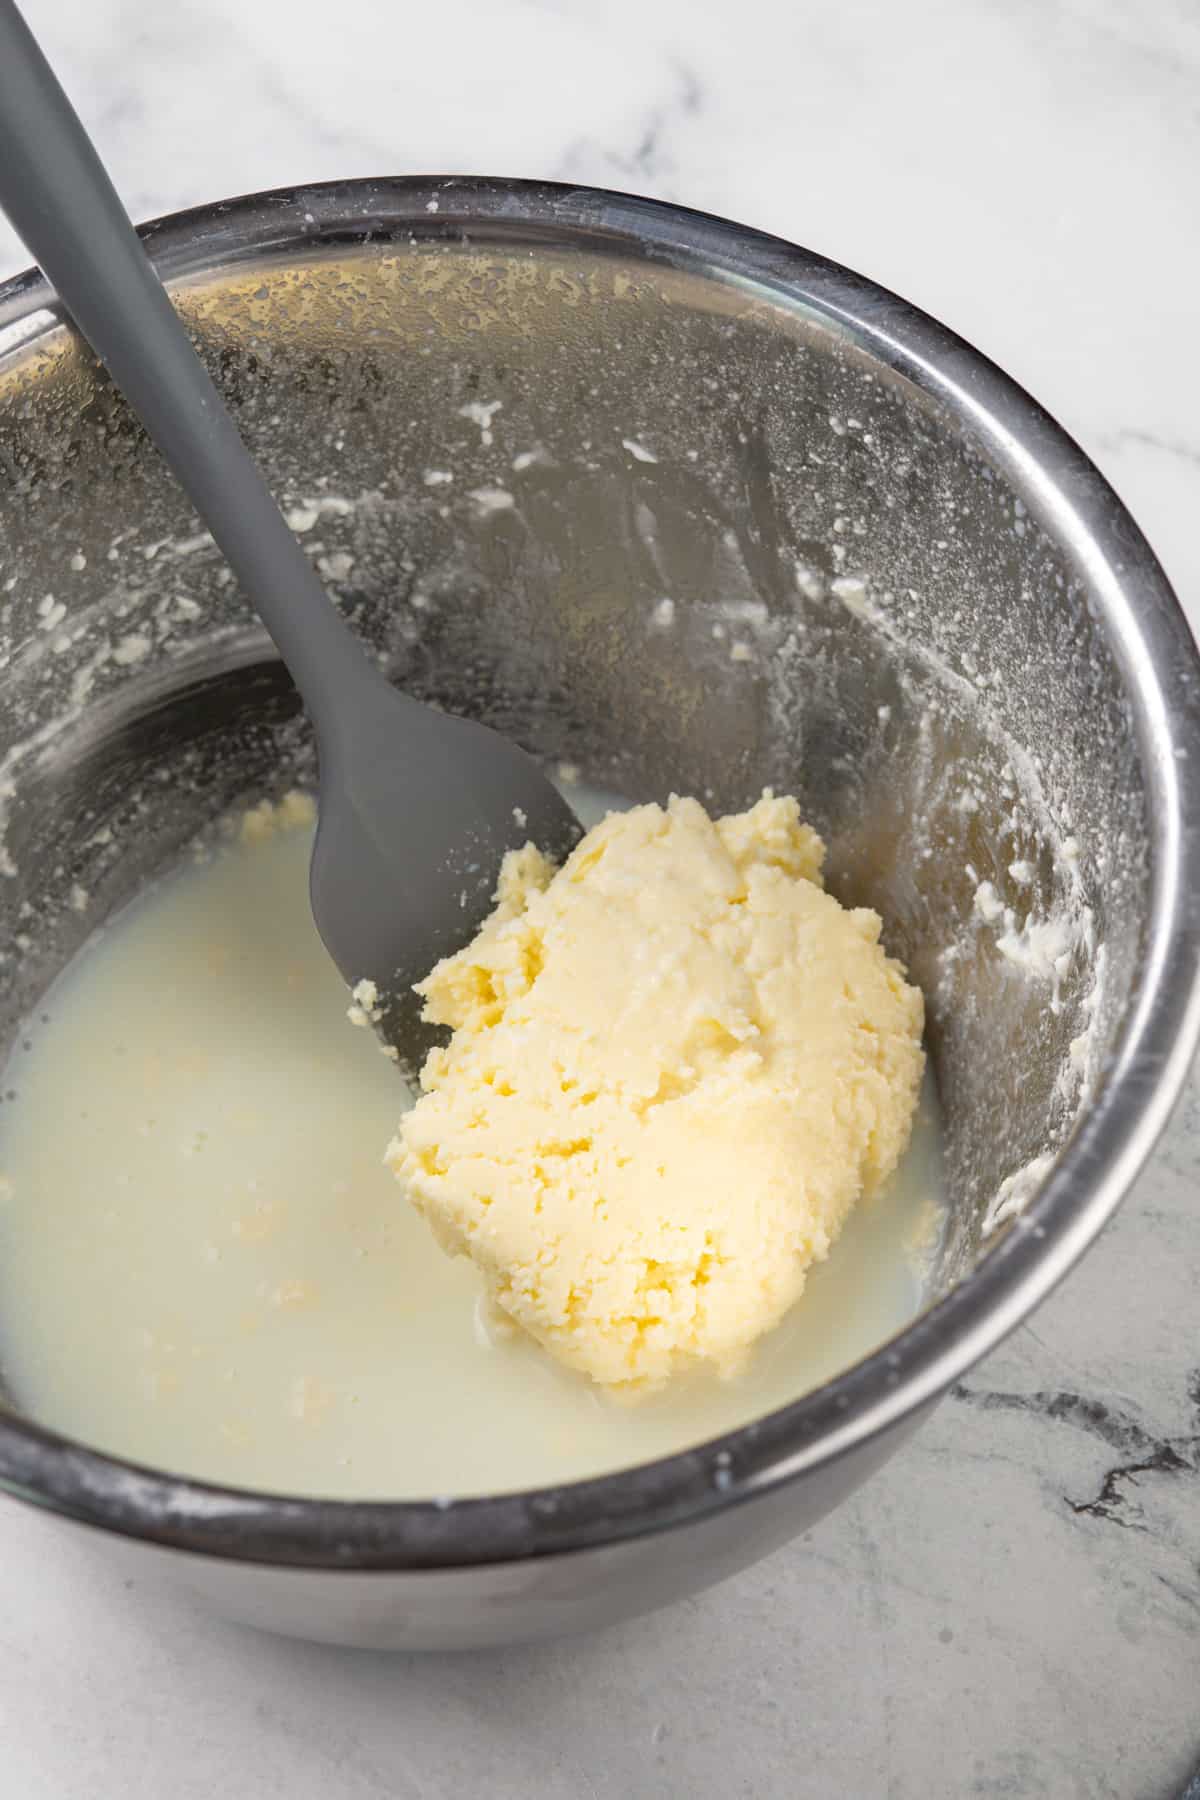
Phase 3: Butter Separation Success (45 seconds)
Yellow butter crumbs clump together, floating in pale liquid buttermilk. Stop blending the moment you see distinct solid chunks. Over-churning creates greasy, broken butter.
Timing varies by blender age. New Ninja models finish in 2 minutes; older units may take 8-10 minutes. If cream stalls at the whipped stage:
– Pause blending and scrape down sides to break air pockets
– Add 1 tablespoon room-temperature cream to restart separation
– Pulse instead of continuous blending for better control
Separate Butter from Buttermilk and Wash Correctly
Pour off buttermilk immediately. This liquid isn’t waste—it’s fresh, tangy buttermilk perfect for pancakes or marinating chicken. Strain through cheesecloth to catch stray butter bits.
Washing removes spoilage-causing buttermilk. Add cool water to cover butter in the blender, pulse 2-3 times, then drain cloudy water. Repeat until rinse water runs clear (usually 2-3 cycles). Skipping this step cuts shelf life to days instead of weeks.
Squeeze out hidden moisture. Press butter against the blender walls with a spatula after final washes. Residual liquid pockets cause sour flavors and mold. Properly washed butter feels dense and cool to the touch—not greasy.
Add Custom Flavors to Your Ninja Blender Butter

Salt preserves and enhances. Mix ¼ teaspoon kosher salt per pint of cream after washing. Salted butter lasts 12 months frozen versus 6 months for unsalted.
Flavor infusion ideas (add after washing):
– Garlic-Herb Butter: 2 minced roasted garlic cloves + 1 tbsp each rosemary and thyme
– Maple-Cinnamon Butter: 2 tbsp pure maple syrup + 1 tsp cinnamon
– Lemon-Dill Butter: Zest of 1 lemon + 1 tbsp fresh dill
– Everything Bagel Butter: 1 tbsp everything bagel seasoning
Pulse gently to blend. Overmixing heats the butter, creating grainy texture. Fold in delicate ingredients like fresh herbs by hand after transferring to a bowl.
Store Homemade Butter for Maximum Freshness
Room temperature storage requires strategy. Use a butter keeper (bermudine) for soft, spreadable butter up to 1 week. Never leave butter uncovered at room temperature more than 2 hours per FDA guidelines.
Refrigeration rules:
– Store in airtight container for 2-3 weeks
– Place butter upside-down in water to create an airtight seal
– Discard immediately if mold appears or smells sour
Freeze for long-term use:
1. Wrap butter tightly in parchment paper
2. Seal in aluminum foil or heavy-duty freezer bag
3. Label with date and flavor (e.g., “Garlic Butter – Oct 2024”)
Salted butter freezes 12 months; cultured butter (fermented version) lasts 3 months refrigerated due to natural preservatives.
Fix Common Ninja Blender Butter Failures

Cream won’t separate past whipped stage?
– Cause: Cold cream or air pockets disrupting agitation
– Fix: Let cream warm 5 minutes, then pulse 10-second intervals
– Emergency hack: Add 1 tsp room-temperature water to restart separation
Butter turns grainy or greasy?
– Cause: Over-churning or inadequate washing
– Fix: Rewash butter with ice water and press firmly to remove liquid
Motor overheats during churning?
– Prevention: Never fill blender past ½ capacity
– Solution: Pause 30 seconds every minute for older models
Make Cultured Butter Using Your Ninja Blender
Fermentation adds complex, cheese-like depth. Mix 2 tablespoons plain yogurt with live cultures into cream. Cover and let sit 8-10 hours at room temperature until thickened and tangy. Proceed with standard churning.
Cultured butter benefits:
– Longer refrigerator life (up to 3 weeks)
– Richer flavor profile for gourmet dishes
– Natural preservation from beneficial bacteria
Pro tip: Use cultured butter for compound variations—it holds flavors better than sweet cream butter.
Critical Safety Steps for Ninja Blender Butter
Non-negotiable safety rules:
– Use pasteurized cream only (raw cream requires special handling)
– Wash hands and equipment thoroughly before starting
– Supervise children closely—blades remain sharp even when unplugged
Quality check before use:
– Butter should be pale yellow with neutral, fresh aroma
– Buttermilk should smell pleasantly tangy (not sour or rancid)
– Discard if texture becomes slimy or develops off-odors
Your Ninja blender just became a butter-making powerhouse. From basic sweet cream to truffle-infused gourmet spreads, you control every ingredient and flavor note. Start with salted butter this weekend, then experiment with cultured techniques for dinner party showstoppers. Remember: perfect butter hinges on thorough washing and precise separation timing.
Ready for your next challenge? Try freezing fresh herb butter in ice cube trays for instant flavor boosts in soups and sauces. Your homemade butter will transform everything from toast to Thanksgiving turkey—proving premium ingredients don’t require premium prices.


