

Picture this: you’re craving that perfect Italian grinder—the kind with crisp, chewy bread, layers of savory meats, tangy vegetables, and just the right amount of oil and vinegar dressing trickling through each bite. Instead of settling for a lackluster deli version or expensive takeout, you could be crafting an authentic Italian grinder at home that rivals even the best Northeastern delis. Learning how to make an Italian grinder properly transforms a simple sandwich into a culinary experience rooted in Italian-American tradition. This guide reveals the exact techniques and ingredient combinations that deliver exceptional results every time, ensuring your homemade grinder will satisfy cravings and impress guests alike.
Choose the Right Bread for Your Italian Grinder
The foundation of an exceptional grinder starts with bread that maintains structural integrity while providing contrasting textures. Skip the soft supermarket rolls that collapse under pressure and opt for authentic Italian submarine rolls with a crisp, crackly crust that yields slightly when pressed. These rolls should spring back immediately when gently squeezed in the center, indicating proper fermentation and freshness.
Look for these specific bread qualities:
– Golden-brown crust with subtle saltiness
– Interior with moderately chewy texture
– Slight sweetness that complements savory fillings
– Structural integrity to hold generous fillings
While Italian submarine rolls remain traditional, quality baguettes offer a nuttier alternative with pronounced crust, and ciabatta provides an olive oil-enriched crumb. Before purchasing, press the center to test spring-back, listen for a slight crust squeak, and examine the ends for an open, irregular crumb structure. For optimal results, buy bread fresh and use within several hours—never refrigerate, as this accelerates staling.
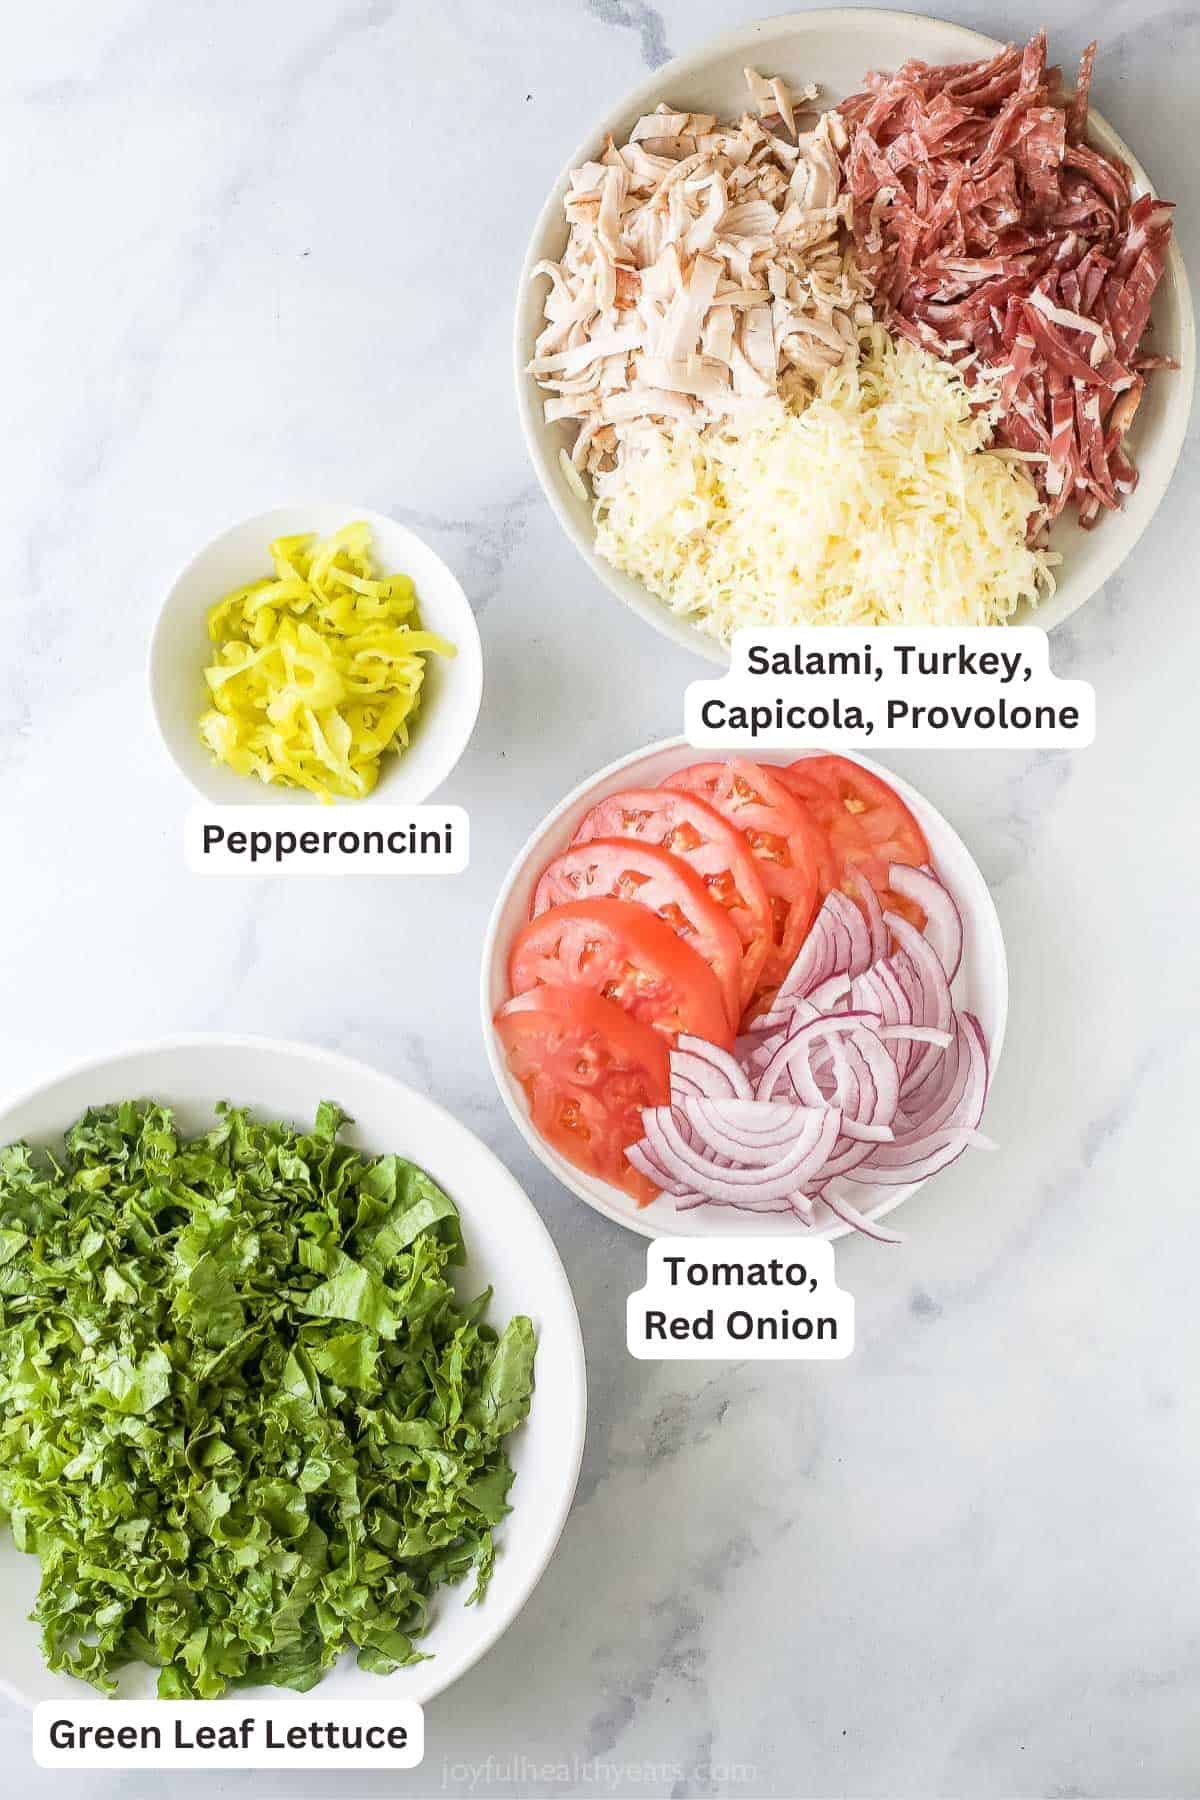
Select Authentic Italian Meats for Your Homemade Grinder

The heart of your Italian grinder lies in properly chosen cured meats that work together to create complex flavor in every bite. Skip the mass-produced supermarket options loaded with preservatives and seek out quality Italian-American producers at specialty markets or deli counters.
Must-have meats for an authentic grinder:
– Genoa Salami: Coarsely ground with robust garlic notes, sliced thin to medium thickness
– Capicola (Coppa): Made from pork shoulder with delicate sweetness and buttery texture
– Prosciutto: Paper-thin slices of this dry-cured ham add luxurious sweetness when budget allows
When selecting meats, inspect for deep, uniform coloration without gray or brown discoloration. Genuine cured meats should display visible white fat marbling, indicating proper curing. Aim for four to six ounces of meat total per grinder, layering in overlapping rows with stronger-flavored meats toward the center and milder meats toward the edges for balanced flavor distribution and structural stability.
Choose Cheese That Elevates Your Italian Grinder
Provolone remains the quintessential cheese for authentic Italian grinders, delivering semi-hard texture with subtle tanginess that complements cured meats perfectly. Opt for aged provolone for sharper flavor or younger versions for creamier characteristics, slicing thin enough to soften against room-temperature meats but thick enough to maintain presence in each bite.
Place cheese directly against the bread to create structural adhesion as it softens. Two to three slices typically provide sufficient cheese presence without overwhelming other ingredients. While mozzarella offers a milder alternative, its higher moisture content requires careful handling to prevent sogginess—pat fresh mozzarella slices dry thoroughly before adding to your grinder.
Add Fresh Vegetables with Proper Technique
Essential vegetables provide the crunch and brightness that lift your Italian grinder beyond simple meat and bread. Iceberg lettuce remains traditional for its crisp texture and moisture resistance—tear (don’t cut) leaves to maintain crispness longer. Ripe, firm tomatoes sliced to ¼-inch thickness deliver juicy sweetness; salt off-season tomatoes lightly to draw out excess moisture. Sweet onions like Vidalia provide mild sweetness, while red onions offer sharper flavor—slice paper-thin and consider brief marination in red wine vinegar.
Critical vegetable preparation steps:
– Wash thoroughly and dry completely using salad spinners
– Slice tomatoes just before assembly to minimize juice accumulation
– Pat all vegetables dry—excess moisture is the enemy of structural integrity
– Arrange vegetables loosely to maximize coverage without creating bulk
Master Oil and Vinegar Dressing for Authentic Flavor
Authentic Italian grinders require oil and vinegar dressing rather than mayonnaise—this classic combination allows natural flavors to shine while adding essential moisture and tang. Start with quality extra-virgin olive oil applied generously to both bread surfaces, then add red wine vinegar sparingly (remembering its flavor intensifies as the sandwich rests). Sprinkle dried oregano, basil, and Italian seasoning over the wet ingredients to rehydrate and release essential oils.
Apply dressing before adding fillings, allowing it to soak slightly into the bread. This creates a moisture barrier that prevents sogginess while carrying flavor throughout each bite. For alternative preparations, store-bought Italian dressing offers convenience, while deli mustard adds sharp notes that complement salty meats—apply these sparingly to avoid overwhelming other flavors.
Step-by-Step Assembly of Your Italian Grinder
Proper assembly technique separates outstanding grinders from mediocre ones. Before beginning, gather all components in logical assembly order—this preparation streamlines the process and prevents mid-assembly scrambling that compromises quality.
Follow this assembly sequence:
1. Spread condiments evenly across both interior bread surfaces
2. Create a cheese foundation directly against the bread
3. Layer meats in overlapping rows, alternating directions
4. Add vegetables in loose arrangements that minimize bulk
5. Apply additional oil, vinegar, and seasonings
6. Complete with a final lettuce layer as a protective barrier
Many experienced sandwich makers employ the “roll-bottom” technique, folding the bottom half of the roll inward before adding fillings to create a reinforced base that prevents leakage. After assembly, press the sandwich firmly and allow it to rest for 5-15 minutes before serving—this critical step allows flavors to meld and bread to absorb condiments, significantly improving cohesion. When cutting, use a sharp serrated knife at a 45-degree angle to ensure proportional filling distribution.
Regional Variations to Customize Your Italian Grinder

Italian grinders have evolved differently across American regions, offering distinctive styles worth exploring. New York style emphasizes traditional ingredients with particular attention to bread selection, featuring generous meat portions and classic oil-vinegar preparation. Philadelphia style often incorporates sharp provolone with locally beloved additions like fried peppers or sautéed mushrooms. New England style features substantial meat and cheese layers with frequent hot pepper inclusion, while California style adaptations incorporate avocado and fresh produce reflecting regional agricultural abundance.
Understanding these variations helps you make an Italian grinder that suits your regional preferences or inspires creative experimentation. Start with traditional preparation, then gradually incorporate regional elements to develop your signature version.
Serving and Storage Tips for Maximum Freshness
Italian grinders taste best when served within 30 minutes to 2 hours of assembly, when bread maintains crispness and vegetables retain maximum freshness. If preparing in advance, omit tomatoes and dress vegetables separately to prevent sogginess, assembling just before serving. Room temperature grinders deliver optimal flavor and texture, though slight refrigeration above 40°F extends shelf life for several hours.
Wrap completed grinders tightly in deli paper, parchment, or foil and refrigerate for up to 24 hours. Note that bread softens significantly during refrigeration, and lettuce wilts—store components separately for best results when preparing ahead. Traditional accompaniments include dill pickles, potato chips, or simple green salads dressed with olive oil and lemon to complement the sandwich’s richness.
Essential Tips for Exceptional Italian Grinder Results
The difference between ordinary and exceptional grinders lies almost entirely in ingredient quality. Invest in premium meats from Italian specialty producers, quality provolole aged to desired sharpness, fresh vegetables at peak ripeness, and bread from artisan bakeries. While these ingredients cost more than supermarket alternatives, they transform the sandwich experience and justify every dollar spent.
Allow meats and cheeses to approach room temperature before assembly—this enhances flavor complexity and texture significantly. Finding your personal balance between food safety and optimal flavor comes with practice. The resting period after assembly proves critical for flavor integration, so resist the temptation to cut immediately.
Mastering how to make an Italian grinder requires attention to detail at each stage, from bread selection through final assembly. Through careful ingredient choices, proper technique, and respect for traditional methods, anyone can create restaurant-quality sandwiches that capture the essence of Italian-American culinary heritage. The grinder represents more than a meal—it embodies generations of immigrant experience transformed into one perfect, portable package. Whether you’re crafting a quick lunch or impressing guests, your homemade Italian grinder will deliver satisfaction that transcends ordinary sandwiches.


