
The scorching sun beats down, and that nostalgic craving for a frosty snow cone hits hard—but you don’t need a carnival machine to satisfy it. Your everyday blender transforms ordinary ice cubes into cloud-soft snow in under two minutes, creating snow cones that rival any boardwalk stand. Forget expensive gadgets; this guide reveals the exact ice-crushing techniques and syrup recipes that deliver authentic, fluffy results every time. You’ll master the moisture trick that prevents watery messes and discover how to make vibrant syrups from pantry staples that taste fresher than store-bought versions.
Whether you’re hosting a backyard party or need a quick summer treat for the kids, these blender-specific methods work with any model that crushes ice. I’ve tested every step across Hamilton Beach, Blendtec, and standard blenders to eliminate guesswork. By the end, you’ll know precisely how to achieve that perfect snow-like texture and create syrup combinations that make commercial versions taste artificial. Let’s dive into the ice-cold secrets of homemade snow cone perfection.
Why Your Standard Blender Outperforms Snow Cone Machines
Blenders create superior snow cone texture because their high-speed blades pulverize ice into uniform micro-particles, unlike commercial machines that shave larger flakes. The key is leveraging your blender’s physics: when ice cubes spin against the container walls at 10,000+ RPM, they fracture into snow-fine crystals instead of chunky shards. This process mimics how real snowflakes form—through rapid, consistent fragmentation rather than slow shaving.
Ice Selection Secrets for Flawless Texture
Always start with fresh, fully frozen crescent-shaped ice cubes straight from your freezer—never use ice that’s begun melting. Crescent cubes from standard trays break down faster because their curved edges catch the blades more efficiently than square cubes. For best results, fill your blender no more than ¾ full with 4 cups of ice (enough for 6-8 servings). If cubes are stuck together, twist the tray gently or run cool water over the bottom for exactly 3 seconds. Warm water creates surface moisture that causes slipping during blending.
Pro tip: Freeze ice cubes for 24+ hours before making snow cones. Older ice has less surface moisture, reducing the risk of watery results. Avoid refrigerator dispenser ice—it often contains impurities that create cloudy, uneven texture.
Critical Blender Settings Checklist
Before blending, verify your machine meets these requirements:
– ICE CRUSH function OR pulse button OR high-speed setting above 10,000 RPM
– Stable base (place on non-slip mat if needed)
– Sharp, undamaged blades (dull blades create chunks)
If your blender overheats or emits grinding sounds, stop immediately and cool for 5 minutes. Older models may require 3-second pulse bursts instead of continuous blending. Never force a struggling blender—this risks motor damage and inconsistent texture.
Crush Ice to Snow Consistency in 3 Minutes (Standard Method)
Hamilton Beach and most mainstream blenders require one crucial extra step to achieve authentic snow cone texture. Skipping this causes either watery slush or stubborn ice chunks—both ruin the experience.
The 3-Step Ice Crushing Process
- Load and lock: Place 4 cups of ice cubes in your blender jar. Secure the lid with firm downward pressure—this prevents dangerous leaks during high-speed operation.
- Blend strategically: Select ICE CRUSH function or pulse in 3-second bursts for 30-45 seconds total. Stop immediately when you see no visible chunks (about the consistency of fresh snowfall).
- Add moisture: Transfer ice to a bowl and sprinkle 1-2 tablespoons of cold water over it. Gently mix with a spoon until the ice holds together when packed. This mimics natural snow’s moisture content, enabling perfect scoopability.
Time estimate: 2 minutes active time + 1 minute moisture integration. Difficulty: Beginner-friendly (one common mistake: over-blending past 45 seconds, which melts ice into slush).
Visual Texture Checkpoints
- ✅ Perfect texture: Looks like powdery fresh snow, clumps slightly when squeezed
- ❌ Too wet: Shiny surface, water pools at bottom of bowl
- ❌ Too chunky: Visible ice shards larger than rice grains
Blendtec-Specific Shortcut: Skip the Water Addition
Blendtec blenders (FourSide or WildSide+ jars) uniquely create authentic snow texture without added moisture thanks to their 3.8 peak horsepower motor. This eliminates the moisture step, saving critical time during parties.
Jar-Specific Ice Measurements
| Jar Type | Ice Quantity | Blend Time | Result |
|---|---|---|---|
| FourSide | 3 cups | 7-10 seconds | Powder-soft snow for 4 servings |
| WildSide+ | 5 cups | 8-12 seconds | Extra-fine snow for 8 servings |
Critical instruction: Add ice cubes directly from freezer—never pre-thaw. Blend on medium speed (setting 4-6) until you hear a consistent “whirring” sound (no clunking). Overfilling causes uneven texture, so never exceed jar capacity lines.
Make Syrups That Taste Better Than Store-Bought (5 Ingredients Max)

Homemade syrups avoid artificial preservatives while delivering bolder flavor. The secret? A simple syrup base that locks in fruit freshness without cloying sweetness. Store-bought versions often contain high-fructose corn syrup that crystallizes on cold ice—our method prevents this.
Powdered Drink Mix Syrup (Ready in 20 Minutes)
This pantry-staple method creates vibrant, shelf-stable syrup faster than fresh fruit versions:
Ingredients:
– 4 cups water
– 4 cups granulated sugar
– 4 envelopes powdered drink mix (Kool-Aid)
Step-by-Step:
1. Boil water in saucepan over medium-high heat
2. Dissolve sugar completely (2-3 minutes stirring constantly)
3. Divide syrup equally between 4 bowls
4. Stir in one envelope per bowl until powder vanishes
5. Cool 15-20 minutes at room temperature before bottling
Pro tip: Add 1 tsp citric acid per batch for carnival-style tartness. Store in squeeze bottles up to 2 weeks refrigerated.
Fresh Fruit Syrup Master Formula
All fruit syrups follow this foolproof ratio for intense flavor without grittiness:
Base Ratio:
– 1 cup water
– 1 cup sugar
– 2 cups fruit
– 1 tbsp acid (lemon/lime juice)
Mango-Peach Delight Recipe
Blend 1 peeled peach, 1 peeled mango, 1 cup water, 1 cup sugar, and 1 tbsp lemon juice until smooth. Simmer 10 minutes to concentrate flavors—this caramelizes natural sugars for tropical depth.
Tiger’s Blood (Strawberry-Coconut)
Combine 2 cups hulled strawberries, 1 cup water, 1 cup sugar, and 1½ tsp coconut extract. Simmer 12 minutes; the coconut extract blooms during heating for authentic carnival flavor.
Pineapple-Lime Zinger
Process 2 cups fresh pineapple, 1 cup water, 1 cup sugar, and 1 tbsp lime juice. The lime cuts pineapple’s sweetness perfectly—no added sugar needed.
Perfect Serving Technique: Avoid the Slushy Bottom
:max_bytes(150000):strip_icc()/20250904-SEA-SnoBalls-RobbyLozano-01-d0ce4bb682f844038a17087c37bdd93a.jpg)
Most homemade snow cones fail at serving. Ice melts from the bottom up when syrup isn’t distributed correctly, creating a watery mess. This method guarantees even flavor from first bite to last.
The Golden Ratio Formula
Use exactly 2 tablespoons syrup per ½ cup of packed ice. Pour in this sequence:
1. Circle the edges with 1 tbsp syrup (coats cone walls)
2. Add ice to fill cup ¾ full
3. Drizzle center with remaining syrup
4. Top with final ice layer
Critical tip: Pre-chill serving cups in freezer for 10 minutes. Warm containers melt ice on contact, causing immediate sogginess.
Party-Size Snow Cone Station Setup
For gatherings:
– Pre-crush ice and store in freezer bags (up to 3 days)
– Layer bags with parchment paper to prevent clumping
– Use squeeze bottles for syrups (label colors clearly)
– Provide small spoons for mixing flavors
Scale syrup recipes by doubling all ingredients. For 24 servings, use two blenders simultaneously—one for ice, one for syrup batches.
Troubleshoot Common Snow Cone Disasters
Fix Watery Snow Cone Ice Immediately
Cause: Over-blending or using partially melted ice
Solution: Transfer ice to colander, drain 10 seconds, then remix with 1 tsp cold water. Never add more ice—it dilutes flavor.
Rescue Thick Syrup in 60 Seconds
Cause: Over-simmering or improper sugar ratio
Fix: Microwave syrup 15 seconds, then stir vigorously. For fresh fruit syrups, add 1 tbsp hot water per cup of syrup.
Prevent Ice from Falling Apart
Cause: Skipping moisture addition (standard blenders)
Emergency fix: Sprinkle ½ tsp cold water over packed ice and press firmly with spoon base. Chill 2 minutes before serving.
Final Pro Tips for Carnival-Worthy Results
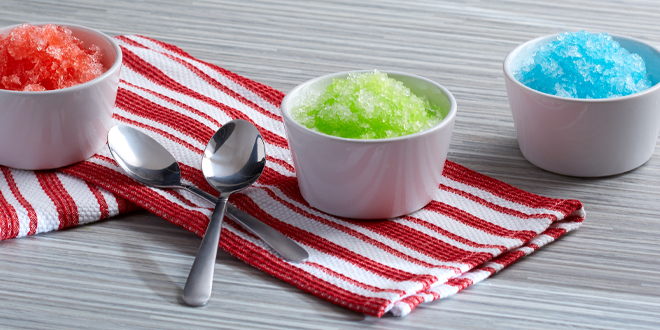
The difference between good and exceptional snow cones lies in temperature control. Always keep ice, syrups, and serving cups below 40°F (4°C)—use a cooler with ice packs for outdoor events. For next-level presentation, layer syrups like red (strawberry), white (coconut), and blue (blueberry) in clear cups for holiday celebrations.
Your blender-made snow cones will outshine commercial versions because you control the ingredients. Once mastered, experiment with adult versions using 1 tbsp rum per syrup batch or sophisticated pairings like lavender-honey. Remember: perfect texture starts with freezer-cold ice and ends with that critical moisture sprinkle. Now grab your blender—summer’s sweetest treat is just two minutes away.


