
Fresh pear juice delivers a naturally sweet, refreshing beverage that surpasses store-bought versions in both flavor and nutritional value. Learning how to juice pears with a juicer unlocks the ability to preserve your harvest, reduce food waste by utilizing peels and scraps, and create a versatile ingredient for cooking and baking. The steam juicing method stands out as the most effective approach for home processing, maximizing yield while preserving the delicate sugars and aromatic compounds that make fresh pear juice so special. This comprehensive guide walks you through every step of the process, from preparation through long-term storage, ensuring success whether you’re processing a small batch or a large harvest.
Home juicing gives you complete control over ingredients, eliminates preservatives, and captures the fresh-picked flavor commercial products can’t replicate. Pears naturally contain sugars that create a pleasantly sweet juice without any additions, making this a healthy alternative to sugary beverages. The process requires minimal equipment beyond a steam juicer, and the results store for months when properly canned. By mastering this technique, you’ll transform abundant pear harvests into a pantry staple that provides year-round enjoyment.
Steam Juicing Method for Maximum Pear Juice Yield
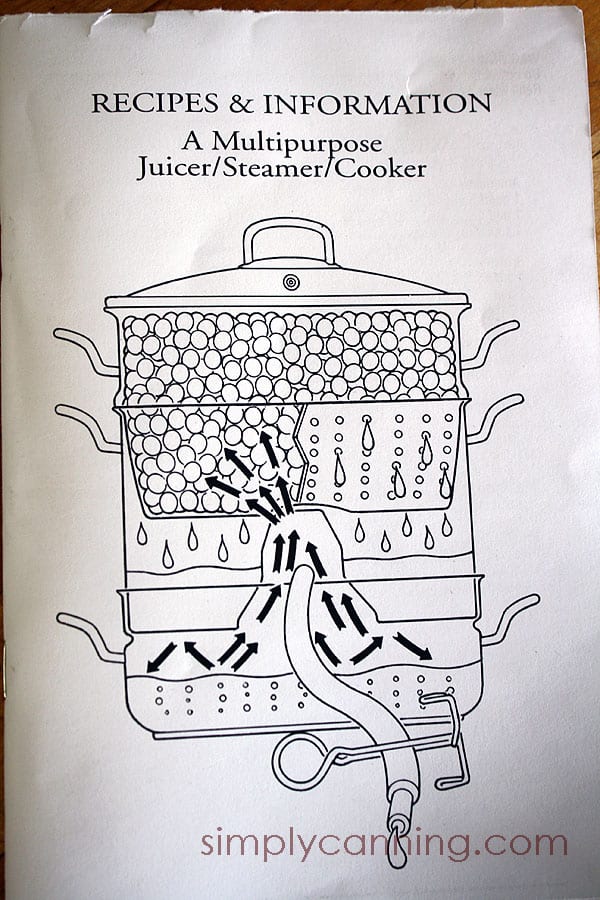
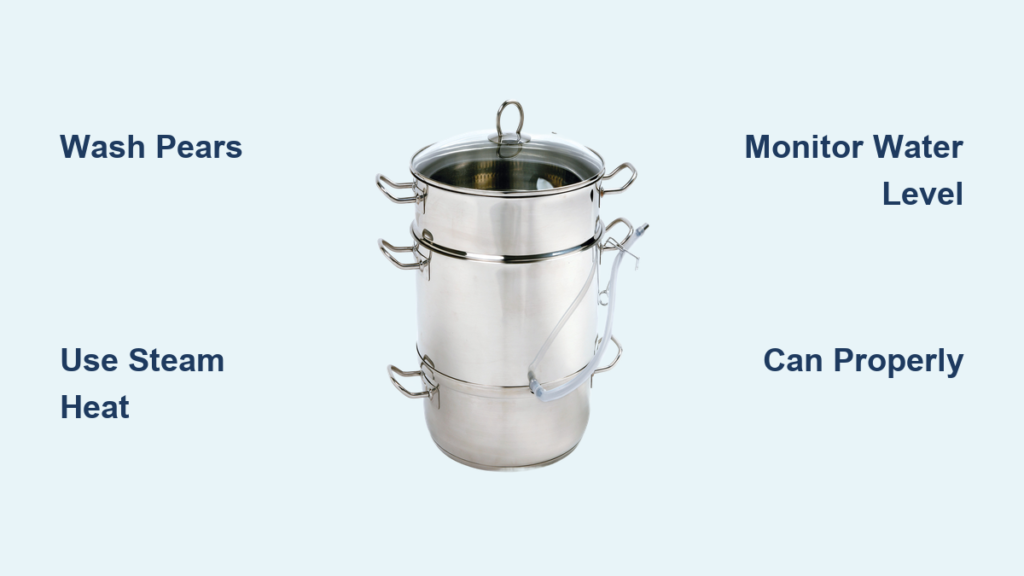
Steam juicing represents the most efficient technique for extracting juice from pears, offering advantages traditional juicer machines simply can’t match. This method uses steam power to gently break down fruit cell structures, releasing liquid that drips into a collection chamber below. The three-section steam juicer design—a bottom water reservoir, middle collection section, and top fruit chamber—creates a continuous extraction system that handles large quantities with minimal supervision. As water in the bottom section boils, steam rises through the system, heating the pears without burning them and causing them to release their juice gradually.
The steam juicing process produces clearer, cleaner-tailing juice compared to mechanical extraction methods. Heat and moisture work together to extract sugars gradually, avoiding the bitterness that mechanical juicers can introduce from seeds or skins. This gentle approach preserves more of the fruit’s natural flavors and nutrients while handling peels and scraps without waste. The resulting juice has a smooth, pleasant character that works wonderfully as a standalone beverage or as an ingredient in recipes calling for pear juice or pear cider.
Why Steam Beats Traditional Juicers for Pears
Why does steam juicing work better than standard juicers for pears? Traditional centrifugal or masticating juicers often struggle with pears due to their firm texture and low water content compared to citrus or leafy greens. Steam juicing bypasses this limitation entirely by using heat and moisture to extract liquid rather than mechanical force. You’ll notice significantly higher yields—up to 50% more juice—when using steam compared to conventional methods. The process handles whole pears, peels, and cores efficiently, turning what would be waste into valuable liquid.
Steam juicing also prevents oxidation that occurs in mechanical juicers, preserving the bright color and fresh flavor of your pear juice. Without the high-speed blades or crushing mechanisms that generate heat and foam, steam-extracted juice maintains its integrity from extraction to storage. This method works equally well with Bartlett, Anjou, and Bosc varieties, though Bartlett pears typically yield the sweetest juice due to their higher natural sugar content.
Gather Essential Equipment for Pear Juicing
Having the right equipment ready before you begin ensures a smooth juicing session and professional-quality results. The essential piece is a dedicated three-section steam juicer, typically made from stainless steel or heavy-duty aluminum for even heat distribution. This unit connects directly to your stovetop and forms the core of your setup. Beyond the juicer itself, you’ll need quart jars for collecting your juice—these must be free from chips or cracks to ensure proper sealing during canning.
Your complete equipment checklist includes:
– Three-section steam juicer (stainless steel recommended)
– Quart-sized canning jars with new two-piece lids
– Water bath canner with fitted lid
– Jar lifter and magnetic lid wand
– Clean towels for cooling jars
– Funnel for clean filling
– Optional but helpful: jar labels, jar wrench, and silicone hot pads
Critical Safety Considerations Before Juicing
What safety precautions should you take when steam juicing pears? Working with boiling water and steam requires vigilance to prevent burns or accidents. Always position your steam juicer away from edges where it could be accidentally bumped, and keep children and pets clear of the work area during operation. Use oven mitts or silicone hot pads when handling any part of the steam juicer, as metal components become extremely hot during the process.
Never leave your steam juicer unattended while it’s operating—steam generation requires continuous monitoring of water levels. Keep a fire extinguisher accessible in your kitchen, though steam juicers rarely cause fires when used properly. If using an electric stovetop, ensure the steam juicer sits securely on the burner to prevent tipping. These precautions ensure your pear juicing experience remains safe and enjoyable from start to finish.
Prepare Pears for Optimal Juice Extraction
Proper preparation maximizes your yield and ensures clean, great-tasting juice free from unwanted debris. Start by washing your pears thoroughly under running water to remove dirt, residue, or surface contaminants. If using whole pears, core them to remove seeds and the tough center portion—though you can leave the skins intact as they won’t impact juice quality. Trim away any blemishes, bruised areas, or signs of spoilage before processing.
For optimal results, select pears that are ripe but still firm. Underripe pears release less juice and produce a harsher, less sweet final product, while overly soft pears may yield juice with off-flavors. Bartlett, Anjou, and Bosc pears all make excellent juice, with Bartlett offering a sweeter profile. You can incorporate peels and scraps from other preparations, making this an efficient method for minimizing food waste. Measure any optional sugar you plan to use—typically up to half a cup per batch—and have it ready to add with the pears.
Execute the Steam Juicing Process Step by Step
Begin by filling the bottom section of your steam juicer with water up to the maximum fill line, crucial for maintaining continuous steam production. Place this section on your stovetop and set the heat to medium-high, bringing the water to a rolling boil. While the water heats, prepare your collection jars by washing them in hot, soapy water and keeping them warm—placing hot juice into cold jars can cause thermal shock.
Assemble the steam juicer by placing the middle collection section onto the bottom section, ensuring the collection tube is properly positioned. Add your prepared pears and optional sugar to the top section, distributing them evenly, then place the lid on top. As the water boils, steam rises through the system and begins extracting juice within 15-20 minutes—you’ll notice liquid accumulating in the middle section.
Throughout the juicing process (approximately one hour per batch), monitor the water level continuously. Add water every fifteen to twenty minutes to maintain the level at or near the maximum fill line. Once enough juice has collected in the middle section, carefully transfer it to your warm jars, repeating until juice production slows significantly. Critical tip: Never let the water reservoir run dry, as this can damage your steam juicer and potentially create a fire hazard.
Can and Seal Your Pear Juice for Long-Term Storage

Proper canning ensures your pear juice remains safe for room temperature storage. Fill your warm jars with collected juice, leaving approximately one inch of headspace at the top—this space allows for expansion during processing. Wipe the jar rims thoroughly with a clean cloth to remove any juice residue that could compromise the seal, then place the flat lid on each rim and secure with a screw ring, finger-tightening only.
Lower your filled jars carefully into the water bath canner, ensuring they remain upright. The water should cover the jars by one to two inches. Bring the water to a full boil, then process pear juice for a minimum of ten minutes. If you live above 1,000 feet elevation, increase processing time by five minutes for every additional 3,000 feet.
After processing, turn off the heat and let jars sit in the hot water for five minutes before carefully lifting them out. Transfer to a clean towel and cool undisturbed for twelve to twenty-four hours. You’ll hear the characteristic “pings” as lids seal vacuum-tight against the jar rims—a sign of successful preservation.
Store Pear Juice Properly for Year-Round Enjoyment
Once jars have cooled completely, verify the seals before long-term storage. Press down on each lid center—if it doesn’t flex or pop up and down, the jar has sealed properly. Remove the screw bands, as they’re unnecessary for storage and can mask seal failures. Wipe jar exteriors and label with contents and processing date.
Store sealed jars in a cool, dry location away from direct sunlight, with temperatures between fifty and seventy degrees Fahrenheit. A pantry, basement, or closet typically provides suitable conditions. Properly sealed pear juice remains good for up to one year, though quality is best within the first six to twelve months. For unsealed jars, transfer immediately to the refrigerator and consume within one to two weeks.
Customize Your Pear Juice with Sweetness and Variations
Pear juice requires no added sugar, as the fruit’s natural sugars produce a pleasantly sweet beverage. Ripe, flavorful pears yield juice with a clean, pure pear character many prefer over sweetened versions. However, if your pears are slightly underripe or you prefer enhanced sweetness, add up to half a cup of sugar per batch. Pro tip: Taste the juice before adding sugar to adjust according to your preferences and the natural sweetness of your batch.
For serving, enjoy pear juice chilled as a standalone beverage. During cooler months, gently warm the juice without boiling to create a comforting hot drink—you can add cinnamon, nutmeg, or clove for extra warmth. The juice also works beautifully in cooking applications, sweetening oatmeal naturally, adding moisture to baked goods, or reducing to a syrup for drizzling over desserts.
Troubleshoot Common Pear Juicing Problems

Slow juice extraction typically indicates insufficient heat or low water levels. Ensure your heat is high enough to maintain a steady boil and verify that the steam juicer sections are properly assembled with no steam escaping from connection points. Check the water level every fifteen minutes and add more as needed to keep steam production continuous.
Cloudy juice may result from processing overripe fruit or inadequate straining during collection. Select firmer, ripe pears and allow juice to settle in jars before processing, or strain through cheesecloth for clearer results. Poor flavor usually stems from using low-quality or spoiled starting fruit—always select pears that are ripe but firm, free from bruises, mold, or signs of spoilage. If your juice tastes harsh, consider blending different pear varieties or allowing pears to ripen further before juicing.


