
Rough, uneven concrete surfaces can ruin the appearance of your space and create safety hazards that demand professional attention. Knowing how to grind concrete with a grinder properly transforms these problem areas into smooth, functional surfaces ready for coatings or decorative finishes. This comprehensive process removes high spots, eliminates imperfections, and creates the perfect profile for epoxy applications or achieves stunning polished concrete results. Whether you’re tackling a small garage floor or preparing surfaces for commercial renovation, mastering concrete grinding techniques puts professional-quality results within your reach while saving significant contractor costs.
Concrete grinding requires using a rotating abrasive tool—typically an angle grinder fitted with a diamond-coated cup wheel—to systematically remove material from the surface. This mechanical abrasion process eliminates contaminants, levels uneven areas, and prepares the substrate for subsequent treatments. Without proper grinding technique, you risk creating more problems than you solve, including inconsistent surfaces, excessive dust exposure, and premature equipment wear. This guide delivers actionable steps for safe, effective concrete grinding that produces professional results regardless of your experience level.
Select the Proper Grinding Equipment
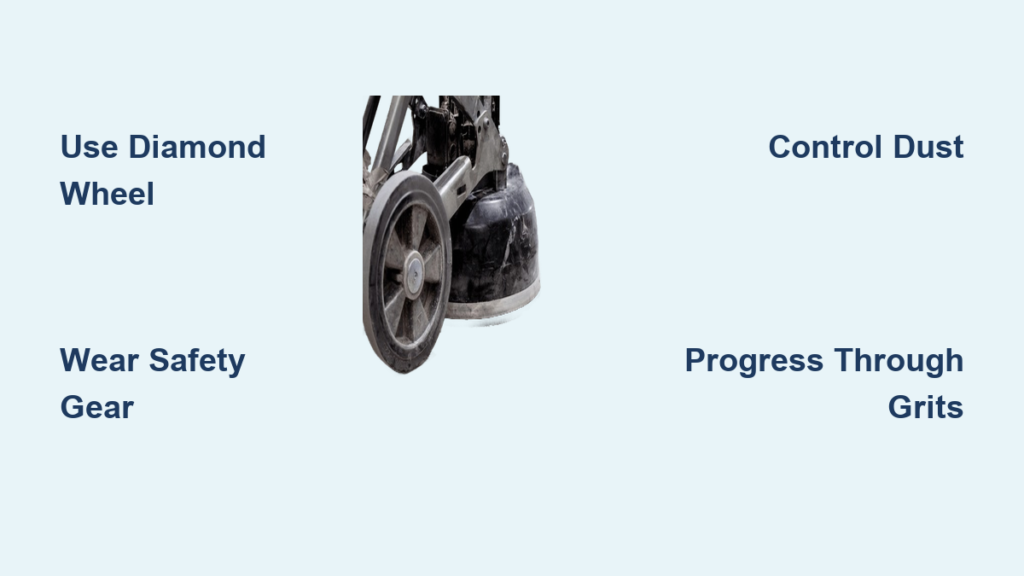
Your project’s success begins with selecting equipment matched to your specific concrete conditions and desired outcome. The foundation of your setup is a variable-speed angle grinder with sufficient power to handle concrete abrasion without overheating. Look for models featuring at least a 9-amp motor and adjustable speed settings ranging from 2,500 to 10,000 RPM, as different grinding stages require specific rotational speeds for optimal performance on various concrete densities.
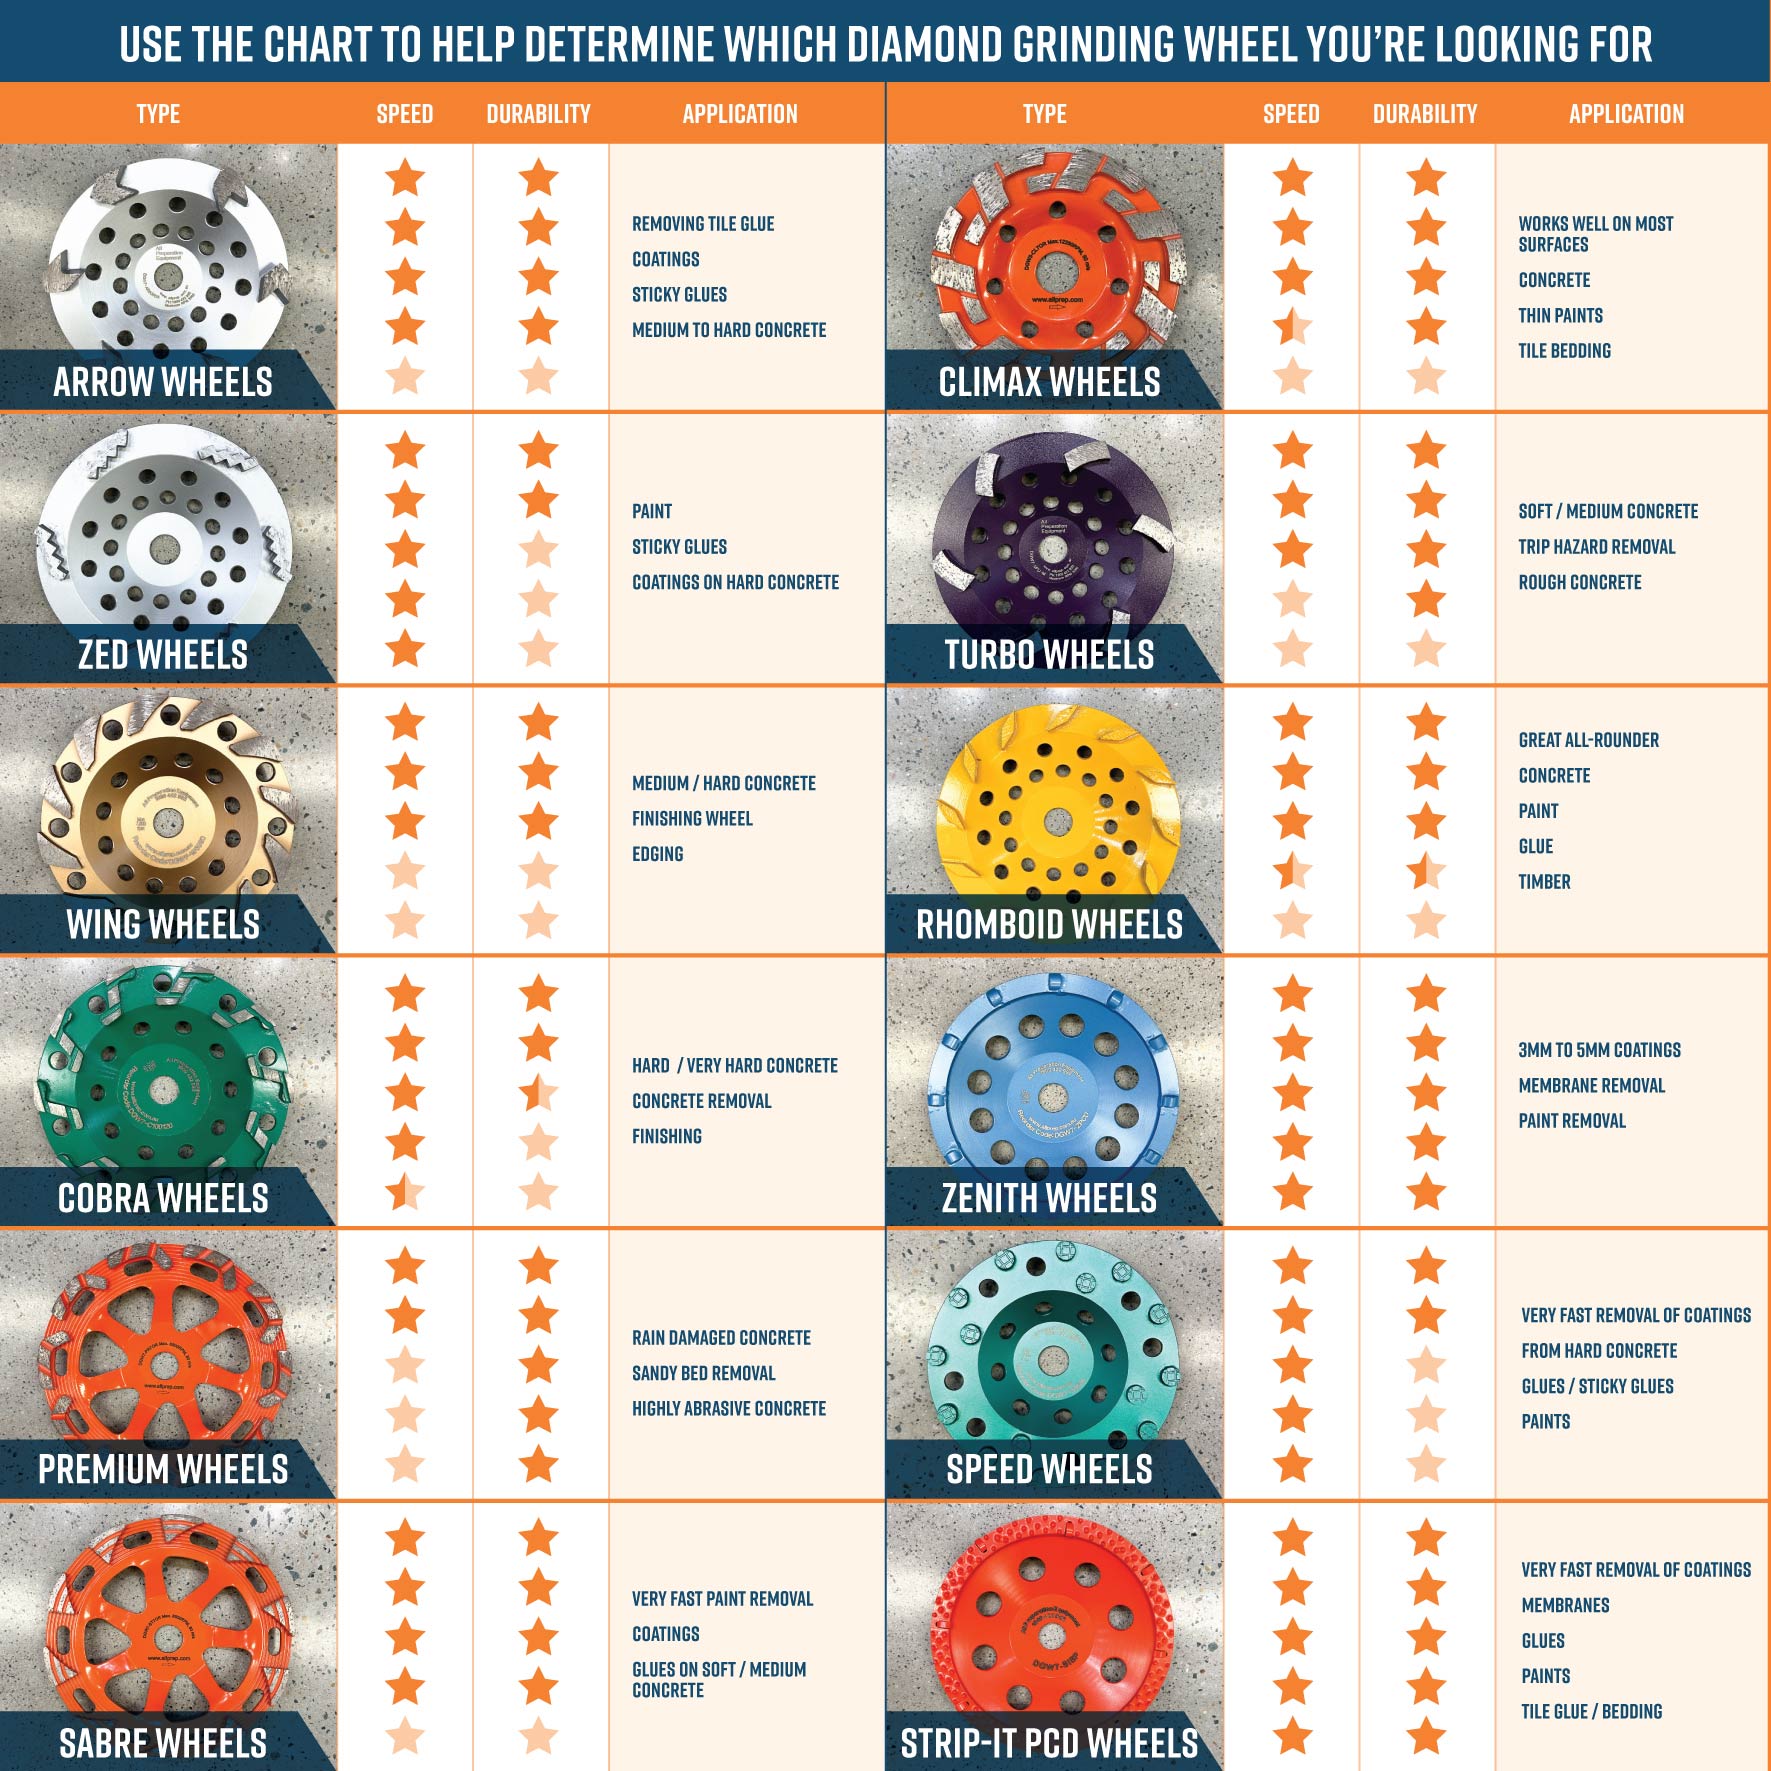
Diamond cup wheels provide the actual grinding action and come in multiple configurations designed for specific applications. Single-row wheels feature widely spaced diamond segments that efficiently discharge debris when working on soft concrete or removing coatings but leave a more scratchy surface. Double-row wheels offer balanced performance between material removal rate and surface finish quality, making them versatile for most residential projects. Turbo cup wheels with continuous or spiraled diamond rims produce smoother results with less vibration across both soft and hard concrete varieties.
Essential Supporting Equipment
Beyond the grinder and wheel, several critical accessories ensure efficient, safe operation. A shop vacuum equipped with HEPA filtration captures hazardous silica dust at the source, protecting your respiratory health and minimizing cleanup. For wet grinding applications—which dramatically reduce airborne particles—have a garden hose with spray attachment ready to maintain a light, continuous mist over your work area. Measuring tools like straightedges or levels help identify high spots before grinding begins, while marking chalk allows precise problem area identification.
Implement Critical Safety Measures

Concrete grinding creates multiple hazards that demand comprehensive protective equipment before you begin. Silica dust generated during dry grinding causes silicosis—a potentially fatal lung disease—while high-velocity debris, loud noise, and vibration exposure create additional risks requiring proper mitigation.
Respiratory and Eye Protection
Standard dust masks offer inadequate protection against silica particles—you need at minimum an N95 respirator, though half-face respirators with P100 filters provide superior protection for extended grinding work. Impact-rated safety glasses or a full face shield worn over safety glasses protect eyes from concrete chips and diamond fragments dislodging during operation. Never rely on prescription glasses alone, as they lack necessary impact resistance.
Hearing and Body Protection
Angle grinders routinely produce noise levels exceeding 100 decibels, causing permanent hearing damage with extended exposure. Use foam earplugs rated for at least 20 decibels reduction for short jobs, or over-ear muffs with 25+ decibel rating for comfort during multi-hour projects. Wear long sleeves and pants made from durable work materials to protect skin from debris, coupled with steel-toed boots and knee pads for joint protection during floor-level work. Always remove rings and loose jewelry that could catch in rotating equipment.
Prepare Your Work Area Thoroughly
Proper area preparation prevents costly mistakes and ensures consistent grinding results across your concrete surface. Begin by completely clearing the work zone of furniture, equipment, and obstacles that might interfere with movement or create dust contamination hazards.
Carefully inspect the concrete surface before grinding begins. Identify cracks, expansion joints, holes, and areas of spalling (surface deterioration) that may require special attention or patching. Mark these problem areas with chalk so you don’t overlook them during the grinding process. Understanding your surface’s full condition helps plan grinding passes and estimate time requirements accurately.
Protect adjacent surfaces from dust migration by covering doorways with plastic sheeting secured with painter’s tape and using drop cloths to shield nearby objects. For indoor projects, establish dust barriers between work zones and living spaces to prevent contamination. Ensure adequate ventilation by opening windows and setting up fans to create air movement that carries dust toward your extraction system, improving both air quality and dust collection efficiency.
Execute Proper Grinding Technique
Mastering concrete grinding technique requires understanding movement patterns, pressure application, and progression logic that transforms rough surfaces into refined finishes. The fundamental principle involves maintaining consistent motion and pressure to avoid gouging or uneven material removal that creates more work later.
Movement and Pressure Control
Move the grinder in steady, overlapping passes across your work area, slightly overlapping each pass to ensure complete coverage. Work in one direction first, then make perpendicular passes in a crosshatch pattern to eliminate directional scratch patterns. Maintain a slight forward angle of approximately 10 to 15 degrees between the grinder head and concrete surface—this allows the wheel’s edge to engage properly rather than presenting the entire face.
Apply steady, moderate pressure rather than forcing the grinder into the concrete. Let the diamonds do the work—excessive pressure overheats the wheel, accelerates wear, and strains the motor. The appropriate pressure produces consistent dust output without the motor bogging down. Vary your speed setting based on concrete hardness: slower speeds (2,500-4,000 RPM) work best for hard concrete or coarse grinding, while higher speeds (6,000-10,000 RPM) suit softer concrete or finer finishing stages.
Manage Dust Effectively
Concrete dust presents serious health hazards and significant cleanup challenges that require proactive management strategies. Two primary approaches exist for controlling silica dust during grinding operations.
Wet grinding eliminates airborne particles by binding them with water spray, dramatically improving visibility and reducing cleanup requirements. Apply a light, continuous mist to your grinding area using a garden hose with spray attachment—the flow rate should dampen dust without creating excessive runoff or slip hazards. While wet grinding creates slurry requiring proper disposal, it significantly reduces respiratory risks compared to dry methods.
Dry grinding with vacuum extraction provides an alternative when water use isn’t practical. Attach a shroud to your grinder that connects directly to a shop vac with HEPA filtration. The vacuum must provide sufficient airflow to capture dust at the point of generation—insufficient extraction leaves dangerous particles suspended in the air. Regardless of method, allow dust to settle completely before entering adjacent areas, and never blow dry dust with compressed air, as this redistributes hazardous particles.
Address Surface Imperfections Strategically
Concrete surfaces rarely arrive perfectly flat, requiring strategic grinding passes that progressively level the substrate. Use a long straightedge or level to identify elevated areas—places where the straightedge rocks or gaps appear indicate high spots needing attention. Mark these areas with chalk to focus grinding passes where they’ll have maximum leveling effect.
For significant unevenness exceeding a quarter-inch, consider whether hand grinding with an angle grinder remains practical or if rental equipment would be more efficient. Plan your approach based on the scale of leveling required rather than forcing a single tool to handle tasks beyond its capacity. When encountering expansion joints and control joints, either avoid grinding through them entirely or plan to re-cut joints to proper depth and width after grinding to maintain their structural function.
Progress Through Grit Stages Methodically

Successful concrete grinding follows a systematic progression through increasingly finer grit sizes that build upon previous work rather than undermining it. Begin with coarse 30-50 grit wheels for initial material removal on rough concrete or thick coatings. Transition to 80-120 grit for secondary grinding that refines the surface profile. Finish grinding before coatings typically requires 200-400 grit wheels, though decorative polishing may continue through 800, 1500, and even 3000 grit stages.
Never skip grit sizes in your progression—each step removes the scratches from the previous grit, creating progressively finer scratch patterns. Rushing through stages by skipping sizes means coarser scratches remain visible in your final finish, ultimately requiring more work to achieve satisfactory results. Spend adequate time at each grit stage, watching for consistent scratch patterns that indicate complete coverage before moving to the next finer grit.
Maintain Equipment Between Uses
Regular equipment maintenance extends tool life, preserves performance, and prevents unexpected failures during critical project phases. After each use, inspect your diamond cup wheel for damage, excessive wear, or loose segments—replace wheels showing cracks, missing segments, or visible damage immediately as they pose safety risks.
Clean accumulated concrete from wheel segments and the grinder guard using a wire brush before storage, as hardened material affects balance and cutting efficiency. Check your grinder’s carbon brushes periodically and replace them when worn to prevent motor damage. Store your grinder and accessories in a dry location protected from temperature extremes, and coil cords loosely rather than tightly wrapping them to avoid stressing internal wiring.
Avoid Common Grinding Mistakes
Learning from others’ mistakes prevents frustration, wasted materials, and potential injury during your concrete grinding projects. Skipping proper safety equipment remains the most dangerous error—never begin grinding without complete eye, hearing, and respiratory protection regardless of job duration.
Rushing through grit progressions creates persistent scratch patterns that require additional grinding work to correct. Using the wrong wheel for your concrete type or application wastes time and money—hard concrete requires wheels with softer bonds that release diamonds before they dull, while soft concrete needs harder bonds that maintain diamond exposure. Neglecting dust control affects more than cleanup—it compromises your health and the health of everyone near your work area. Invest in proper extraction equipment and use it consistently throughout every grinding session.


