
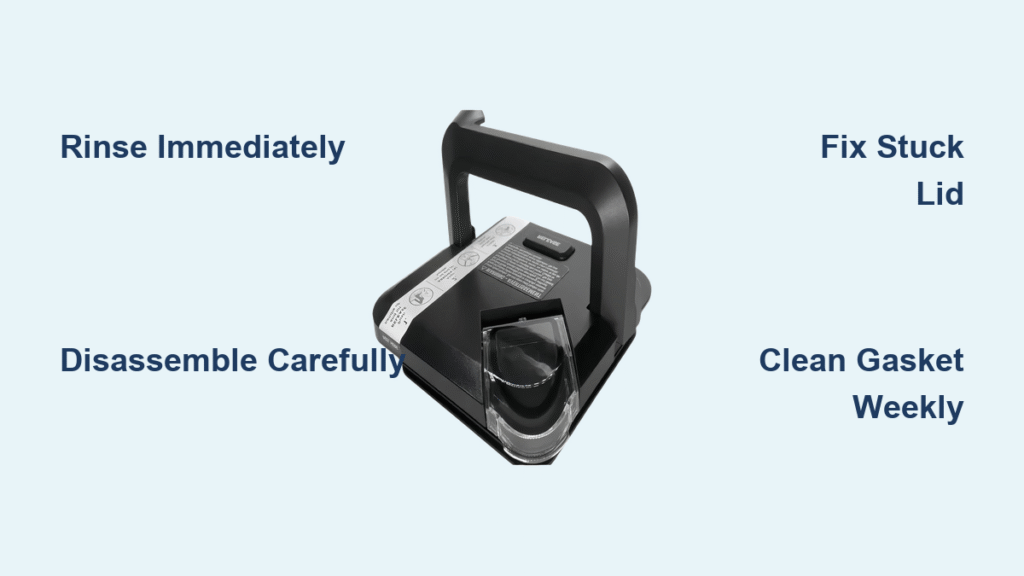
That Ninja blender whirrs through frozen fruit and tough greens with ease, yet its lid often gets ignored in the cleanup rush. Left unattended, trapped food particles transform into stubborn stains and foul odors while dried residue compromises the seal. Worse still, improper cleaning leads to stuck lids that require frantic prying before your morning smoothie. Even bacterial growth becomes a real risk when food hides in the gasket groove.
This guide delivers proven techniques to keep your Ninja blender lid spotless, odor-free, and functioning perfectly. You’ll master quick daily rinses that prevent buildup, deep-cleaning methods for cloudy plastic, and safe solutions for stuck lids that won’t damage components. Most importantly, you’ll learn gasket care secrets that extend your lid’s lifespan—critical since Ninja doesn’t sell individual gaskets.
Quick Daily Rinse Method That Prevents Buildup
Skipping immediate lid cleaning turns minor residue into permanent stains. This 30-second routine eliminates the need for aggressive scrubbing later while protecting your seal.
Rinse while ingredients are still wet: Remove the lid from the pitcher immediately after blending. Hold it under warm running water for 15 seconds, rotating to hit all surfaces including the pour cap crevices. Shake off excess water and place upside down on a drying rack. Never let food dry on the lid—this clogs the release mechanism and hardens into stains.
Pro tip: If you can’t wash right away, fill the pitcher with warm water and a few drops of dish soap. Secure the lid and pulse for 10 seconds. This self-cleaning action dislodges particles from the lid’s interior and gasket area before they set.
Deep Clean Each Ninja Lid Component Properly

Your lid contains five critical parts requiring individual attention. Missing even one component traps bacteria and causes leaks during blending.
Disassemble Without Damaging the Gasket
Step 1: Twist the pour cap counterclockwise until it releases. Check for food debris around its base.
Step 2: Insert a fork tine into the gasket groove and gently pry the rubber seal outward. Never use metal utensils—this scratches the plastic housing where bacteria hide.
Step 3: Inspect alignment arrows on the lid top and pitcher rim. Wipe trapped debris from these markers with a soft cloth.
Step 4: Separate all pieces on a clean towel before washing.
Warning: Forcing the gasket removal cracks the lid housing. If stuck, soak components in warm water for 2 minutes first.
Handwash Each Part for Maximum Longevity
Lid structure: Soak in warm, soapy water for 5 minutes. Use a soft sponge to scrub around release latches where smoothie residue accumulates. Pay special attention to the underside rim where the gasket seats.
Gasket seal: Wash separately with mild soap and a soft toothbrush. Scrub both sides thoroughly—this rubber ring traps odors from garlic or spices. Rinse until water runs clear to prevent soap residue.
Pour cap: Remove completely and scrub inside the hinge mechanism. Dried protein powder here prevents proper sealing.
Drying technique: Place components upside down on a ventilated rack. Never towel-dry the gasket groove—lint fibers cause leaks. Allow 4+ hours for complete drying before reassembly to prevent mold.
Fix Stuck Ninja Lids Without Breaking Components
A lid fused shut by suction or mineral deposits triggers panic when you’re late for work. Understanding the root cause determines your safest release method.
Why Lids Suddenly Get Stuck
Suction lock: Trapped water between the seal and lid creates vacuum pressure when cooling.
Mineral buildup: Hard water leaves calcium deposits around the rim after repeated washes.
Over-tightening: Storing with the lid fully locked compresses the gasket permanently.
Food glue: Dried spinach or nut butter acts like adhesive in the locking mechanism.
Release Stuck Lids in Under 2 Minutes
Hot water method (safest): Fill the pitcher with hot tap water (not boiling). Let sit 60 seconds—the heat expands the plastic, breaking the seal. Gently twist the lid counterclockwise while lifting.
Lubrication technique: Apply olive oil around the lid seam with a cotton swab. Wait 30 seconds for penetration, then twist. Must rinse thoroughly afterward to avoid oily residue.
Latch assistance: Slide a butter knife under the white latches on both sides of the handle. Lift gently to release the locking mechanism—never force it.
Grip enhancement: Wear rubber dish gloves for better leverage. Wrap a rubber band around the lid for extra traction if needed.
Remove Stubborn Stains Without Scratching Plastic
Cloudy lids and yellowed plastic make even clean blenders look unsanitary. These natural methods restore clarity without damaging surfaces.
Baking Soda Paste for Cloudy Lids
Create restoration paste: Mix 2 tablespoons baking soda, 1 tablespoon water, and 5 drops lemon juice into a thick paste.
Application:
1. Spread generously over stained areas
2. Wait 20 minutes for deep penetration
3. Add ¼ cup white vinegar—the fizzing reaction lifts mineral deposits
4. Scrub gently with a non-scratch sponge
5. Rinse until water runs clear
Pro tip: For severe cloudiness, leave the paste overnight before Step 3.
Vinegar Soak for Discoloration
Solution: Combine 1 cup white vinegar, 2 cups warm water, and 1 tablespoon baking soda in a basin.
Soaking method:
1. Submerge all lid components completely
2. Soak 30 minutes for light stains (extend to 2 hours for turmeric or beet stains)
3. Scrub with a soft brush—avoid abrasive pads
4. Air dry in direct sunlight to prevent lingering odors
Alternative: Dampen a Magic Eraser and buff cloudy areas with light pressure. Rinse immediately to remove melamine residue.
Eliminate Garlic and Onion Odors Permanently
Strong-smelling ingredients permeate the gasket, making your next smoothie taste like last night’s curry. These deodorizing methods neutralize odors at the source.
Lemon-Baking Soda Blend Treatment
- Add 1 cup hot water, juice of ½ lemon, and 1 tablespoon baking soda to the pitcher
- Secure the lid and blend 30 seconds
- Let solution sit in the closed lid for 10 minutes
- Disassemble and rinse all parts thoroughly
- Air dry in sunlight for 2 hours
For stubborn smells: Soak components overnight in equal parts vinegar and water. Add lemon slices to boost deodorizing power.
Maintain Gasket Seal for Leak-Proof Blending

The rubber gasket creates your watertight seal but fails prematurely without proper care—requiring full blade assembly replacement since Ninja sells no individual gaskets.
Weekly Gasket Care Checklist
Inspect for:
– Cracks or tears along the inner curve
– Permanent flattening (should spring back when stretched)
– Food particles trapped in the groove
– Proper seating after reassembly
Cleaning protocol: Remove the gasket weekly using a fork. Wash with warm soapy water and a soft brush. Rinse until no suds remain—soap residue causes leaks.
Prevent Gasket Failure for Years
Critical storage rules:
– Never store with lid fully locked
– Leave pour cap slightly ajar for airflow
– Apply food-grade mineral oil monthly to maintain flexibility
– Replace immediately if cracks appear (prevents sudden leaks)
Time-saver: After washing, place the gasket on a paper towel for 10 minutes before reinserting—this ensures complete drying.
Dishwasher Cleaning Done Right
While handwashing is ideal, the dishwasher works safely with these precise protocols to avoid warping or gasket damage.
Safe Top-Rack Dishwasher Protocol
Placement: Position lid upside down on top rack, away from heating elements.
Prep: Remove large food particles first. Take out the gasket seal for separate drying.
Detergent: Use mild, plant-based soap only—harsh formulas cloud plastic.
Drying: Allow 4+ hours of air drying post-cycle. Never use heated dry settings.
Dishwasher Mistakes That Ruin Lids
Never:
– Place lid on bottom rack (direct heat warps plastic)
– Run heated dry cycles (degrades gasket elasticity)
– Overload the rack (blocks water access to crevices)
– Skip pre-rinsing (dried debris fuses to surfaces)
Quick Stuck Lid & Leak Troubleshooting
Lid won’t budge: Hot water soak → check alignment arrows → apply oil → lift latches with knife
Leaks during blending: Inspect gasket placement → test for cracks → verify lid alignment → clean locking mechanisms
Cloudy lid won’t clear: Baking soda paste → vinegar soak → Magic Eraser → replace if damaged
Persistent garlic smell: Lemon-baking soda blend → vinegar overnight soak → sun-dry for 3 hours
Daily Lid Maintenance That Saves Money
Your Ninja lid works as hard as the motor—treat it right with this simple routine:
– Morning: Rinse immediately after each use (30 seconds)
– Weekly: Deep clean all components (10 minutes)
– Monthly: Inspect gasket and treat stains (15 minutes)
– Immediately: Address sticking or odors before they worsen
Spending five minutes daily on proper lid care prevents costly replacements and ensures every blend tastes fresh—not like yesterday’s leftovers. With these techniques, your Ninja blender lid will deliver leak-proof performance for years, keeping bacteria at bay and your morning routine smooth.


