
That stubborn film clinging to your blender jar after a spinach smoothie? It’s not just gross—it’s actively ruining your next meal’s flavor while breeding bacteria in hidden crevices. Knowing how to clean a blender properly transforms a dreaded chore into a 30-second habit, preventing stained plastic, funky odors, and motor-killing gunk. Skip the finger-slicing scrubbing or dangerous dishwasher mistakes. Below, you’ll get the exact protocol used by commercial kitchens: a daily speed-clean that works on Vitamix, Ninja, and NutriBullet jars, plus deep-cleaning tricks for turmeric stains and peanut butter cement. Every step is verified safe for glass and plastic—no guesswork required.
Daily 30-Second Clean for Spotless Jars
Empty, Rinse, Fill Before Residue Dries
The critical window is immediately after pouring your smoothie. As soon as that last drop leaves the jar, act:
1. Empty all contents completely—no scraping needed.
2. Rinse once under warm running water to flush loose bits (this prevents dried-on “food cement”).
3. Fill halfway with hot tap water (use near-boiling water from a kettle for nut butters or hummus).
Pro Tip: If you can’t clean it right away, at least rinse the jar and lid. Dried residue takes 10x longer to remove later. Look for cloudy film forming near the blade—that’s your deadline.
Soap & Spin Without Touching Blades
- Add exactly 1–2 drops of mild dish soap (more creates un-rinsable suds).
- Secure the lid tightly—leaks happen if threads aren’t fully aligned.
- Blend on high for 30 seconds (use “pulse” for 15-second bursts if no “clean” preset).
- Pour out the gray foam—this carries away 95% of residue.
- Rinse jar, lid, and gasket under running water until water runs clear (check for soap film in the gasket groove).
- Air-dry upside-down on a rack—never towel-dry interior surfaces.
Why this works: The blades circulate soapy water into every crevice, including under the blade assembly. Plastic jars show immediate clarity; glass jars gleam without streaks. Done correctly, you’ll never see dried berry stains again.
Deep-Clean Weekly to Erase Stubborn Stains

Vinegar Power Wash for Mold & Mineral Film
Blend ¾ cup white vinegar + ¼ cup warm water for 30 seconds. Vinegar’s acetic acid dissolves:
– Mineral deposits from hard water (white chalky film)
– Invisible mold spores in gasket grooves
– Protein buildup from dairy or nut milks
Visual cue: If water runs cloudy after rinsing, repeat with full-strength vinegar. Rinse until no vinegar smell lingers—this takes 2-3 flushes.
Baking Soda Scrub for Cloudy Plastic Jars
For jars stained orange by turmeric or blue by berries:
1. Blend ¼ cup baking soda + ¼ cup warm water for 30 seconds.
2. Scrub gently with a soft sponge only if a hazy film remains (baking soda is mildly abrasive).
3. Rinse thoroughly—baking soda residue attracts dust.
Critical note: Plastic jars get cloudy from micro-scratches (caused by flax seeds or ice). This won’t restore crystal clarity but prevents worsening stains. Accept minor cloudiness—it doesn’t affect performance.
Lemon Bomb for Pigment Stains in Plastic
For severe turmeric or beetroot stains:
1. Squeeze 1 lemon into the jar (add spent rinds).
2. Add 2 Tbsp baking soda + 1 cup water.
3. Blend 30 seconds, then let fizz sit 5 minutes (the reaction lifts deep pigment).
4. Rinse completely—citric acid can degrade plastic if left overnight.
Works on: Vitamix S30 cups, NutriBullet cups, and other BPA-free plastic. Never use on glass—acid can etch surfaces.
Fix Lingering Odors Without Bleach

Garlic & Fish Smell Neutralizer
Blend ½ lemon + ½ cup water for 30 seconds immediately after rinsing. The citric acid breaks down sulfur compounds causing:
– “Fishy” smells from chia seeds
– Pungent garlic/hummus residue
– Rancid nut butter odors
When to repeat: If odor persists, run a second cycle with vinegar. Never mix vinegar and lemon—they cancel each other’s deodorizing power.
Gasket Groove Mold Removal
Odors often hide in the rubber seal:
1. Remove the gasket (if your model allows—check manual).
2. Soak in 1:1 vinegar/water solution for 10 minutes.
3. Scrub with an old toothbrush—focus on the inner groove where black specks form.
4. Air-dry completely before reassembling (damp gaskets breed mold fast).
Warning: If mold is visible, replace the gasket—it’s porous and can’t be fully sanitized.
Blade & Jar Manual Care Without Cuts
Fixed vs Removable Blade Safety Protocol
- Fixed blades (KitchenAid, Blendtec): Never insert tools. If residue remains after self-clean, repeat with hotter water + baking soda.
- Removable blades (Most Ninja, NutriBullet):
1. Place jar upside-down on a towel (blades are razor-sharp).
2. Unscrew base counterclockwise—use pliers if stuck (wrap in cloth).
3. Soak blades in warm soapy water 5 minutes.
4. Scrub crevices with a bottle brush (never fingers!).
5. Dry completely with microfiber cloth before reassembly.
Key visual: Check for greenish gunk where blade meets shaft—this causes metallic smells.
Safe Scrubbing for Tall Jars
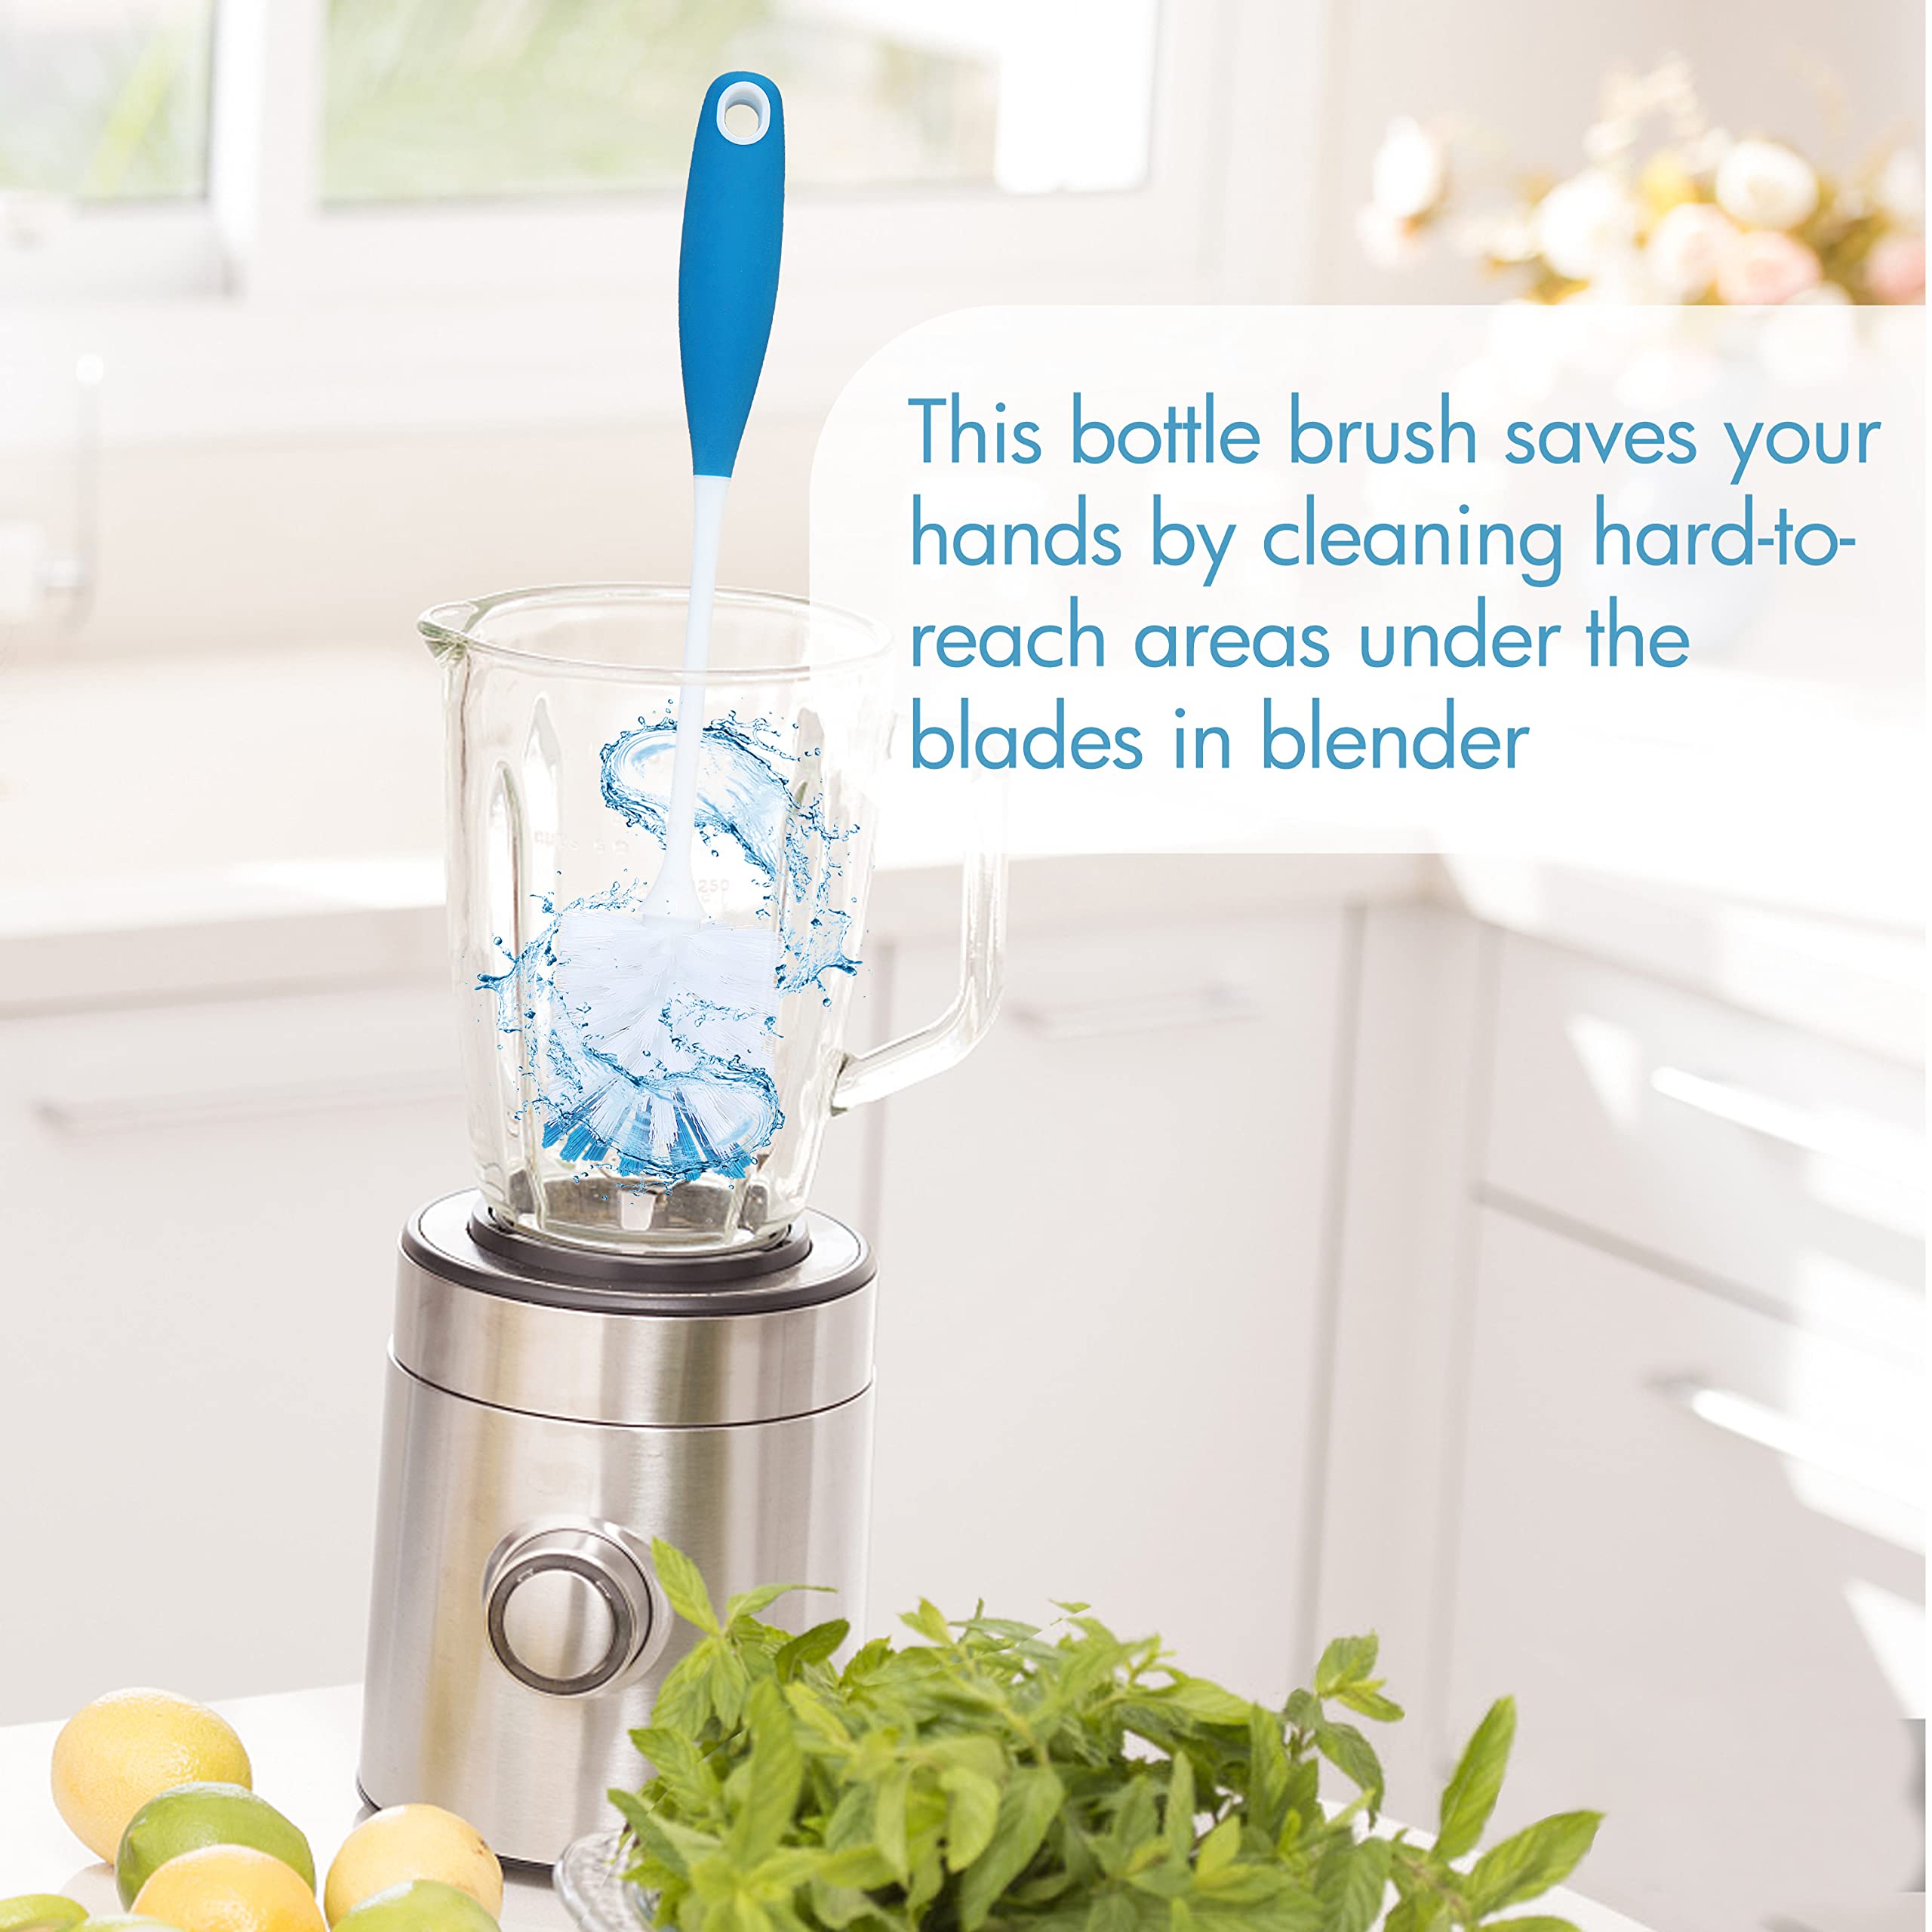
Use a long-handled bottle brush (not a sponge) for jars over 6″ deep:
– Focus on the “splash zone” 1-2″ below the rim where residue pools.
– Never use steel wool—it scratches plastic, creating stain traps.
– For glass jars, a nylon dish brush removes dried seeds safely.
Pro move: Dip brush in baking soda paste for stubborn spots—abrasive enough to clean, gentle enough to avoid scratches.
Base Cleaning That Won’t Kill Your Motor
10-Second Wipe-Down Routine
- Unplug immediately—water + electricity = fried motor.
- Wipe buttons and vents with a barely damp cloth (wring until no drips form).
- Scrub crevices with a dry toothbrush to dislodge food bits.
- Dry instantly with microfiber—moisture in vents causes short circuits.
Never: Submerge base, use spray cleaners near vents, or wipe while plugged in. One drop in the motor housing can cost $100+ in repairs.
Dishwasher Truths: What Really Breaks
Safe Parts Checklist
- ✅ Jars & lids: Top-rack only for KitchenAid, Vitamix, Ninja (check manual for dishwasher-safe symbol:
).
- ⚠️ Blades: Only if labeled “dishwasher-safe”—hand-washing preserves sharpness.
- ❌ Gaskets: Dishwasher heat warps rubber in 3-5 cycles. Hand-wash extends life 2+ years.
- ❌ Base unit: Never dishwasher-safe—wiping is the only option.
Why Dishwashers Backfire
- Heat bakes residue onto plastic, creating permanent stains.
- Long cycles delay reuse—your post-workout smoothie waits 90 minutes.
- Detergent residue affects taste in next blend (rinses poorly in blender geometry).
Exception: Run jars/lids through only if you missed the daily clean window and have dried-on gunk.
Troubleshoot Dirty Blender After Cleaning
| Problem You See | Why It Happens | Fix in <2 Minutes |
|---|---|---|
| Cloudy plastic near base | Micro-scratches from flax/chia seeds | Weekly vinegar cycle—accept cosmetic change |
| Garlic smell after rinsing | Oil trapped in gasket | Remove gasket, soak in lemon water, scrub groove |
| Nut butter stuck under blade | Dried residue blocked water flow | Repeat self-clean with boiling water + 1 ice cube (abrasive action) |
| Metallic odor | Food bits corroding blade shaft | Soak removable blade in vinegar 10 mins, dry fully |
Safety Must-Dos Before You Start
- Unplug before touching blades—even “off” blenders can activate if jar is misaligned.
- Dry all parts before reassembly—damp gaskets cause mold in 24 hours.
- Never submerge the base—water in vents is irreparable damage.
- Check your manual for model-specific warnings (e.g., Vitamix Ascent jars require hand-washing).
That daily 30-second clean isn’t just convenient—it’s the difference between a blender that lasts 10 years versus one ruined by moldy gaskets in 6 months. Stick to this routine, and your morning smoothie will always taste fresh, never faintly of last night’s curry. For heavy-duty jobs, the vinegar-lemon-baking soda triad erases stains without harsh chemicals. Now unplug that base, grab your bottle brush, and give your blender the 5-minute TLC it deserves. Your next blend—and your health—will thank you.


