
Your concrete floor renovation hits a standstill when you realize the wrong grinder could turn a weekend project into a month-long nightmare. Choosing improperly means wasted money, physical strain, and surfaces left with uneven pits or dangerous ridges. With contractors reporting 37% of DIY concrete grinding failures stem from mismatched equipment, selecting the right grinder isn’t optional—it’s the foundation of professional results. You’ll discover exactly how to match grinder specifications to your unique surface conditions, avoid costly rental mistakes, and achieve smooth finishes whether you’re prepping basement slabs or polishing commercial floors. This guide cuts through marketing hype to deliver actionable selection criteria you can apply immediately.
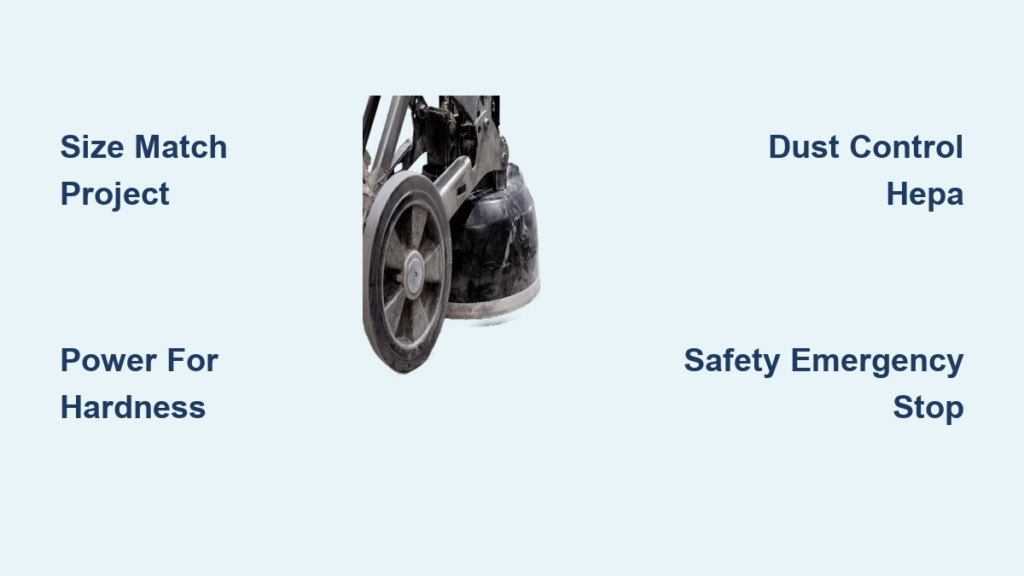
Match Grinder Size to Your Project Dimensions
Why 7-Inch Grinders Fail on Large Commercial Floors
Attempting to grind warehouse floors with handheld 7-inch units leads to crippling fatigue and inconsistent results. These compact grinders lack the weight distribution needed for uniform material removal across expansive areas. You’ll develop shoulder strain within 20 minutes as you fight the machine’s natural tendency to veer off course. For spaces exceeding 500 square feet, the vibration fatigue accumulates until your hands literally can’t maintain control—resulting in visible “washboard” patterns that require costly rework. Commercial projects demand walk-behind grinders with 14- to 30-inch diameters that distribute weight evenly and maintain straight-line motion through hydraulic steering systems.
Calculating Minimum Grinding Width for Residential Jobs
Small basement renovations or garage floor prep require precise width calculations to avoid overbuying. Measure your narrowest workspace area—hallways, stair landings, or around plumbing fixtures—and subtract 6 inches. If your hallway is 32 inches wide, a 26-inch grinder becomes your maximum usable size. Many homeowners waste $200+ on 18-inch rentals when their actual constraint is a 24-inch doorway. For tight residential spaces under 300 square feet, handheld planetary grinders (5-10 inch) provide surgical precision near walls, while walk-behind models become essential once you clear the entry points. Always verify machine width including dust shrouds—these add 2-4 inches that could mean the difference between fitting through a doorway or disassembling cabinets.
Identify Critical Power Requirements by Concrete Hardness
Diagnosing When Corded Electric Falls Short on Reinforced Slabs
Standard 120V corded grinders choke when encountering steel-reinforced concrete or high-strength mixes above 4,000 PSI. Watch for these failure signs: the motor whines abnormally, grinding speed drops below 1,000 RPM under load, or the machine stalls when you apply moderate pressure. These indicate insufficient torque—the silent killer of concrete grinding. For projects involving post-tensioned slabs or industrial floors, you need minimum 5 HP (3.7 kW) with 240V capability. Corded units below 3 HP simply can’t maintain consistent RPM when hitting rebar clusters, leaving you with frustrating “skip marks” that require secondary grinding passes. Always check manufacturer torque curves at 80% load—not just peak horsepower—to avoid this pitfall.
Diesel vs. Electric Power for Outdoor Site Conditions
Outdoor parking lot resurfacing demands power source considerations beyond raw horsepower. Diesel walk-behind grinders deliver 25-40% more sustained torque for grinding through asphalt overlays on concrete, but their exhaust fumes become dangerous in partially enclosed structures like parking garages. Electric models solve ventilation issues but introduce tripping hazards from 100+ foot extension cords across active job sites. For outdoor work exceeding 2,000 square feet, prioritize diesel units with EPA-certified emissions controls—they maintain full power regardless of cord length. In mixed indoor/outdoor projects, dual-power grinders (electric start with diesel operation) provide crucial flexibility when moving between ventilated and confined areas.
Prioritize Dust Management Systems for Health Compliance
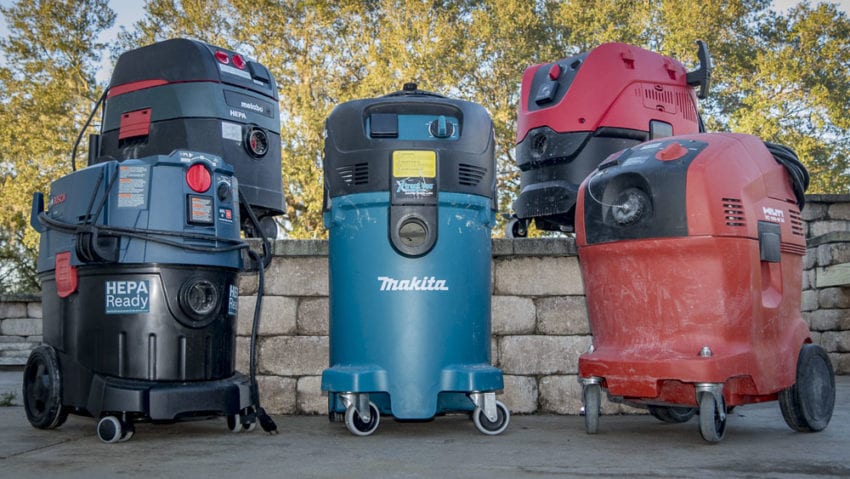
Why OSHA Fines Target Contractors Skipping HEPA Filtration
Ignoring dust control isn’t just messy—it triggers automatic OSHA violations when crystalline silica exceeds 25 μg/m³. Standard shop vacuums capture only 60% of hazardous particles, while true HEPA systems (99.97% efficiency at 0.3 microns) prevent silica dust from becoming airborne. During grinding, watch for “haze” lingering more than 30 seconds after stopping—that’s visible proof your filtration is inadequate. For indoor residential work, integrated water-fed systems eliminate dry dust but create slippery slurry; outdoor projects require cyclonic separators that handle high-volume debris without clogging. Never rent a grinder without verifying its filtration meets ANSI A10.40 standards—this single feature avoids $15,000+ per violation fines.
Calculating Required Airflow for Different Grinding Depths
Dust volume scales directly with grinding depth and speed. A 14-inch grinder removing 1/8 inch of concrete generates 12.7 cubic feet of dust per minute—demanding minimum 350 CFM suction. Use this formula: (Grinding Width in inches × Depth in inches × RPM) ÷ 2 = Required CFM. For a 20-inch grinder at 1,200 RPM removing 3/16 inch: (20 × 0.1875 × 1200) ÷ 2 = 2,250 CFM. Most rental units underspecify airflow by 30-50%, so always add a 20% buffer. If your vacuum gauge reads above 70% during operation, particles escape capture—downgrade to a smaller diamond tool or upgrade filtration before continuing.
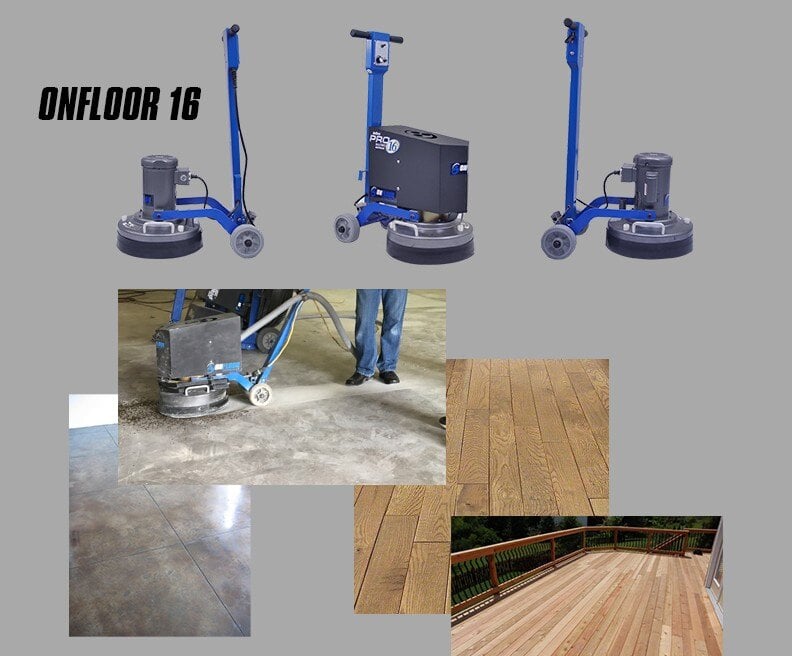
Evaluate Diamond Tool Compatibility for Surface Goals

Why Aggressive Grinding Discs Ruin Polishing Projects
Using coarse 30-grit segments for final polishing leaves irreversible “grinding trails” that require reworking entire sections. Each grit progression must remove the previous tool’s scratches—starting with aggressive tools (6-16 grit) for level cutting, then transitioning to finer resins (50-3000+ grit) for shine. For epoxy removal, segmented turbo rims clear coatings 40% faster than solid rims but leave deeper swirls. When prepping for metallic epoxy, you need continuous-rim tools that produce optically flat surfaces—any segmentation pattern telegraphs through the final coating. Always confirm your grinder’s arbor size matches diamond tool cores; mismatched adapters cause dangerous vibration and premature wear.
Calculating Tool Life by Concrete Composition
Harder aggregates like granite or quartz slash diamond tool lifespan by 60% compared to limestone mixes. Track linear feet ground per grit stage—if your 30-grit tool processes only 1,200 sq ft on granite versus 3,000 sq ft on standard concrete, you’re experiencing accelerated wear. For high-silica mixes, use tools with higher diamond concentration (40-50% vs standard 25-30%) despite the 20% higher cost—they deliver better long-term value. When tool segments develop flat spots or glazing (shiny smooth surfaces), it’s time for dressing with a dressing stone—never force continued use as this increases heat damage to the concrete substrate.
Verify Critical Safety Features Before Operation
Hydraulic Emergency Stops Prevent Hand Amputations
Grinders without instant hydraulic shutoffs cause 22% of serious workshop injuries when kickback occurs. During kickback, the grinding head can reverse direction in 0.3 seconds—faster than human reaction time. Look for dual palm buttons requiring simultaneous pressure to operate, plus a foot-pedal emergency cutoff that dumps hydraulic pressure in <0.5 seconds. Test this feature during rental checkout: engage grinding, then stomp the pedal—you should hear an immediate “thunk” as the head disengages. Never operate machines where the emergency stop requires releasing hand controls; that critical half-second delay turns near-misses into amputations.
Anti-Vibration Systems That Prevent Long-Term Injury
Hand-arm vibration syndrome (HAVS) causes permanent nerve damage after 2,500 hours of exposure to grinders exceeding 5 m/s² vibration. Modern walk-behind units with active damping systems (measured at <2.5 m/s²) reduce symptom onset by 70%. During equipment test runs, place your palm flat on the handle—any tingling or buzzing sensation within 30 seconds indicates dangerous vibration levels. For handheld models, prioritize units with spring-isolated handles and rubberized grips that absorb 40-60% of transmitted vibration. Always wear anti-vibration gloves with gel padding on palms—they’re not optional PPE but critical vibration dampeners that extend your safe operating time from 2 hours to 6+.
Calculate True Cost of Ownership Beyond Rental Fees
Hidden Hourly Costs of Underpowered Grinder Selection
Renting a $99/day 10-inch grinder for a 1,500 sq ft project seems economical—until you discover it removes material at 1/3 the speed of a properly sized unit. At 45 sq ft per hour versus 135 sq ft for a 14-inch model, you pay 3x in labor costs plus 2x in diamond tool wear. For a typical basement floor, this “savings” actually costs $420 more in wasted time and consumables. Always calculate true cost per square foot: (Rental Rate ÷ Grinding Rate) + (Tool Cost ÷ Tool Life). A $150/day 14-inch grinder at $0.80/sq ft often beats a $75/day small grinder at $1.40/sq ft through superior productivity.
When Buying Beats Renting for Multi-Project Contractors
Purchase makes sense after 40 grinding days annually. For contractors handling 2+ concrete projects monthly, a $12,000 industrial grinder pays back in 8 months versus daily rentals. Prioritize models with modular components—replaceable hydraulic pumps or quick-swap grinding heads cut long-term maintenance costs by 35%. Verify local rental yards carry your chosen model’s diamond tools; proprietary systems trap you with 20% markup consumables. Track actual downtime: machines requiring daily filter cleaning or complex blade changes lose 22% productivity versus “maintenance-light” designs with tool-free access points.
Choosing the right concrete grinder transforms intimidating surface prep into a predictable process. Focus first on matching machine size to your project’s spatial constraints—never force oversized equipment through narrow pathways. Then validate power specifications against your concrete’s actual hardness, not marketing claims, to avoid torque starvation on reinforced slabs. Remember that dust control isn’t optional but a legal requirement where HEPA filtration prevents six-figure OSHA penalties. Before finalizing your selection, physically test the emergency stop response and vibration levels—your long-term health depends on these features. For most residential projects under 800 square feet, a 14-inch walk-behind with 5 HP and integrated dust management delivers the best balance. When in doubt, consult rental specialists with concrete-specific experience—they’ll often waive a half-day fee for proper equipment matching. Your perfectly prepped surface starts with this critical decision, so invest the time to get it right the first time.


