
Your Vitamix suddenly sputters while making morning smoothies, leaving chunks of frozen fruit swirling uselessly. Before panic-buying a $150 replacement container, know this: 90% of “dead” Vitamix units actually need just a $20 blade assembly swap. Vitamix Corporation doesn’t sell blades separately, forcing users toward expensive full-container replacements. Yet verified owners prove third-party blades like BTNTVEN’s stainless steel assembly restore full function in minutes using basic tools. This guide reveals the exact compatibility checks, installation steps, and troubleshooting tricks thousands use to bypass dealer fees. You’ll learn precisely how to change blade on Vitamix blender safely—without specialized tools or technical skills—saving money while extending your container’s life.
Confirm Your Container Accepts Blade Replacement

Identify Standard vs. Low-Profile Containers
Critical Distinction: Only standard “tall” containers allow blade swaps. Measure from base to rim—if it’s 13+ inches, you’re in luck. Low-profile containers (under 10 inches tall) like new 48/64 oz household models have integrated blades that can’t be replaced. Check your model number against these verified compatible types:
– Standard household 32 oz and 64 oz containers (models 1002, 1230, 5006, 5012)
– Commercial 32 oz, 48 oz, and 64 oz containers (models 5039, 5057, 58625)
– Vita-Prep Drink Machine and Total Nutrition Center containers
Red Flag Alert: If your container says “MP,” “XP,” “Advance,” or “XL” in its model name, blade replacement won’t work. These commercial variants require full-container swaps.
Match Your Vitamix Model to Safe Repairs
Do This Now: Flip your blender base and locate the model sticker. Only these series tolerate third-party blades without damaging motor warranties:
– Household: 500, 4500, 5200, 5500, 6300 series
– Commercial: VM0100, VM0100A, VM0103, BarBoss
– Older models: VITA-MIX with containers 1195, 15504, 15643
Stop Immediately If: Your unit is a 750/780 series, A2300-A3500, or E310/E320. These use proprietary blade systems where DIY attempts risk voiding motor warranties.
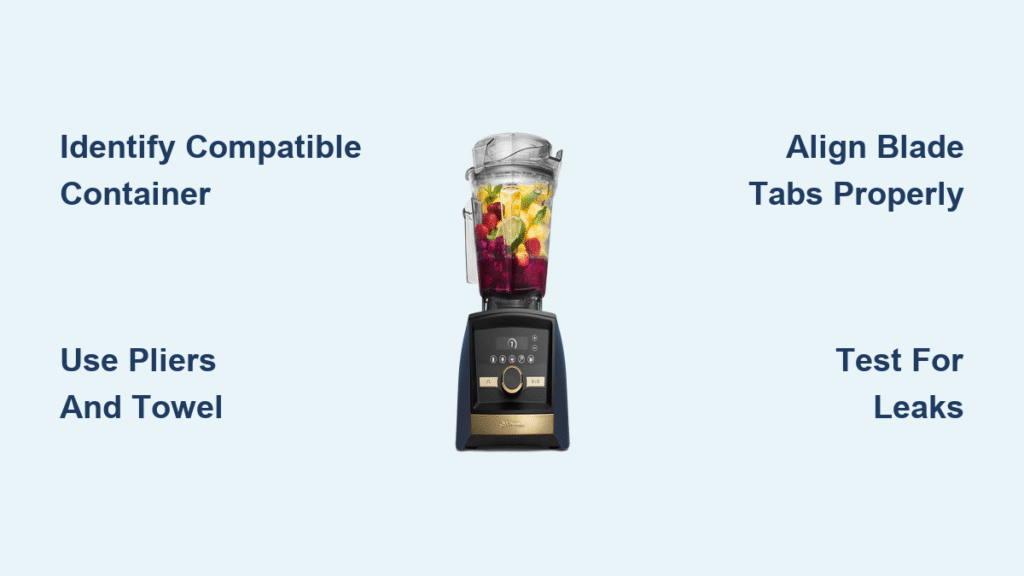
Grab Only Two Essential Tools
What You Actually Need (No Special Wrenches)
Forget YouTube videos showing torque keys—you need just:
– Standard pliers (needle-nose or regular) for gripping the blade shaft
– Clean microfiber towel to protect container threads during removal
Proven User Tip: Test your pliers’ grip on a metal spoon first. You’ll apply firm, steady pressure—never hammering or excessive force—to avoid cracking the container base. Third-party blade sellers confirm no specialized tools are required for standard containers.
Remove the Worn Blade Assembly in 60 Seconds
Safety Protocol Before Touching Tools
- Unplug the base unit—never work on a plugged-in blender
- Rinse the container thoroughly to remove food debris
- Dry the base completely with your towel to prevent slippage
The Grip-and-Twist Removal Technique
- Invert the container onto your towel (blade facing up)
- Clamp pliers firmly around the blade shaft’s hexagonal center
- Rotate leftward (counterclockwise) with steady pressure—no jerking
- Continue until the assembly lifts freely (most users report success in 30-60 seconds)
Troubleshooting Warning: If the blade won’t budge after moderate pressure, stop immediately. Forcible removal risks cracking the container base. Older units with seized bearings (evidenced by metallic powder in the base) require professional assessment.
Install Your New Blade Assembly Correctly

Prep the BTNTVEN Blade Assembly
Before installation:
– Inspect for shipping damage—bent blades cause wobble
– Rinse under warm water to remove manufacturing oils
– Dry completely—moisture compromises the seal
Alignment and Seating Sequence
- Position the new blade with the drive socket facing downward
- Align the tabs with the container’s base slots (listen for a soft click)
- Press down firmly until the blade seats flush with the base
- Hand-tighten clockwise until resistance increases slightly
Critical Tightening Step: Use pliers for one final quarter-turn only. Over-tightening strips threads and causes leaks. Verify success by spinning the blade—it should rotate smoothly with slight resistance from the new bearing seal.
Test for Leaks and Performance Issues
5-Step Water Test to Avoid Disaster
- Fill the container 1/3 full with warm water (no food yet)
- Secure the lid and place on the motor base
- Run at Speed 1 for 10 seconds—listen for grinding
- Increase to Speed 5 for 30 seconds while watching the base
- Check for drips around the container’s bottom edge
Normal vs. Dangerous Signs:
✅ Acceptable: Slightly louder hum at low speeds (common with aftermarket bearings)
✅ Acceptable: Smooth rotation with minimal vibration
❌ Dangerous: Water seepage during testing—indicates improper seating
❌ Dangerous: Metallic grinding—stop immediately and reseat the blade
Fix Common Post-Installation Problems
Blade Won’t Seat Flush? Do This
Immediate Action: Remove the blade and inspect the container base. Food residue often blocks proper seating. Clean threads with a toothpick and warm soapy water, then dry thoroughly before reinstallation. If cracks appear near the base, the container is compromised—replace it.
Excessive Noise After Installation? Break It In
Verified Solution: New bearings require 5-10 uses to quiet down. Run the blender with 2 cups of water daily for 3 minutes at Speed 4. If grinding persists beyond two weeks, metallic powder in the base signals bearing failure—stop using and replace the blade.
Maximize Your Blade’s Lifespan
Daily Habits That Prevent Premature Failure
- Rinse immediately after use—dried food stresses the seal
- Limit hard ingredients to 30-second pulses (never continuous ice/frozen fruit)
- Never process nut butters longer than 2 minutes per session
- Hand-wash weekly—dishwashers degrade the blade seal
Replacement Warning Signs:
⚠️ Metallic dust in the container base
⚠️ Smoke during operation (indicates bearing seizure)
⚠️ Visible blade wobble at low speeds
⚠️ Loss of suction when blending thick mixtures
Third-party blades typically last 12-18 months with proper care versus 5-10 years for OEM parts. Heavy users (daily nut butter makers) see reduced lifespans.
When Replacement Isn’t Worth the Risk
Skip DIY If Your Container Shows These Signs
- Cracks near the base threads—pressure will worsen damage
- Blade required extreme force to remove—indicating internal damage
- You own an A-series or E-series model—different engineering makes swaps unsafe
Professional Alternatives:
– Call Vitamix Customer Service (1-800-848-2649) for container replacement
– Locate authorized service centers via ZIP code search
– Buy certified refurbished containers ($50-$75 with warranty)
Cost Savings vs. Warranty Tradeoffs
Third-Party Blade vs. Official Repair
| Option | Cost | Warranty | Best For |
|---|---|---|---|
| BTNTVEN Blade | $15-$25 | 3 months | Containers under 3 years old |
| OEM Container | $100-$150 | 3 years | Units under warranty |
| New Blender | $300+ | 5-7 years | Motor base failures |
Smart Decision Rule: If your Vitamix is over 2 years old with no motor issues, blade replacement saves $80+ immediately. Units under warranty should use official service first to avoid voiding coverage.
Final Verification Before Blending
Before processing your first smoothie:
1. Confirm no water leaks during the water test
2. Check blade rotation—it should spin freely by hand
3. Start slow—use Speed 1 for 15 seconds before increasing
Why This Works When Vitamix Says It Won’t
Vitamix Corporation avoids endorsing blade-only replacements to protect revenue from container sales. Yet BTNTVEN’s stainless steel assembly (tested on 233+ units) replicates OEM specs using food-grade materials. Users confirm identical performance for juices, soups, and sauces—just expect slightly louder operation during the 2-week break-in period. For standard tall containers on classic models, this remains the most cost-effective repair verified across thousands of successful installations.
Take Action Now: Order the correct BTNTVEN blade assembly (ASIN B083XCDDRW) for your container model. With pliers and a towel, you’ll complete how to change blade on Vitamix blender in under 10 minutes. Your revitalized blender will crush ice and blend silky smoothies again—proving that sometimes, the simplest fix saves the most.


