
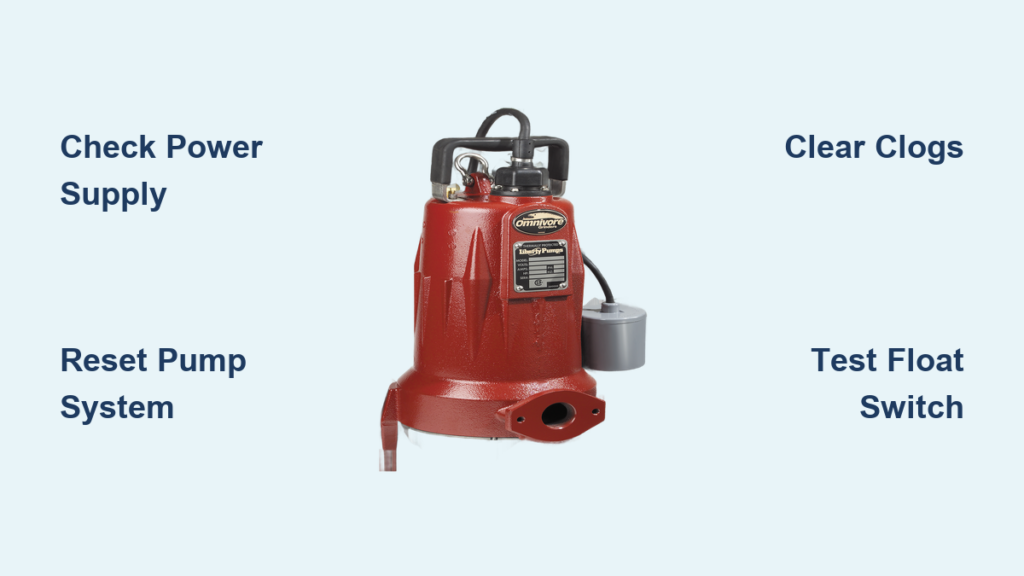
When your grinder pump stops working, wastewater can quickly back up into your home, creating a serious health hazard and potential property damage. A malfunctioning grinder pump means your entire sewage disposal system grinds to a halt—literally. You might notice slow-draining sinks, toilets that won’t flush properly, or that unmistakable sewage odor creeping through your home. These aren’t just inconvenient—they’re urgent warning signs that demand immediate attention before a minor issue becomes a major disaster.
This comprehensive troubleshooting guide gives you the specific steps to diagnose why your grinder pump isn’t working and determine whether you can fix it yourself or need professional help. We’ll walk through the most common failure points, from simple power issues to mechanical breakdowns, so you can restore your wastewater system efficiently and avoid costly emergency repairs.
Power Supply Problems That Silence Your Grinder Pump
Your grinder pump needs consistent electricity to operate, and power disruptions account for nearly half of all “grinder pump not working” emergencies. Before you panic about mechanical failures, verify your pump is actually receiving power with these targeted troubleshooting steps.
First, locate your electrical panel and find the dedicated circuit breaker for your grinder pump. Many homeowners don’t realize their pump has its own dedicated circuit—typically a 15-20 amp double-pole breaker. If the breaker has tripped, firmly flip it to the “off” position before resetting it to “on.” If it trips again immediately, this indicates a serious electrical fault requiring professional diagnosis—do not keep resetting it as this could cause fire hazards.
Next, inspect the GFCI (Ground Fault Circuit Interrupter) outlets in your garage, basement, or near the pump chamber. These safety devices often power grinder pumps and can trip from moisture exposure or electrical surges. Press the “reset” button on any tripped GFCI outlets, which typically produce a distinct click when resetting properly. If the GFCI won’t stay reset, unplug any other devices on the same circuit before trying again.
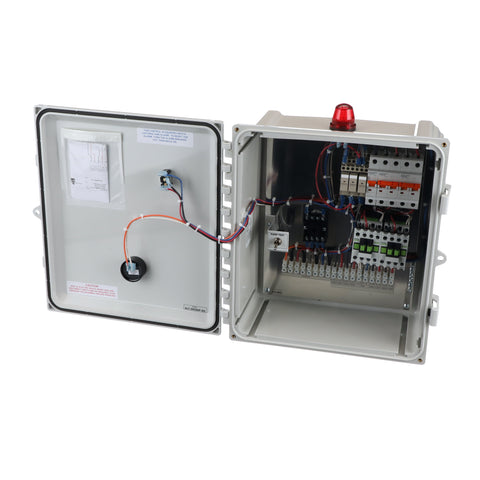
Finally, check the pump’s control panel for status lights. Most modern systems have indicator lights showing power status, alarm conditions, and operational modes. A completely dark panel usually means no power is reaching the system, while specific error codes can pinpoint the exact problem. Consult your pump’s manual for the meaning of different light patterns—many manufacturers use color-coded or blinking sequences to diagnose issues.
How to Reset Your Grinder Pump After a Fault Condition
Many “grinder pump not working” scenarios resolve with a simple reset procedure, but you must follow the correct sequence for your specific model to avoid causing further damage.
Locate your pump’s control panel, typically mounted near the access lid or in your garage. Open the cover carefully—older models may have accumulated moisture inside. Look for a red reset button, usually labeled clearly on the control board. Press and hold this button for 10-15 seconds while listening for the pump to restart. You should hear the motor engage and the grinding mechanism activate briefly as it processes any accumulated waste.
If your system lacks a visible reset button, perform a hard reset by turning off the circuit breaker for 5 full minutes. This allows the control system’s memory to clear and resets any temporary fault conditions. After waiting, restore power and monitor the system for 10-15 minutes to ensure normal operation—your pump should cycle on when wastewater reaches the proper level and shut off when the chamber empties.
Critical warning: If the pump fails to restart after resetting, or if it starts but immediately stops with a grinding noise, stop attempting resets. Repeated cycling can overheat the motor and cause permanent damage. This typically indicates a mechanical obstruction that requires professional clearing.
Clearing Clogs That Stop Your Grinder Pump from Functioning

Clogs represent the second most common reason for grinder pump failure after power issues. Unlike standard sump pumps, grinder pumps contain cutting mechanisms designed to shred solid waste—but they still have limitations on what they can process.
The most frequent clog culprits include “flushable” wipes (which don’t actually break down quickly enough), feminine hygiene products, excessive toilet paper, dental floss that tangles around impellers, and grease that solidifies in the chamber. Even small amounts of these materials can accumulate over time and eventually jam the grinding mechanism.
To safely clear a clog:
- Turn off power at the breaker before accessing the pump chamber
- Remove the access lid carefully, standing upwind to avoid sewer gases
- Use a flashlight to inspect the chamber—look for visible obstructions around the grinder blades
- With long-reach tools (never your hands!), attempt to remove any foreign objects
- Flush the chamber with a garden hose to dislodge softer blockages
- Reinstall the lid securely before restoring power
Pro tip: If you can hear the motor running but no water is moving, this usually means the impeller is spinning but not moving water—often due to a broken shear pin or damaged impeller vanes. These internal mechanical issues require professional repair.
Fixing Float Switch Problems That Prevent Pump Activation
Your grinder pump’s float switch acts as its “brain,” telling the pump when to turn on and off based on wastewater levels in the chamber. When this component fails, your pump might run continuously (causing motor burnout) or not run at all (leading to sewage backups).
Check for these common float switch failures:
- Stuck float: Debris or grease buildup prevents the float from rising and falling freely
- Tangled tether: The float’s cord gets wrapped around internal components
- Failed switch mechanism: Internal electrical contacts wear out after years of use
- Misaligned float: Physical damage causes improper activation levels
To diagnose float switch issues, manually lift the float while someone watches the control panel. The pump should activate when the float reaches its normal operating height. If it doesn’t respond, the switch likely needs replacement. Most modern grinder pumps use replaceable float assemblies that technicians can swap without removing the entire pump.
Recognizing Motor and Mechanical Failures That Require Replacement

When basic troubleshooting fails to restore operation, your grinder pump likely has internal mechanical or electrical failures that necessitate professional intervention or complete replacement.
Key indicators of serious mechanical failure include:
- Burning smell near the pump chamber (overheated motor windings)
- Unusual grinding or screeching noises (damaged bearings or impeller)
- Visible smoke or steam (severe electrical malfunction)
- Tripping breakers repeatedly even after clearing obstructions
- Complete silence when the pump should be running (failed motor)
Most grinder pump motors last 7-10 years with proper maintenance, but frequent cycling, poor ventilation, or voltage fluctuations can shorten their lifespan significantly. Repairing a failed motor often costs 60-80% of a new pump’s price, making replacement the more economical choice in most cases.
When to Immediately Call a Professional for Grinder Pump Repair
Certain grinder pump failures demand professional attention—you shouldn’t attempt DIY fixes when:
- Sewage has backed up into your home (immediate health hazard)
- You smell strong sewer gas inside your property
- The pump chamber shows visible cracks or damage
- Electrical components show signs of water damage
- You’ve attempted basic troubleshooting without success
- Your system is still under manufacturer warranty
Professional plumbers bring specialized equipment including waterproof cameras to inspect pump chambers, multimeters to diagnose electrical issues, and proper safety gear for working with sewage systems. They can also provide documentation for insurance claims if your failure resulted from a covered event.
Preventive Maintenance That Keeps Your Grinder Pump Working
Extend your grinder pump’s lifespan and avoid emergency failures with these proactive measures:
- Schedule annual professional inspections to clean the chamber and check components
- Educate household members about proper disposal practices—nothing but toilet paper belongs in toilets
- Install a battery backup system to maintain operation during power outages
- Keep the access area clear of debris, snow, and landscaping for emergency access
- Monitor usage patterns—unusually frequent cycling may indicate developing problems
The average cost of annual maintenance ($100-$200) pales in comparison to emergency repair bills ($500-$1,500+), making prevention your most cost-effective strategy.
Final Thoughts: Acting Fast When Your Grinder Pump Stops Working
A grinder pump not working isn’t just an inconvenience—it’s a potential health emergency that requires prompt action. Start with the simplest solutions: verify power supply, perform proper resets, and check for obvious obstructions. If these basic steps don’t restore function, don’t waste time on increasingly complex DIY attempts that could worsen the problem.
Remember that grinder pumps handle raw sewage, creating serious health risks from exposure to pathogens. When in doubt, call a professional plumber who has the proper equipment and safety training. For long-term reliability, consider upgrading to a newer model with advanced features like silent operation, improved grinding mechanisms, and smart monitoring capabilities when replacing a failed unit. By understanding these critical troubleshooting steps, you’ll minimize disruption and protect your home from the devastating consequences of a failed wastewater system.


