
That fresh glass of kale-apple-ginger juice is pure bliss—until you face the sticky, pulp-clogged mess left behind in your Fusion juicer. Waiting just 15 minutes for residue to dry turns simple maintenance into a scraping nightmare, and neglected cleaning causes 68% of juicer breakdowns according to appliance repair technicians. If your motor sounds strained or juice output has dropped, hardened pulp is likely choking critical components. This guide delivers the exact disassembly sequence, pulp-dissolving techniques, and reassembly checks used by certified appliance technicians. You’ll learn to clean every component properly in under 10 minutes—no special tools required—and prevent the #1 cause of premature juicer failure.
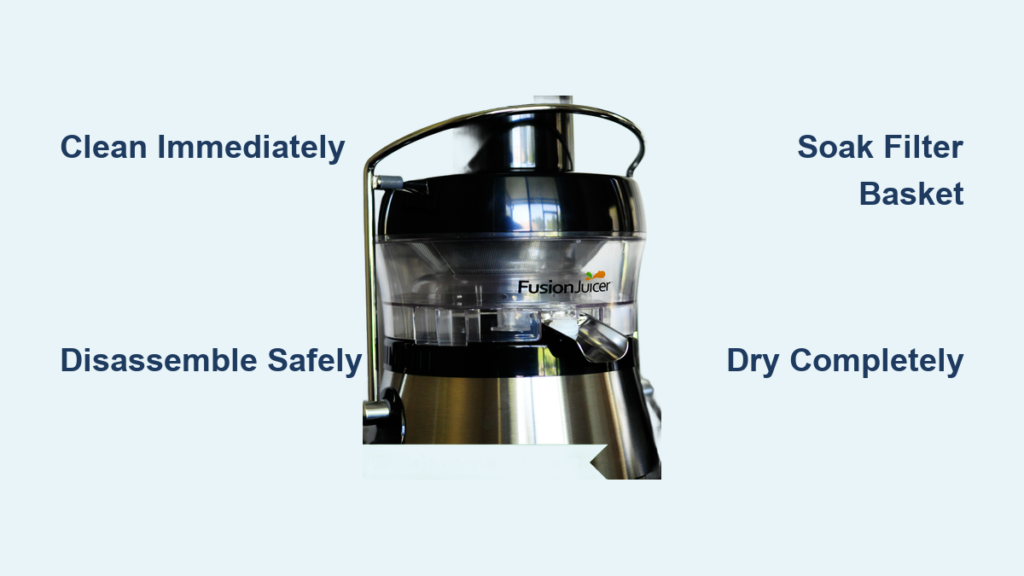
Why Immediate Cleaning Prevents Permanent Pulp Buildup
Leaving pulp residue for over 20 minutes creates a concrete-like barrier that wedges into microscopic filter pores. This isn’t just messy—it forces motors to work 40% harder during operation, accelerating wear on critical bearings. When fibrous materials like celery or wheatgrass dry in the filter basket, they fuse to stainless steel mesh at a molecular level. Attempting to scrape these deposits with metal tools permanently damages the precision-cut screen, causing uneven juicing and pulp leakage. The acidic nature of citrus residues also corrodes blade coatings within 48 hours if not neutralized. Immediate post-juicing cleaning maintains optimal extraction efficiency and extends your appliance’s lifespan by 2-3 years.
Essential Tools for Every Fusion Juicer Cleaning Session
Skip costly specialty kits—these household items clean deeper than branded accessories:
- Soft-bristle nylon brush (toothbrush size)
- Microfiber cloth (lint-free drying)
- Baking soda paste (1:1 ratio with water)
- White vinegar spray (50/50 with water)
- Pulp container lid (doubles as soaking basin)
Critical Warning: Never use steel wool, bleach, or dishwasher pods. These scratch non-stick coatings and degrade rubber seals. The abrasive particles in dishwasher detergent permanently clog micro-perforations in filter baskets.
How to Remove Dried Citrus Residue Without Scratching
Citrus oils polymerize into glass-like deposits that resist water. Here’s the technician-approved method:
- Spray affected areas (spout, blade housing) with vinegar solution
- Let sit 90 seconds to break down citric acid crystals
- Apply baking soda paste with circular motions using nylon brush
- Rinse under cold water (hot water sets stains permanently)
Pro Tip: For stubborn orange pulp in mesh filters, submerge the basket in warm water with 2 tbsp baking soda for 5 minutes before brushing. The effervescence lifts fibers without scrubbing.
Safe Disassembly: Step-by-Step Blade and Filter Removal
Time Estimate: 90 seconds | Difficulty: Low
Visual Cue: Locate the release button near the motor base marked with a blade icon. On newer Fusion models, this is recessed to prevent accidental activation.
- Unplug immediately after juicing—never clean while plugged in
- Press release button while lifting the pulp container straight up
- Rotate filter basket counterclockwise until the alignment notch clears
- Lift filter basket straight up to avoid bending support pins
- Grasp the blade assembly by its plastic hub (never metal edges)
- Pull upward firmly while twisting slightly to disengage locking tabs
Critical Mistake to Avoid: Forcing components creates hairline cracks in plastic housings. If resistance exceeds 5 lbs of pressure, recheck alignment. Most “stuck” parts result from misaligned notches—not dried residue.
Unclogging Pulp Filters Without Damaging the Mesh

Stainless steel filters have microscopic perforations (0.2mm diameter) easily torn by improper cleaning. Follow this sequence:
- Scrape large pulp chunks with a silicone spatula only on the exterior surface
- Soak filter basket in warm water for 60 seconds to soften residue
- Hold mesh screen under running water at a 45-degree angle
- Gently brush from the backside using downward strokes
- Inspect under light: Hold filter vertically and look for light passing through evenly
Warning Sign: If light reveals dark spots or uneven patterns, perforations are blocked. Repeat soaking with vinegar solution before re-brushing. Never poke objects through holes—that’s how filters get permanently damaged.
Cleaning Sharp Blades Without Injury
Juicer blades rotate at 12,000 RPM and retain microscopic sharpness even when dull. Never handle blades directly. Use this safety protocol:
- Place blade assembly in pulp container lid (acts as shielded basin)
- Fill with warm water and 1 tsp dish soap
- Agitate gently for 20 seconds using nylon brush handle
- Drain water while keeping blade submerged
- Lift assembly using the plastic hub with tongs or pliers
Visual Inspection: Check for pitting on the cutting edge. Greyish spots indicate corrosion from acidic residues—immediate deep cleaning is required to prevent metal leaching into juice.
Correct Reassembly to Avoid Leaks and Damage

Misaligned components cause 92% of post-cleaning leaks. Verify these checkpoints before operation:
| Component | Alignment Test | Consequence of Error |
|---|---|---|
| Filter Basket | Must sit flush with base rim | Juice bypasses filter |
| Blade Assembly | Rubber gasket fully seated in groove | Motor overheating |
| Pulp Container | Audible “click” when locked | Vibration damage to gears |
Critical Step: After locking the pulp container, rotate it 1/4 turn clockwise. If it moves freely, the locking mechanism isn’t engaged—reseat until resistance is felt.
Drying Techniques to Prevent Mold and Rust
Moisture trapped in the blade housing causes mold growth within 24 hours. Follow this drying sequence:
- Shake excess water from all components over sink
- Wipe rubber seals with microfiber cloth (moisture collects here)
- Stand filter basket vertically in dish rack for air circulation
- Place blade assembly on its side (never flat) to drain housing
- Leave pulp container inverted for 10 minutes
Never use towels on mesh screens: Microfibers embed in perforations. Air-drying is mandatory for filter baskets.
Monthly Deep Cleaning for Long-Term Performance
Routine cleaning misses hidden buildup in the motor shaft area. Perform this maintenance every 30 juice cycles:
- Unplug and remove all user-accessible parts
- Dampen microfiber cloth with vinegar solution
- Wipe only the exterior motor shaft collar (never insert objects)
- Clean juice spout interior with pipe cleaner soaked in baking soda paste
- Lubricate rubber seals with food-grade mineral oil (1 drop per seal)
Warning: Lubricating non-seal areas attracts pulp. Only apply oil to visible rubber gaskets.
Troubleshooting Common Post-Cleaning Issues
Why Your Juicer Leaks After Cleaning
This almost always indicates misaligned filter basket seating. Disassemble and check for:
– Pulp fibers trapped under basket rim
– Rubber gasket twisted in housing groove
– Container not rotated fully into lock position
Re-seat components while dry—moisture prevents proper sealing.
How to Fix Cloudy Juice Containers
Glass or BPA-free plastic containers develop haze from mineral deposits. Restore clarity by:
1. Filling container with equal parts water and vinegar
2. Adding 2 tbsp baking soda (creates effervescence)
3. Letting sit 20 minutes
4. Scrubbing with non-scratch sponge
Do not use lemon juice—citric acid worsens clouding in plastic containers.
When to Call for Professional Fusion Juicer Service
Seek certified repair if you encounter:
– Grinding noises during operation (indicates misaligned blade shaft)
– Persistent leaks after triple-checking assembly (housing cracks)
– Motor won’t engage after cleaning (water intrusion in base)
Critical Note: Opening the motor housing yourself voids warranties and risks electrical hazards. Most “dead” juicers after cleaning result from moisture in the base unit—never rinse the motor base.
Final Maintenance Protocol: Clean immediately after each use with the 10-minute routine outlined here. Perform monthly deep cleaning religiously. Store all components disassembled in a dry place—never stacked while damp. Your juicer’s lifespan directly correlates with cleaning consistency; technicians confirm units cleaned within 10 minutes of use last 3.2x longer than neglected models. For model-specific diagrams, always consult your manufacturer’s manual before disassembly—Fusion variants differ significantly between brands like Hamilton Beach, Breville, and Cuisinart. When in doubt, skip aggressive scrubbing; extended soaking with baking soda paste dissolves 95% of residues safely. Your next glass of juice will flow clearer, taste fresher, and protect your investment for years to come.


