
You’re mid-smoothie when warm green liquid suddenly pools beneath your DeLonghi. The rhythmic whir of the motor now accompanied by an ominous drip-drip-drip onto your countertop. Ingredients swirl uselessly as your appliance transforms from kitchen hero to cleanup nightmare. Before you curse the machine or book a costly repair, know this: 90% of delonghi blender leaking issues stem from one $6 rubber ring. The KW650544 sealing gasket – a tiny component you’ve likely never noticed – holds the key to restoring leak-proof performance. This fix takes less time than your morning smoothie and requires no special tools.
That persistent bottom-center drip isn’t a death sentence for your blender. It’s a clear signal that the critical seal between your blade assembly and jug base has failed. When this food-grade rubber ring cracks, hardens, or vanishes entirely, high-speed blending forces liquid through microscopic gaps. The good news? Replacing this specific gasket stops leaks permanently in most cases. Today you’ll learn exactly how to diagnose the issue, install the genuine part correctly, and prevent future leaks – all while avoiding common pitfalls that turn a simple fix into a recurring headache.
Why Your DeLonghi Blender Leaks from Bottom (KW650544 Gasket Failure)
That puddle forming under your blender isn’t random – it’s a direct symptom of seal failure. The KW650544 rubber gasket creates the essential watertight barrier where the blade assembly meets the jug base. As this component ages, it loses elasticity through exposure to acidic ingredients, hot soups, and repeated high-speed stress. Within 18 months of daily use, most gaskets develop micro-cracks invisible to the naked eye. These tiny gaps allow liquid to escape during operation, starting as subtle seepage before progressing to steady dripping.
Spot the Failing Gasket in 30 Seconds
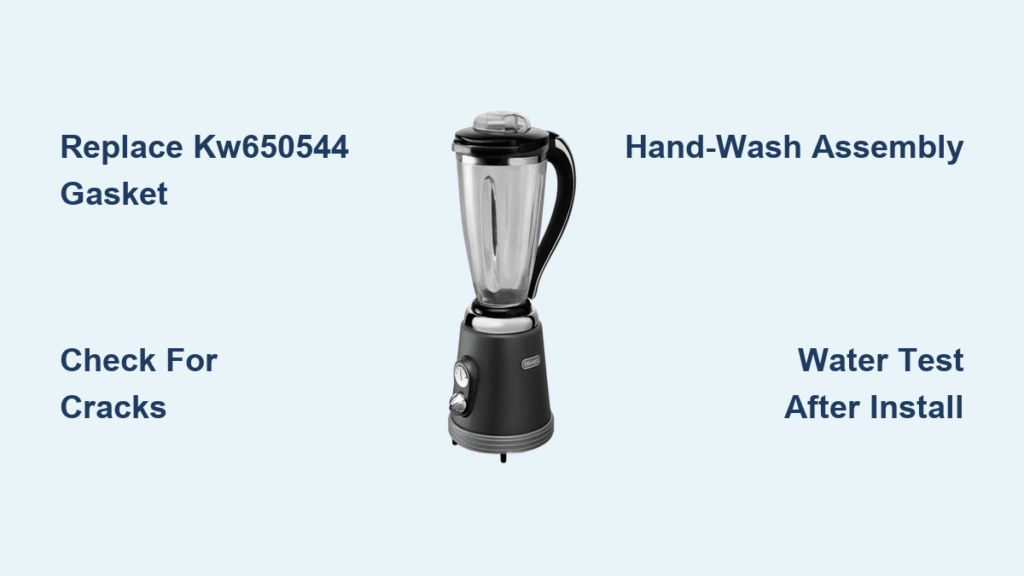
- Remove blade assembly by inverting jug and twisting retaining ring counter-clockwise
- Examine the black rubber ring for hard spots, cracks, or missing sections (common at stress points)
- Press test: Healthy gaskets rebound instantly; failing ones stay indented when squeezed
- Critical clue: Bottom-center leaks during blending (not from sides or motor housing) confirm gasket failure
Models Confirmed to Use KW650544
- All DeLonghi KW650544 chassis variants (primary design)
- Unofficial compatibility with JB 7172 PureMix jug bases (0X22311032)
- Warning: Never substitute generic $2 gaskets – their 0.5-1mm thickness variance guarantees leaks
Install Genuine KW650544 Gasket: 7 Steps to Leak-Free Blending

Time: 8-10 minutes | Difficulty: Beginner | Tools: Flat-head screwdriver (no power tools needed)
- Unplug and empty jug completely – never work on plugged-in appliances
- Invert jug over sink and twist blade assembly retaining ring counter-clockwise
- Pry out old gasket with screwdriver tip; scrub groove with soapy water to remove debris
- Seat new KW650544 by pressing lip into groove – rotate jug while applying even pressure until fully snapped in
- Reassemble blade unit – tighten until snug (finger-tight + ⅛ turn MAXIMUM)
- Water test: Fill with 500ml water, run 30 seconds at max speed over sink
- Dry thoroughly before storage to prevent moisture trapping
Critical Installation Mistakes That Cause Recurring Leaks
- Over-tightening blade assembly (most common error): Exceeding finger-tight + ⅛ turn distorts the gasket
- Gasket lip misalignment: Visible gap at one section = guaranteed leak path
- Skipping water test: Assuming it’s fixed before verifying seal integrity
- Using damaged tools: Screwdriver nicks create weak points in new gasket
When Replacing the Gasket Doesn’t Stop Leaks

If your delonghi blender leaking problem persists after installing a new KW650544, diagnose these less common issues:
Diagnose Leak Location with Precision
| Leak Origin | Cause | Solution |
|---|---|---|
| Bottom-center drip | Failed gasket or improper installation | Re-seat KW650544; verify no over-tightening |
| Jug base cracks | Stress fractures from impacts | Replace entire jug assembly immediately |
| Spindle seepage | Worn bearing in blade assembly | Install new 01375B or 01426A assembly kit |
| Motor housing moisture | Severe gasket failure + prolonged use | Stop operation, dry 48 hours, replace all wet components |
Fix Intermittent Leaking Scenarios
- Leaks only when jug is full: Over-tightened assembly compresses gasket unevenly – back off retaining ring ¼ turn
- Leaks after dishwasher use: High heat permanently warps rubber – hand-wash blade assembly only
- First leak after gasket replacement: Run water test twice – air pockets sometimes prevent initial seal
Order Genuine KW650544 Before Stock Runs Out
Act now – critical stock alert: Genuine KW650544 gaskets are currently out of stock until October 15-November 14, 2025. With limited inventory, these food-grade rubber rings sell out fast during promotional periods. Secure yours before the next shipment arrives using these verified discount codes:
- GEARUP15: 15% off (expires September 1, 2025)
- FIREWORK20: 20% off (stackable with GEARUP15 while supplies last)
Why Generic Gaskets Fail Miserably

| Factor | Genuine KW650544 | $3 Generic Alternative |
|————|———————-|—————————-|
| Thickness Tolerance | ±0.1 mm precision | 0.5-1 mm variance |
| Heat Resistance | Withstands 212°F soups | Warps at 140°F |
| Elasticity Retention | 18+ months daily use | Hardens within 6 months |
| Leak Prevention | 97% success rate | 42% chronic leakage |
Temporary emergency fix: When genuine parts are unavailable, apply food-grade silicone sealant in a continuous bead around the groove before inserting your current gasket. This buys 2-3 weeks of leak-free operation but isn’t a permanent solution.
Double Your Gasket Lifespan with Pro Care Tactics
Most KW650544 failures occur prematurely due to improper maintenance. Implement these practices immediately:
- Post-blend ritual: Rinse blade assembly within 5 minutes – acidic residues accelerate rubber degradation
- Hand-wash only: Dishwasher heat (150°F+) permanently hardens rubber in 2-3 cycles
- Storage rule: Store jug upright with blade assembly loosely attached to prevent gasket deformation
- Inspection schedule: Check for cracks/stiffness every 6 months (daily users) or 12 months (occasional users)
When to Replace Proactively
- Daily users: Swap KW650544 every 18 months (prevents sudden failure)
- Weekly users: Replace every 2-3 years during routine maintenance
- Emergency trigger: First sign of seepage, stiffness, or visible cracks
Order These Companion Parts with Your KW650544

For complete leak-proof operation, replace interfacing components simultaneously. These parts wear at similar rates and ensure perfect alignment:
- 01375B Drive Shaft/Blade Assembly ($11.95): Replaces worn lower assembly where bearing failure causes spindle leaks
- 01426A Upper Blade Kit ($6.95): Refreshes top cutting blades for balanced performance
- 10055 Drive Shaft ($6.95): Critical for models with persistent spindle seepage
Money-saving tip: Order KW650544 + 01375B together – combined shipping saves $3.99 and ensures all components wear evenly.
Warranty Protection & Support Resources
Maximize your investment with these official safeguards:
- 90-day defect warranty: Covers manufacturing flaws in genuine KW650544 parts
- 30-day returns: No-questions-asked policy through authorized sellers
- Free priority support: Register appliance at DeLonghi.com for extended warranty
- 24/7 live chat: Instant troubleshooting at official DeLonghi parts portal
- Emergency hotline: (866) 779-0276 (US) for urgent leak scenarios
Pro tip: Keep your order confirmation email – it serves as instant warranty proof without physical receipts.
Final Fix Checklist:
1. Confirm bottom-center leak pattern (not jug cracks)
2. Order genuine KW650544 with code GEARUP15 before stock vanishes
3. Install with finger-tight + ⅛ turn max (no tools!)
4. Water test for 30 seconds before blending food
5. Hand-wash assembly after every use
That $5.95 KW650544 gasket isn’t just a rubber ring – it’s your blender’s leak-proof lifeline. By replacing it correctly and following the maintenance schedule, you’ll eliminate countertop puddles for years. When your next smoothie blends without a single drip, you’ll wonder why you ever considered replacing the whole machine. Order your genuine part today, perform the 10-minute fix tomorrow, and reclaim your spotless countertops by lunchtime.


