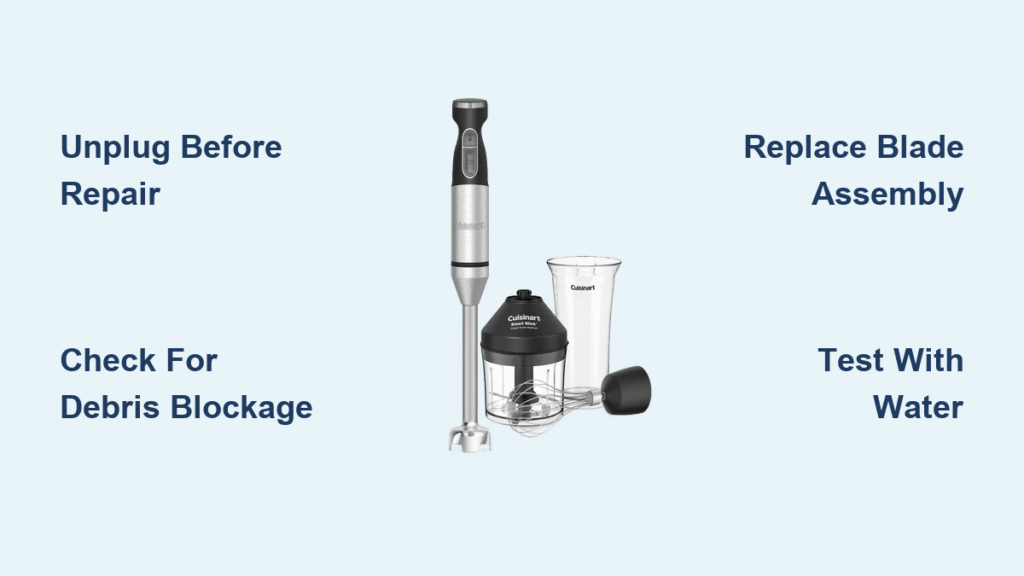
Your Cuisinart hand blender just stopped working mid-recipe—the motor hums but the blade won’t spin. This frustrating problem affects thousands of home cooks daily, often when you’re in the middle of making soup or smoothies. Before you toss your Smart Stick in the trash or order a replacement, know that most blade rotation failures can be diagnosed and fixed in under 30 minutes using basic tools and authorized parts. This guide delivers proven troubleshooting steps specifically for Cuisinart Smart Stick models CSB-76, CSB-77, and CSB-78 when blades refuse to turn.
You’ll learn to identify the exact failure point, safely disassemble your unit, and either repair or replace the faulty component—all while maintaining your warranty coverage. Most repairs require no special tools and can be completed with parts costing less than $15. Let’s restore your kitchen essential to full working order.
Immediate Safety Steps for Non-Spinning Blade Repair
Attempting repairs while your Cuisinart hand blender remains connected to power creates serious safety hazards. This single oversight causes most blender-related injuries and can damage internal components beyond repair. Before you touch any part of your malfunctioning unit, follow these critical safety protocols.
Power Disconnection Protocol
Immediately unplug your hand blender from the wall outlet or remove it from the charging dock. For cordless models, verify complete motor cessation through both visual and auditory confirmation before handling. Never rely solely on the power switch—always disconnect from the actual power source to eliminate electrical risks.
Safe Workspace Preparation
Choose a dry, well-lit table away from children and pets. Working surfaces must be thoroughly dried to prevent accidental slippage during repair operations. Position your work area near the edge of a stable surface—this prevents accidental drops while providing easy access to all sides of your hand blender. Always wear protective gloves throughout the entire repair process to prevent blade-related injuries from sharp edges.
Identify Why Your Cuisinart Blade Won’t Spin

When Cuisinart hand blender blades refuse to turn, three primary culprits emerge: seized internal components, obstructed blade assembly, or motor coupling failure. Each requires different repair approaches, but all are fixable without professional service. Identifying the exact cause saves you time and prevents unnecessary part replacements.
Quick Visual Inspection Checklist
Look for these telltale signs that indicate specific failure points:
– Food debris packed around blade shaft preventing rotation
– Cracked or damaged blade housing compromising structural integrity
– Loose connections between motor body and blade assembly
– Burnt smell indicating motor overheating or electrical failure
Motor vs. Mechanical Failure Test
Hold the motor body firmly and attempt to rotate the blade manually (with gloved hands). If the blade moves freely but won’t spin during operation, you’ve likely isolated the issue to motor coupling or electrical failure rather than mechanical obstruction. If the blade feels stiff or won’t move manually, food debris or component damage is probably blocking rotation.
Proper Disassembly of Cuisinart Blade Assembly
Proper disassembly prevents damage to delicate components and ensures successful reassembly. This process takes approximately 5-7 minutes once you understand the release mechanisms. Never force components—Cuisinart designed their Smart Stick models with specific release points that require precise pressure application.
Step-by-Step Blade Shaft Removal
Position your hands correctly—grasp the motor body with your dominant hand, placing fingers at the blade shaft connection point while keeping your grip away from the sharp blade end. Follow this exact sequence:
- Locate release button – Find the small button near where blade shaft meets motor body
- Apply steady pressure – Press button while maintaining firm grip on motor body
- Pull straight down – Execute controlled pulling motion to detach blade shaft
- Set aside carefully – Place blade assembly blade-up on stable surface
Chopper Attachment Disassembly Process
For models with chopper/grinder attachments, follow this additional sequence:
- Remove reversible blade from chopper bowl
- Grip prep bowl bottom with one hand
- Grasp central hub ribs with opposite hand
- Rotate blade ring counterclockwise 45 degrees
- Lift blade ring clear of plastic sheath notches
Source Authorized Replacement Parts Correctly

Using genuine Cuisinart replacement parts maintains warranty coverage and ensures proper fit. Aftermarket components often fail prematurely or create safety hazards due to poor tolerances. Never attempt to repair damaged blades—always replace them with manufacturer-approved parts.
Find Your Exact Part Number
Visit Cuisinart.com and navigate to “Parts & Accessories.” Enter your specific model number found on the motor body label (CSB-77, CSB-78, or CSB-76). Select the blade assembly that matches your exact model configuration and verify the part number matches your unit. For Smart Stick models, the primary replacement components include:
– Blade shaft assembly (part # CB-70)
– Motor coupling (part # MC-15)
– Blade ring assembly (part # BR-30)
Verify Compatibility Before Purchasing
When uncertain about part compatibility, call Cuisinart customer service directly with your model number and a description of the failure symptoms. They’ll recommend specific replacement components and current pricing. Most common blade assembly parts cost between $12-$25 and ship within 3-5 business days.
Clean and Inspect Components Before Reassembly
Thorough cleaning prevents future failures—food residue and moisture cause 70% of Cuisinart hand blender blade seizure issues. Never reassemble components without proper cleaning, as trapped debris accelerates wear on new replacement parts.
Proper Blade Assembly Cleaning Protocol
Use these manufacturer-approved cleaning methods:
– Submerge blade assembly in warm soapy water for 5 minutes
– Remove stubborn food particles from shaft crevices using a soft brush
– Air-dry components completely for 24 hours or use compressed air
– Apply one drop of food-grade mineral oil on the blade shaft for smooth operation
Motor Housing Inspection Points
Carefully examine the motor coupling—the small plastic piece that connects to the blade shaft. Look for:
– Cracks or chips in coupling teeth that prevent proper engagement
– Discoloration from overheating that indicates thermal damage
– Metal shavings around the coupling area signaling internal motor damage
– Proper alignment of the coupling mechanism with the blade shaft
Install Replacement Components Correctly
Component replacement rather than blade manipulation is Cuisinart’s recommended repair approach. This strategy maintains safety standards and warranty compliance while ensuring reliable operation. Never attempt to repair damaged blades—always replace them with authorized parts.
Precise Blade Assembly Installation
Follow these exact steps for proper installation:
1. Align coupling teeth – Match motor coupling with blade shaft connector precisely
2. Push firmly upward – Apply steady pressure until you hear/feel a distinct click
3. Test connection – Perform a gentle tug to confirm secure attachment
4. Verify blade rotation – Manual rotation should feel smooth, not gritty or resistant
Safety Testing Before Full Operation
Before processing food, perform this critical safety test:
– Connect to power briefly (2-3 seconds)
– Listen for unusual grinding or clicking sounds
– Observe smooth blade rotation without wobble
– Test with a small amount of water before attempting food processing
Prevent Future Blade Failures with Proper Maintenance
Regular maintenance prevents 90% of Cuisinart hand blender blade failures. These simple habits extend component life and maintain optimal performance, saving you repair time and replacement costs.
Daily Maintenance Routine
Follow these steps after each use:
– Rinse blade assembly immediately in warm water
– Remove and dry detachable parts separately
– Store with blade assembly detached from motor
– Check for food residue in coupling connection
Monthly Deep Cleaning Schedule
Every 30 days, perform this comprehensive maintenance:
– Disassemble all detachable components
– Soak blade assembly in vinegar solution (1:3 ratio with water)
– Clean motor coupling with a cotton swab
– Inspect seals and gaskets for wear or damage
Warning Signs Requiring Immediate Action
Stop using your hand blender immediately if you notice:
– Blade wobble during operation indicating misalignment
– Grinding sounds from motor housing signaling internal damage
– Overheating motor body that becomes too hot to touch
– Reduced blending efficiency requiring longer processing times
When to Contact Cuisinart Professional Service
While most blade rotation failures are DIY-repairable, certain situations require professional attention. Recognizing these scenarios prevents further damage and maintains safety standards. Check your warranty status before attempting repairs—most Smart Stick models include 3-year limited warranties covering motor and blade assembly failures.
Critical Failure Indicators
Seek professional service immediately if you experience:
– Motor sparks or smoke during operation
– Electrical burning smell from motor housing
– Cracked motor housing or exposed wiring
– Multiple component failures simultaneously
Warranty Preservation Strategy
Unauthorized repairs void warranty coverage, making professional service the cost-effective choice for newer units. Cuisinart’s authorized service centers use genuine parts and follow manufacturer specifications, ensuring your hand blender operates safely after repair.
Final Performance Verification Testing
After completing repairs, verify successful restoration through systematic testing. This final step prevents premature component failure and ensures safe operation before you trust it with your meals.
Four-Stage Performance Test Sequence
- Empty test – Run blender for 10 seconds with no contents
- Water test – Blend 1 cup water for 30 seconds
- Load test – Process soft foods (banana, yogurt)
- Stress test – Blend ice or frozen fruit for 15 seconds
Your repair is successful when the blade spins smoothly without wobble or noise, the motor operates quietly without overheating, blending performance matches original specifications, and all safety features function correctly. If any test fails, recheck component alignment and connections before attempting further use.
Key Takeaway: Most Cuisinart hand blender blade failures result from clogged or damaged blade assemblies rather than motor failure. By following these systematic diagnostic and repair steps, you can restore full functionality in under 30 minutes using only authorized replacement parts. Regular maintenance prevents 90% of future failures, making your hand blender a reliable kitchen companion for years to come. When in doubt about your repair capabilities, contact Cuisinart’s professional service team to maintain warranty coverage and ensure safe operation.

