
Forget expensive store-bought cartons and preservative-laden alternatives—making fresh coconut milk in your juicer delivers unmatched flavor and creaminess with minimal effort. This simple technique transforms young coconuts into rich, dairy-free milk in minutes, bypassing the messy cheesecloth straining traditional methods require. When you process coconut milk in a juicer, you extract every drop of creamy goodness while preserving the natural nutrients and authentic tropical flavor commercial products often lose. Whether you’re following a strict vegan diet, exploring dairy alternatives, or simply craving authentic Thai curries, mastering this juicer technique gives you control over ingredients and quality. In this guide, you’ll discover exactly how to select, prepare, and extract perfect coconut milk using equipment you likely already own.
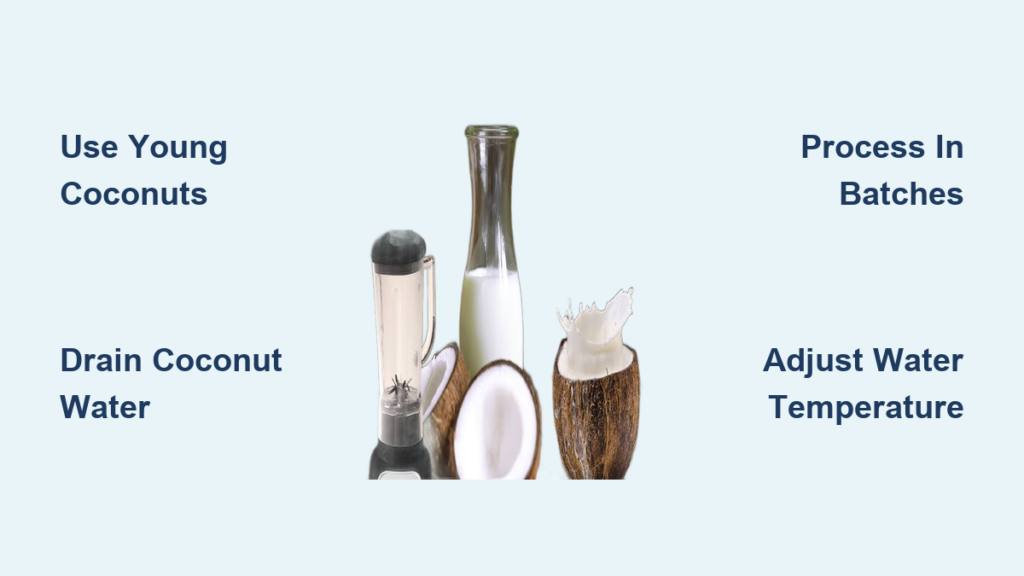
Choose Young Coconuts for Best Juicer Results
Young coconuts deliver superior results when making coconut milk in a juicer compared to mature varieties. Their soft, jelly-like meat processes effortlessly through juicer mechanisms, yielding more liquid with less strain on your machine. Mature coconuts feature hard, fibrous flesh that clogs juicer screens and produces significantly lower yields—requiring extensive pre-processing that defeats the purpose of using a juicer.
When selecting coconuts at your local Asian market or grocery store, prioritize these characteristics:
– Weight: Choose coconuts that feel heavy for their size, indicating abundant water and meat
– Shell appearance: Look for green or light brown shells without cracks or mold
– Sound test: Shake the coconut—clear sloshing indicates sufficient water content
– Eyes inspection: Avoid coconuts with dry, sunken, or discolored eyes
Two young coconuts combined with three cups of filtered water typically yields enough fresh coconut milk for four generous servings. This ratio creates the perfect balance of richness and drinkability for most culinary applications. Never attempt to use dried coconut flakes or shredded coconut in your juicer—these processed products lack sufficient moisture for proper extraction and will damage your machine.
Safely Drain and Crack Young Coconuts

Proper coconut preparation ensures safe handling and maximum milk extraction when using your juicer. Start by piercing all three soft eyes on one end of the coconut with a sharp knife or ice pick. Rotate the tool gently to create wide openings that allow the coconut water to drain completely into a bowl. This liquid byproduct makes an excellent hydrating drink but isn’t needed for the milk recipe itself.
After draining the water (typically one to two cups per coconut), carefully crack open the shell using these steps:
1. Position the coconut horizontally on a stable surface
2. Strike firmly along the natural equator line with the back of a heavy knife
3. Rotate the coconut slightly and repeat strikes until the shell splits cleanly
4. Use a butter knife to separate the white meat from the inner shell
Work deliberately to avoid cutting yourself—coconut shells are incredibly tough. If you struggle with manual cracking, some grocery stores sell pre-opened young coconuts specifically for juicing. Never skip the draining step, as trapped water creates dangerous pressure when striking the shell.
Process Coconut Meat Through Your Juicer
The actual extraction process transforms prepared coconut meat into creamy milk with minimal effort. Feed the separated white meat through your juicer’s chute in small batches, using the tamper to guide it through without forcing. Your juicer separates the liquid milk from fibrous pulp, collecting the rich coconut cream in the juice container while the dry pulp accumulates separately.
For optimal results when making coconut milk in a juicer:
– First extraction: Process coconut meat alone to create concentrated cream
– Dilution step: Transfer cream to a blender and add three cups filtered water
– Final blending: Pulse briefly to achieve uniform consistency
Most home juicers perform better when extracting pure coconut cream first rather than adding water during juicing. The remaining pulp still contains valuable fiber—save it for smoothies, baking, or dehydrate it to make coconut flour. This two-step method yields noticeably creamier milk than traditional blending and straining techniques, with zero cheesecloth mess.
Maximize Coconut Milk Yield with These Techniques

Getting every drop of milk from your coconuts requires strategic adjustments that significantly impact your results. Room temperature water extracts more fat from coconut meat than cold water, producing richer, creamier milk with higher yield. Avoid ice-cold water as it causes coconut fats to solidify prematurely, reducing extraction efficiency.
Juicing technique directly affects your final yield:
– Batch size: Process smaller amounts at a time for better extraction
– Pulp moisture: Ideal processed pulp feels damp but not wet
– Double extraction: Run pulp through your juicer a second time for 10-15% additional yield
– Water temperature: Warm (not hot) water improves fat extraction
The first extraction produces thick, rich cream perfect for curries and sauces, while the second extraction yields thinner milk better suited for drinking or smoothies. Combine both batches for standard consistency, or keep them separate for specialized applications. Never add excessive water during juicing—this dilutes the milk before extraction and reduces overall fat content.
Troubleshoot Common Coconut Juicing Issues
Several problems frequently occur when making coconut milk in a juicer, but most have simple solutions. If your machine struggles to process the meat or produces almost dry pulp, you’ve likely overloaded the feed chute. Reduce batch sizes and feed coconut meat more slowly to maintain consistent extraction.
Common issues and fixes:
– Clogged screen: Stop immediately and clean the screen—pre-soak in warm water if needed
– Bitter taste: Indicates shell fragments in the milk—rinse meat thoroughly before juicing
– Thin consistency: Too much water added during extraction—adjust water-to-meat ratio
– Low yield: Using mature coconuts or insufficient juicing time—stick with young coconuts
If your juicer consistently underperforms with coconut meat, check if it has a pulp control feature—adjusting this setting can dramatically improve extraction efficiency. Always consult your specific juicer model’s manual for coconut-specific recommendations, as masticating and centrifugal juicers handle coconut differently.
Store Fresh Coconut Milk Properly
Homemade coconut milk lacks preservatives, requiring proper storage to maintain freshness and safety. Transfer your freshly made milk to a clean, airtight glass container immediately after preparation. Properly stored in the refrigerator, your coconut milk stays fresh for three to five days—significantly shorter than commercial shelf-stable varieties.
When storing your homemade coconut milk:
– Separation is normal: Natural fat separation occurs during storage—simply shake well before use
– Freezing option: Store in freezer-safe containers with one inch of headspace for expansion
– Thawing method: Transfer frozen milk to refrigerator overnight before use
– Spoilage signs: Discard if you notice sour smell, mold, or unusual texture changes
Never leave fresh coconut milk at room temperature for more than two hours. For frequent users, consider making smaller batches more often rather than one large quantity that might spoil before use. Always use clean utensils when handling stored milk to prevent bacterial contamination.
Creative Uses for Fresh Homemade Coconut Milk
Fresh coconut milk made in your juicer elevates dishes with authentic flavor that store-bought versions can’t match. The unprocessed fat content creates luxuriously creamy curries and soups that cling perfectly to ingredients. Add a splash to your morning coffee for rich, dairy-free creaminess that doesn’t curdle like some commercial alternatives.
Transform your kitchen creations with these applications:
– Savory dishes: Base for Thai red curry, Indian korma, or Caribbean stews
– Breakfast options: Pour over granola, blend into smoothies, or use in oatmeal
– Desserts: Make coconut panna cotta, rice pudding, or dairy-free ice cream
– Beverages: Create piña coladas, tropical lattes, or refreshing coconut water mixers
The natural sweetness and creamy texture also make fresh coconut milk ideal for beauty applications. Use it in homemade face masks, hair conditioners, or bath soaks for deep hydration. Unlike store-bought versions with stabilizers and preservatives, your pure homemade version contains only coconut and water—perfect for both consumption and topical use.
Commercial Equipment for Scaling Production

While home juicers work perfectly for personal use, commercial producers require specialized equipment like the YAOYIM FXJ-500 Screw Juicer for larger-scale operations. This industrial machine processes 500 kilograms of raw coconut per hour—approximately 250,000 times more than a home batch—making it suitable for businesses but excessive for household needs.
The YAOYIM FXJ-500 features:
– Heavy-duty construction: 80-kilogram stainless steel build
– High capacity: 500 KG/hour processing rate
– Customizable output: 0.6mm screen aperture (adjustable for consistency)
– Power requirements: 2.2KW motor operating on 220V electrical service
Priced at $5,534, this commercial unit represents a significant investment only justified for serious production operations. Home users should stick with standard masticating juicers, which handle coconut milk extraction efficiently without the commercial machine’s space and power requirements.
Final Note: Fresh coconut milk made in your juicer delivers superior flavor and texture compared to store-bought alternatives, with complete control over ingredients. By selecting young coconuts, preparing them properly, and optimizing your juicing technique, you’ll create restaurant-quality milk perfect for both culinary and beauty applications. The simple process takes just minutes once you master the technique, providing endless opportunities to enhance your dairy-free lifestyle with authentic tropical flavor. Start with a single coconut to perfect your method before scaling up to larger batches.


