
Your Capresso coffee grinder delivers consistent grounds for perfect espresso, french press, or drip coffee—but only when properly maintained. Residue buildup from oils and coffee particles can dramatically affect flavor, clog mechanisms, and shorten your grinder’s lifespan. Regular capresso coffee grinder cleaning takes just minutes but prevents costly repairs and ensures every cup tastes as fresh as the first. This comprehensive guide covers everything from quick daily maintenance to thorough deep cleaning procedures that keep your Capresso grinder performing like new.
Neglecting grinder cleaning leads to stale, bitter coffee because old oils become rancid and mix with fresh grounds. Beyond taste issues, accumulated coffee dust and oils force the motor to work harder, potentially causing overheating or permanent damage. Whether you own a Capresso Infinity, Ultima, or CoffeeTeam model, the cleaning principles remain similar, though specific disassembly steps vary. Let’s walk through proven methods to restore and maintain your grinder’s performance with proper capresso coffee grinder cleaning techniques.
Why Your Capresso Grinder Suddenly Produces Bitter Coffee
Rancid coffee oils coating internal components create off-flavors that ruin your carefully sourced beans. Freshly ground coffee releases natural oils that gradually oxidize when left inside your grinder. These stale oils mix with new grounds during subsequent grinds, transferring bitterness to your cup. The problem worsens over time as layer upon layer of oxidized oils accumulates on burrs and grinding chambers.
Inconsistent particle distribution caused by clogged burrs directly impacts extraction quality. When burr teeth become obstructed by coffee residue, they produce uneven grounds with both overly fine powder and chunky pieces. This inconsistent mix extracts poorly—fines over-extract (bitter) while chunks under-extract (sour)—creating an unbalanced, unpleasant cup regardless of your brewing method.
Visible oil sheen on grounds indicates severe internal buildup requiring immediate attention. If your freshly ground coffee appears shiny or has an oily texture rather than the expected dry, fluffy consistency, your grinder desperately needs cleaning. This condition typically develops after 2-3 weeks of regular use without proper maintenance on most Capresso models.
Essential Tools for Effective Capresso Grinder Cleaning
Specialized coffee grinder brushes with nylon bristles reach critical areas without damaging precision components. Invest in a set with varying sizes: a narrow conical brush for burr teeth, a flat brush for chamber walls, and a small round brush for tight spaces around adjustment rings. These cost under $15 but prevent the irreversible damage metal brushes cause to burr edges.
Food-grade isopropyl alcohol (70-90%) safely dissolves stubborn coffee oils without leaving chemical residues. Keep a small spray bottle filled with alcohol and a microfiber cloth specifically for grinder maintenance. Never use household cleaners, vinegar, or water directly on burrs—these introduce moisture that can cause rust or damage motor components.
Compressed air canister with precision nozzle clears hard-to-reach areas like motor vents and adjustment mechanisms. Hold the canister upright and use short bursts to avoid moisture discharge. For frequent users, an electric air blower provides unlimited cleaning power without propellant concerns.
Replacement gaskets and seals should be on hand for when routine cleaning reveals worn components. Capresso part #CG-005 fits most Infinity and Ultima models and costs under $8. Inspect these rubber components during each deep clean—they typically last 6-12 months with regular use before needing replacement.
Step-by-Step Weekly Deep Cleaning Procedure

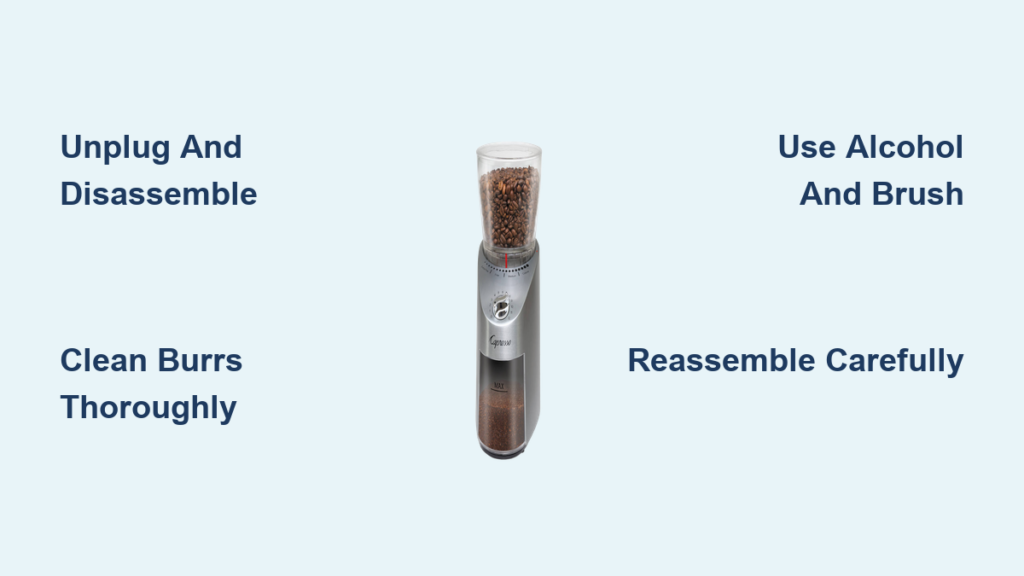
Unplug and disassemble your Capresso grinder completely before beginning the deep clean process. Start by removing the bean hopper (twist counter-clockwise on most models), followed by the grounds container. For Infinity models, press the release button on the front while lifting the hopper assembly. Ultima models require removing the hopper cover before accessing the upper burr.
Remove both burr sets carefully following your specific model’s procedure:
1. Infinity models: Unscrew the retention ring clockwise (yes, clockwise) while holding the upper burr steady
2. Ultima models: Lift the upper burr straight up after removing the hopper assembly
3. CoffeeTeam models: Rotate the upper burr counter-clockwise to release
Clean the grinding chamber thoroughly using this sequence:
– Brush loose particles from the chamber walls with a flat nylon brush
– Use a conical brush to clean between lower burr teeth in a circular motion
– Wipe all surfaces with an alcohol-dampened microfiber cloth
– Blow compressed air through motor vents and adjustment mechanisms
Reassemble in reverse order with proper alignment—this step prevents premature wear. Ensure the rubber gasket sits flush in its groove before installing the upper burr. Hand-tighten retention rings (don’t use tools) until snug—overtightening damages threads and stresses burr alignment. Test run without beans to confirm smooth operation before your next brew.
How to Eliminate Static Cling in Your Capresso Grinder

The 3-second water trick reduces static dramatically without affecting grind quality. Spritz 2-3 drops of water onto your coffee beans before grinding—just enough to create surface moisture without making beans damp. This simple technique prevents grounds from sticking to plastic components and reduces residual buildup by up to 70% according to coffee equipment technicians.
Strategic placement of anti-static materials creates immediate improvement:
– Insert a folded paper towel into the grounds container during grinding
– Rub a dryer sheet along the interior of the bean hopper monthly
– Place a small copper coin in the grounds container (grounding effect)
Season new grinders properly to minimize initial static problems. Run 100-200 grams of plain white rice through your Capresso before first coffee use—this polishes internal surfaces and absorbs manufacturing residues that contribute to static. Follow with a full cleaning cycle before grinding actual coffee beans.
Troubleshooting Persistent Grinder Performance Issues
Grinder jams during operation? Immediately unplug and check these common culprits:
– Foreign object lodged between burrs (check with flashlight)
– Over-tightened retention ring restricting burr movement
– Worn drive gear showing visible stripping (requires replacement)
Motor runs but burrs don’t turn indicates a serious mechanical failure. This typically means the clutch mechanism has failed or the drive shaft coupling has separated. Most Capresso models require complete motor assembly replacement for this issue—attempting DIY repairs often causes further damage. Contact Capresso service for models under warranty.
Strange burning smell during use signals urgent problems needing immediate attention. Unplug immediately and inspect for:
– Beans jammed against motor housing
– Oil buildup near electrical components
– Overheated motor from excessive use or blockage
Allow the grinder to cool completely before inspection. If the smell persists after cleaning, discontinue use and contact Capresso support—continuing to operate could create fire hazards.
Proven Maintenance Schedule for Longevity

Daily cleaning routine (2 minutes):
– Empty and wipe grounds container with dry cloth
– Brush hopper opening where beans enter
– Wipe exterior surfaces with damp microfiber
Weekly deep clean (15 minutes):
– Full disassembly and burr cleaning
– Chamber and component inspection
– Lubrication of moving parts (if specified in manual)
Quarterly professional maintenance (worth the $25-40 cost):
– Complete internal inspection
– Bearing lubrication
– Burr alignment verification
– Component replacement as needed
Annual burr replacement maintains consistent grinding performance. Most Capresso burrs last 500-750 pounds of coffee before noticeable wear affects extraction quality. If you grind 1 pound weekly, plan burr replacement every 10-15 months. Higher-end models may have longer burr life.
Consistent capresso coffee grinder cleaning transforms your morning routine from potential frustration into daily satisfaction. By establishing these simple maintenance habits, you protect your investment while ensuring every cup delivers the rich, balanced flavor that quality coffee deserves. The few minutes invested in proper cleaning pay significant dividends in superior taste, reliable performance, and extended grinder lifespan—easily adding 3-5 years to your Capresso’s service life. Remember that regular capresso coffee grinder cleaning isn’t just about maintenance; it’s the secret to unlocking the true potential of your coffee beans day after day. When in doubt about specific cleaning procedures for your model, always consult your Capresso owner’s manual or contact their customer support for model-specific guidance.


