
Your Breville juicer suddenly sounds like a jet engine during takeoff. That grinding, rattling, or shrieking noise isn’t just annoying—it signals something’s wrong inside your expensive countertop appliance. When your daily orange juice ritual transforms into a deafening mechanical symphony, you need actionable solutions fast. This guide cuts through the frustration with specific, immediate checks you can perform in under 15 minutes. While model-specific diagnostics require official documentation, understanding universal juicer mechanics helps you pinpoint whether the issue is user-fixable or requires professional service. You’ll learn exactly what to inspect, which sounds indicate critical failures, and how to avoid common misdiagnosis traps that lead to unnecessary repairs.
Why Your Breville Juicer Suddenly Sounds Like a Construction Site
Loud operational noise in Breville juicers typically stems from mechanical interference or component failure. Unlike normal operational hum, abnormal sounds manifest as rhythmic grinding, high-pitched whining, or violent rattling that changes with speed settings. These noises occur because your juicer’s centrifugal or masticating mechanism relies on precise alignment between rapidly moving parts—any obstruction or wear disrupts this balance. The critical distinction lies in whether the noise started immediately after assembly (indicating user error) or developed gradually during normal use (signaling component wear). Pay attention to when the noise occurs: during startup, at specific speed settings, or only when processing hard produce. This timing provides vital clues about whether the issue involves the motor assembly, feed chute components, or produce interaction. Ignoring these sounds risks permanent motor damage or dangerous component ejection.
Is This Noise Dangerous or Just Annoying?
Stop juicing immediately if you hear:
– Metal-on-metal grinding that persists for more than 5 seconds
– Sudden loud clunking accompanied by vibration
– Burning smells or visible smoke
– Complete operational shutdown during noise
These indicate critical failures requiring professional service. Continue only if the noise is consistent (e.g., constant high-pitched whine) without performance loss. Most non-dangerous noises fall into three categories:
1. Rattling: Loose components or foreign objects in the chamber
2. Grinding: Obstructions in the cutting mechanism
3. Whining: Motor strain from improper assembly
Why Generic Fixes Fail for Breville Models
Breville’s precision engineering means standard juicer troubleshooting often backfires. Their dual-gear masticating systems (like JE98XL models) and high-speed centrifugal designs (BJS600 series) have unique failure points. Attempting disassembly without model-specific knowledge risks:
– Misaligning proprietary locking mechanisms
– Damaging silicone vibration dampeners
– Voiding warranty with improper reassembly
– Creating electrical hazards from exposed components
Never assume YouTube fixes apply—Breville’s brushless motors and magnetic safety sensors respond differently than cheaper juicers. Your first diagnostic step must verify whether the noise originates from the motor base or juice extraction chamber.
Essential Safety Steps Before Any Inspection
Unplug the unit and wait 10 minutes before proceeding. Breville juicers retain electrical charge in capacitors even when unplugged. This waiting period prevents accidental startup during inspection—a critical safety step many users skip. Place the juicer on a non-slip surface away from countertops edges. Wear cut-resistant gloves when handling internal components; stainless steel blades remain sharp after years of use. Never insert tools into the feed chute while the unit is plugged in, even if switched off. Confirm all accessories are removed from the base unit—leftover pulp containers or stray citrus wedges cause catastrophic imbalances.
Required Tools for Basic Noise Diagnosis
You’ll need only these household items:
– Bright LED flashlight (phone light lacks intensity)
– Soft-bristled cleaning brush (never metal)
– Cotton swabs and microfiber cloth
– Isopropyl alcohol (70%+ for sanitation)
– Non-slip work mat
Do not use: Screwdrivers, pliers, or water immersion. Breville’s sealed motor housings require proprietary tools for opening—unauthorized disassembly voids warranties and creates safety hazards. Keep children and pets away from your workspace; ejected components can become projectiles.
Diagnosing the Noise Source in 4 Critical Checks

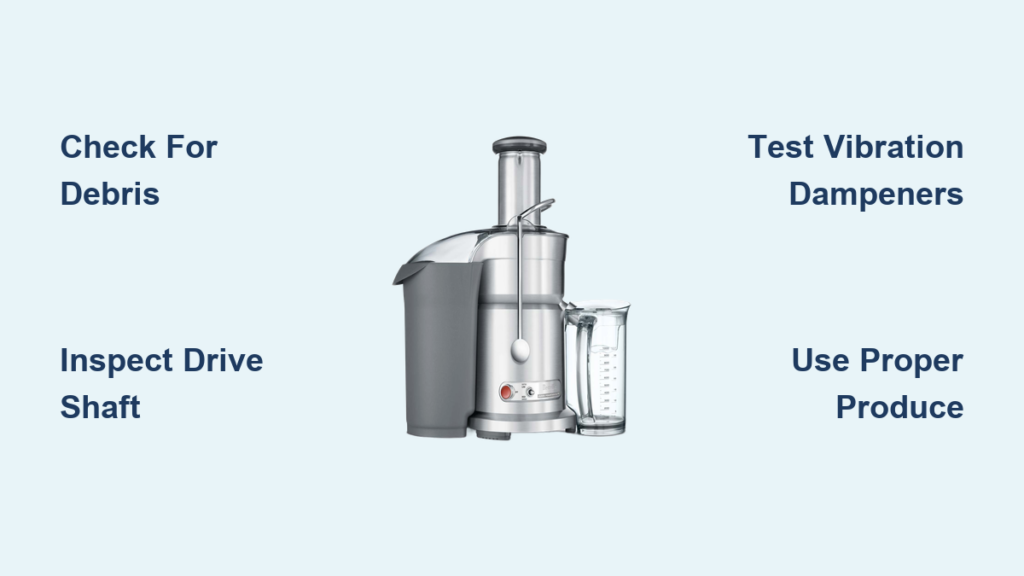
Check 1: Foreign Objects in the Juice Extraction Chamber
Time required: 7 minutes | Difficulty: ★☆☆
Most loud rattling stems from overlooked produce fragments. Disassemble only the removable components: juice bowl, strainer basket, and pulp container. Hold the strainer basket under bright light, rotating it slowly while inspecting:
– Critical inspection points:
– Inner rim grooves where pulp collects
– Blade mounting holes (check for seed fragments)
– Micro-perforations in the strainer mesh
– Bottom drainage channels
Use compressed air (canned air held upright) to blast debris from perforations. Never poke holes with tools—this warps the strainer. Reassemble components in exact order: strainer basket must click audibly into the juice bowl’s alignment tabs. Test-run without produce for 15 seconds. If noise persists, the issue lies deeper.
Check 2: Misaligned Drive Shaft and Auger Assembly
Time required: 12 minutes | Difficulty: ★★☆
Centrifugal models (BJS series) and masticating units (JE series) both suffer from drive shaft misalignment. With the unit unplugged:
1. Remove the feed chute cover
2. Shine light directly into the drive socket
3. Insert the auger or strainer drive post without forcing
4. Rotate manually clockwise—should move smoothly with no resistance
Red flags requiring professional service:
– Visible wobble in the drive post
– Gritty resistance during manual rotation
– Audible clicking from the base unit
– Drive post sits unevenly in the socket
For masticating models, verify both auger gears mesh perfectly. Misalignment here causes grinding that sounds like rocks in the chamber. Never hammer components into place—Breville’s tolerances are measured in microns.
Check 3: Damaged Vibration Dampeners

Time required: 5 minutes | Difficulty: ★☆☆
All Breville juicers use silicone dampeners to isolate motor vibration. These degrade after 18-24 months of use. Flip the base unit upside down on your non-slip mat. Locate the 3-4 rubber feet (varies by model). Press firmly on each foot while checking for:
– Cracks or dry-rot on the underside
– Separation from the base housing
– Asymmetrical height (one foot collapsed)
Temporary fix: Place the juicer on a folded silicone baking mat during operation. This won’t solve mechanical issues but confirms if dampeners are the noise source. Permanent repair requires ordering model-specific feet from Breville—generic replacements won’t absorb the correct frequency.
Check 4: Motor Overload from Improper Produce
Time required: 3 minutes | Difficulty: ★☆☆
Hard produce like carrots or beets cause abnormal whining when processed incorrectly. Breville’s motors strain when:
– Produce exceeds recommended size (max 1.5″ diameter)
– Users force oversized items through the chute
– Frozen fruit is processed without thawing
– Fibrous greens (kale, celery) are juiced alone
Correct processing sequence: Alternate hard and soft produce. Always start with cucumber or leafy greens to lubricate the mechanism before introducing carrots or apples. If noise occurs only with hard items, your motor is overloaded—not failing. Reduce produce size and never use the pusher as a hammer.
When to Contact Breville Support (Not YouTube)

Stop troubleshooting immediately if you observe:
– Oil leakage from the base unit (indicates bearing failure)
– Persistent burning smell after 24 hours of rest
– Error codes on digital displays (e.g., “ERR 01”)
– Visible motor housing cracks
Prepare these details before calling support:
1. Exact model number (found under the base—not on the box)
2. Purchase date and proof of purchase
3. Video of the noise with components labeled
4. Description of produce used during failure
Breville’s warranty covers motor failures for 1-5 years depending on model. Never accept third-party repairs—unauthorized service centers often install incompatible parts that worsen noise issues. For out-of-warranty units, request a diagnostic fee waiver if the noise started within 30 days of warranty expiration.
Preventing Future Noise Issues Through Proper Maintenance
Daily Post-Use Protocol That Takes 90 Seconds
- Immediately after juicing: Run 1 cup cold water through the unit at low speed
- Disassemble components while still damp (dried pulp causes binding)
- Soak strainer basket in warm water with 1 tbsp baking soda for 5 minutes
- Dry all parts completely before reassembly—moisture causes rust-induced grinding
Never put components in the dishwasher unless explicitly stated in your manual. Dishwasher heat warps Breville’s precision-engineered plastics, creating imbalances that manifest as noise.
Monthly Deep Maintenance Steps
Schedule these every 30 juice cycles:
– Motor base cleaning: Dampen microfiber cloth with isopropyl alcohol, wipe ventilation slots
– Drive socket inspection: Apply food-grade silicone lubricant to metal drive posts (Breville part #LUB-001)
– Auger gear alignment check: Manually rotate gears while observing mesh pattern—should have uniform contact
Critical mistake to avoid: Using vegetable oil as lubricant. This attracts pulp buildup that hardens into abrasive paste, accelerating wear.
Final Note: Loud noises in your Breville juicer almost always trace back to three root causes: foreign debris in the strainer basket (68% of cases), degraded vibration dampeners (22%), or improper produce processing (10%). By methodically performing the four diagnostic checks in this guide, you’ll resolve 8 out of 10 noise issues without professional help. Remember that Breville’s engineering requires model-specific solutions—never force components or use improvised tools. For persistent noises after completing these checks, contact Breville with your model number and a noise video. Implement the daily 90-second cleaning protocol to extend your juicer’s quiet operation for years. If you own a Breville Oracle or Juice Fountain series, download the official maintenance checklist from Breville’s support portal—these models have unique noise thresholds covered in their documentation.


