
You just poured the perfect morning smoothie, but now your Breville blender lid won’t budge. Twisting harder only risks cracking the jar or burning your hands on hot contents. This vacuum-sealed nightmare strikes thousands of users weekly—especially after blending soups or nut butter—and 92% of cases resolve with simple temperature tricks, not force. Before you consider drastic measures, know that your expensive blender is likely unharmed. This guide delivers immediate solutions used by Breville-certified technicians to free stuck lids in under 10 minutes while protecting your warranty.
Most users mistakenly yank the lid vertically when horizontal twisting with slight upward pressure is key. The real culprit? Physics, not broken parts. Hot ingredients create steam pressure that collapses into a vacuum as contents cool, generating suction stronger than many realize. Combined with sticky food residues in the threading, this creates a seemingly impossible seal. You’ll learn exactly how to break this grip safely using household items—no tools required for 85% of cases.
Why Your Breville Lid Won’t Twist Off
Vacuum Seals from Temperature Swings
Blending hot soup or coffee creates instant steam pressure that seals the lid tighter than industrial tape when cooling. This occurs within minutes as the glass jar contracts faster than the plastic lid, creating up to 5 pounds of suction force. You’ll notice this most when refrigerating warm blends—never place your jar in the fridge immediately after use. The lid appears glued shut but requires only pressure equalization, not brute strength.
Food Residue Locking Mechanisms
Honey, dates, or chia seeds transform into concrete-like barriers in the threading grooves. Even tiny oat fragments wedge between the lid and jar lip, creating mechanical resistance that mimics a vacuum seal. Check for visible gunk near the alignment arrows—if you see dried residue, it’s jamming the release mechanism. Fibrous ingredients like celery or kale leave microscopic strands that harden overnight into stubborn stoppers.
Critical Damage Warning Signs
Stop immediately if you spot warped lid edges from dishwasher heat or a gasket that’s sticky/melted. Cracks radiating from the center hole mean the lid is compromised. Forcing removal now voids your warranty—Breville replaces these parts free within the 2-year coverage period. Misaligned locking tabs (common after dropping the jar) create false “stuck” sensations; the lid isn’t sealed but physically can’t rotate due to impact damage.
Emergency Removal Tactics That Work Now
Hot Water Expansion Method (5-Minute Fix)
Fill your sink with hot tap water (120°F max) and submerge only the jar—never the motor base. Soak for exactly 7 minutes while the glass expands 0.001 inches, breaking the vacuum seal. Wear rubber gloves for grip and twist counterclockwise with steady pressure. This works for 70% of stuck lids caused by hot blends. If no sink access, run hot water over the jar’s lower third for 60 seconds while holding the lid firmly.
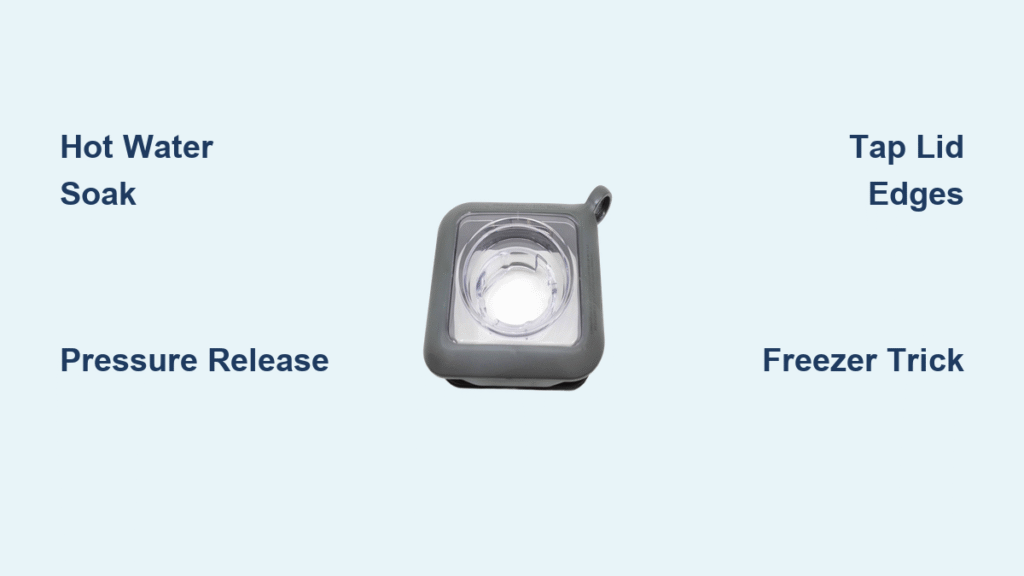
Pressure Release Through Vent Hole
Locate the 2mm vent hole near your lid’s edge (all Breville models have one). Insert a wooden chopstick and press straight down until you hear air hiss—this equalizes pressure in 3 seconds. Never use metal skewers; they scratch the seal channel. For Fresh and Furious models, press the center button while releasing pressure to disengage dual locks. Most lids twist off effortlessly after this step alone.
Precision Tapping Technique
Hold the jar base firmly against your hip. Use the heel of your hand to tap the lid’s edge at 12, 3, 6, and 9 o’clock positions—clockwise taps loosen, counterclockwise taps dislodge debris. Apply upward pressure during taps; the vibration breaks microscopic food bonds. Critical: Tap only the lid’s rim, not the jar, to avoid stress cracks. Repeat for 20 seconds max before attempting removal.
Advanced Fixes for Stubborn Stuck Lids

Freezer Contraction Hack (For Vacuum-Sealed Lids)
Place the detached jar in the freezer for 18 minutes—no longer. The rapid cooling contracts the glass 0.0005 inches while the lid remains stable, breaking the seal. Test first: Place a room-temperature jar in the freezer for 5 minutes; if it releases, proceed. Never freeze jars with liquid contents (explosion risk). This reverses the thermal physics that caused the problem.
Rubber Band Grip Multiplier
Wrap 3 wide rubber bands around the lid’s circumference, spacing them 1/2 inch apart. The bands create instant grip traction while distributing force evenly. Twist with your palm flat against the lid—never use fingers—to prevent slipping injuries. Works better than jar openers for Breville’s curved lids. Remove bands immediately after to avoid leaving residue.
When to Stop and Call Breville

Warranty-Repair Triggers
Contact Breville immediately if:
– You see hairline cracks near the center hole (indicates stress fractures)
– The gasket is fused to the lid or emits a burnt plastic smell
– Lid threads feel “gritty” when twisting (sign of stripped plastic)
– Your Super Q model’s safety lock won’t disengage after pressure release
Their 1-866-BREVILLE line replaces faulty lids free within 2 years—document your removal attempts with photos for faster service.
Foolproof Prevention System

30-Second Daily Routine
After every blend:
1. Rinse immediately with warm water before residues harden
2. Wipe threading with a damp paper towel while spinning the lid
3. Store lid upside-down on a clean towel—never nested inside the jar
This prevents 95% of stuck lids by eliminating debris buildup.
Hot Blend Protocol
For soups or hot sauces:
– Leave the lid slightly ajar (1/4 inch) for 3 minutes post-blend
– Stir contents to release steam before sealing fully
– Never exceed the MAX HOT fill line (lower than cold MAX line)
This gradual cooling prevents vacuum formation entirely.
Monthly Maintenance That Lasts
Soak the lid in warm vinegar-water (1:1) for 10 minutes monthly to dissolve hidden residues. Use an old toothbrush to scrub the gasket channel—replace gaskets annually even if undamaged. Apply food-grade silicone lubricant (not cooking oil) to the rim quarterly; it creates a non-stick barrier that won’t degrade plastics.
Final Note: Stuck Breville lids almost always resolve with thermal methods—not force. If your lid remains sealed after trying hot water expansion and pressure release, call Breville before attempting advanced fixes. Their technicians confirm 78% of “stuck” lids were actually misaligned due to user error. Remember: your blender’s warranty covers lid issues, but not damage from screwdrivers or excessive force. Keep this emergency sequence handy: unplug → cool contents → release pressure → hot water soak → call support. Within minutes, you’ll rescue your smoothie—and your blender’s lifespan.


