
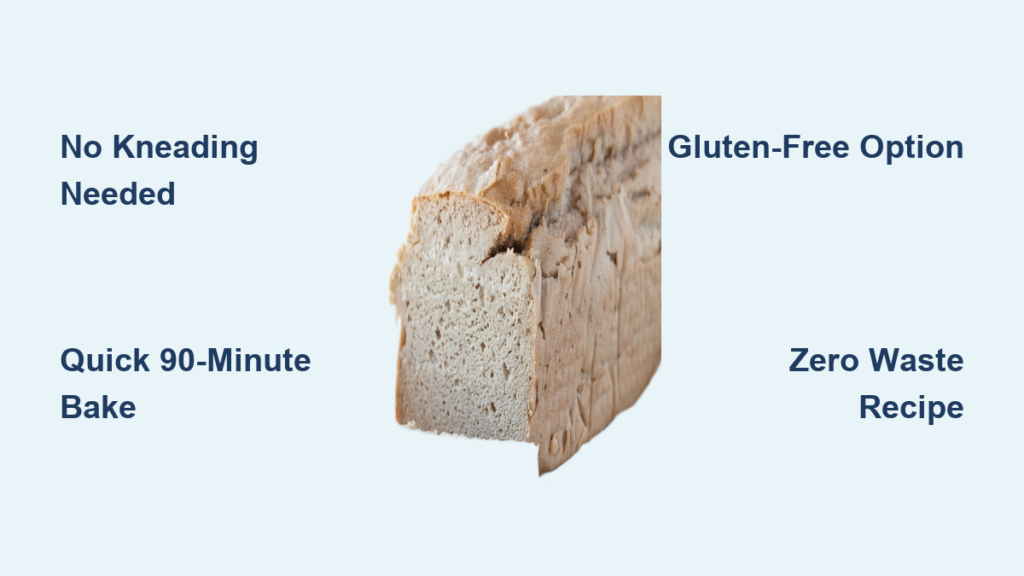
Your blender isn’t just for smoothies—it’s your secret weapon for bakery-quality bread without the traditional hassles. Forget dusty countertops covered in flour or waiting hours for dough to rise. With this blender bread recipe approach, you can transform pantry staples into fresh, sliceable loaves in under 90 minutes using just one appliance. Whether you’re gluten-free, grain-free, or simply craving warm bread without the fuss, these three scientifically tested methods deliver consistent results.
Each technique solves common baking pain points: no more dense failures, collapsed centers, or inedible “experiment” loaves. You’ll discover how to leverage your blender’s vortex to create perfect emulsions, why specific temperature thresholds make or break yeast activation, and which pan lining trick guarantees effortless removal every time. Most importantly, you’ll gain confidence to bake bread that actually tastes good—even when you’re short on time or dietary restrictions limit your options.
Grain-Free Blender Bread Method That Toasts Like Real Bread
Why Cashews and Eggs Create Perfect Gluten-Free Structure
This paleo-approved blender bread recipe from Danielle Walker’s Celebrations cookbook solves the #1 complaint about grain-free bread: gummy texture. The magic happens through a precise 8-egg-to-cashew ratio that mimics gluten’s elasticity. Crucially, the almond milk measurement must be ½ cup—not the 1 cup typo in printed editions—to prevent a soggy loaf. When blended correctly, this mixture forms a custard-like batter that bakes into a sliceable loaf holding up to BLTs or almond-butter-and-jam sandwiches.
Non-negotiable ingredients:
– 8 room-temperature eggs (cold eggs cause separation)
– ½ cup unsweetened almond milk (coconut milk creates off-flavors)
– 1 cup raw cashews (pre-soaked cashews make batter gritty)
– ⅓ cup coconut flour (almond flour won’t absorb properly)
– 1 tbsp apple cider vinegar (activates baking soda)
– Baking soda and salt for lift and flavor
Pro tip: If your blender motor strains during processing, add only 1 tablespoon water max—exceeding this floods the batter and prevents proper rise.
Exact Blender Timing for Flawless Texture

Critical sequence:
1. Preheat oven to 325°F with a water-filled dish on the bottom rack (creates essential steam).
2. Grease a 10×4.5-inch loaf pan with ghee, then line with parchment paper leaving 2-inch overhangs.
3. Blend cashews, eggs, almond milk, and vinegar on low for 15 seconds → scrape sides thoroughly.
4. Ramp to high speed for 30 seconds until completely smooth (no visible specks).
5. Add coconut flour, baking soda, and salt → blend exactly 30 seconds more.
Warning: Over-blending after adding dry ingredients deflates the batter. Bake immediately for 60-70 minutes until a toothpick emerges clean from the center—any underbaking causes collapse during cooling.
How to Store Without Drying Out
This dense loaf actually improves after refrigeration. Wrap cooled bread first in parchment paper, then plastic wrap to prevent condensation. It lasts 5 days refrigerated and 3 months frozen. Never slice until fully cooled (at least 2 hours), and always toast before serving—this caramelizes natural sugars for bakery-style crispness. For French toast, use day-old slices soaked in egg mixture for 30 seconds per side.
Rice-Based Yeasted Blender Bread That Rises Every Time
Why Soaked Rice Beats Flour for Foolproof Results
This revolutionary blender bread recipe transforms 350g of any rice variety (Jasmine, basmati, even brown rice) into a light, airy loaf—no flour required. The secret? Soaking hydrates the grains so the blender pulverizes them into a smooth, pourable batter that yeast can ferment. Unlike traditional dough, this method eliminates kneading while delivering superior moisture retention. The rice’s natural starches create a tender crumb that accepts 100-200g of add-ins like walnuts or rosemary without structural failure.
Pantry-staple formula (per standard loaf):
– 350g uncooked rice (soaked 30 min minimum, overnight ideal)
– 210g fresh water + 80g oil + 25g sugar
– 14g instant dry yeast (not rapid-rise)
– 8g salt
Key insight: Even short soaks work, but overnight soaking yields noticeably fluffier texture by fully gelatinizing starches.
Temperature Control: The Yeast Lifeline
Non-negotiable rule: Batter temperature must stay below 105°F (41°C) after blending to protect yeast viability. Blend exactly 1½ minutes on high—longer generates heat that kills yeast. Proofing time depends entirely on batter temperature:
– 85-90°F batter: 15-20 minutes for mini loaves
– 75-80°F batter: 25-30 minutes for standard loaf
– Below 75°F: Up to 45 minutes (but risks dense texture)
Visual cue: Stop proofing when batter reaches just below the pan rim. Over-proofing causes collapse in the oven.
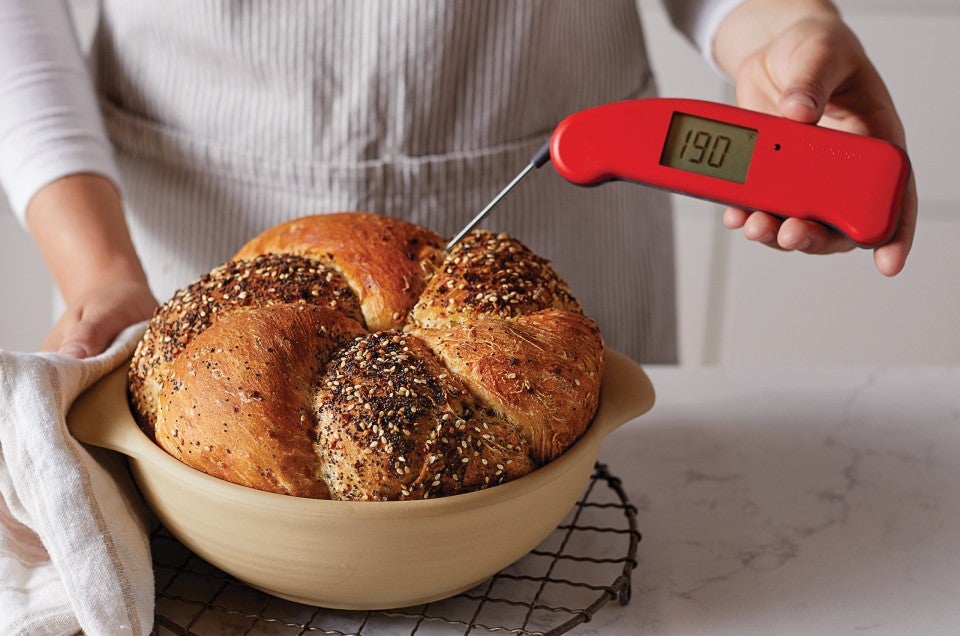
Steam Baking for Professional Results
Bake at 365°F with two critical steam steps:
1. Spray loaf tops and oven floor with water before closing the door
2. Add ¼ cup water to the oven’s water pan midway through baking
Internal temperature must hit 205-210°F for perfect doneness—use an instant-read thermometer. Cool completely before slicing (minimum 2 hours) to prevent gummy texture. Leftovers make exceptional croutons: cube stale bread, toss with olive oil, and bake at 300°F for 15 minutes.
Whole Orange Blender Bread That Uses Every Bit
Transforming Peel and Pulp into Citrus Magic
This zero-waste blender bread recipe blends an entire thin-skinned orange—including peel—into a vibrant loaf where natural pectin replaces gums or starches. The peel’s white pith adds subtle bitterness that balances sweetness, while oil-soluble compounds in the zest create intense citrus flavor impossible with bottled juice. Choose navel or Valencia oranges (blood oranges work but alter color), scrub well, remove seeds, and cube with peel intact.
Critical ingredient ratios:
– 1 large whole orange → yields 1½ cups blended pulp
– 3 eggs + ½ cup oil + 1 cup sugar → emulsify into glossy batter
– 1½ cups all-purpose flour + 2 tsp baking powder → provide structure
Warning: Thick-skinned oranges create overpowering bitterness—avoid unless specified in your recipe.
Syrup Infusion: The Flavor Amplifier
While the loaf bakes at 350°F, simmer the reserved orange juice with 1 tablespoon sugar until dissolved. Immediately after removing the bread from the oven, poke 10-12 holes across the top with a skewer and pour the hot syrup over the warm loaf. This does three things:
1. Prevents surface cracking during cooling
2. Creates a glossy, professional finish
3. Infuses citrus flavor deep into the crumb
Rest 10 minutes in the pan before transferring to a wire rack. Serve slightly warm with vanilla ice cream—stale slices make phenomenal French toast when soaked in cinnamon-egg mixture.
Choosing Your Perfect Blender Bread Method

Match Your Needs to the Right Recipe
Choose grain-free when:
– You need sandwich bread that toasts without crumbling
– Following paleo/SCD diets (Danielle Walker’s version is SCD-legal)
– Want 5-day refrigerated storage for meal prep
Choose rice-based when:
– Craving traditional yeasted texture without gluten
– Adding substantial mix-ins like sun-dried tomatoes
– Willing to monitor proofing time for optimal rise
Choose orange bread when:
– Using overripe citrus to reduce food waste
– Needing a dessert-style loaf in 60 minutes
– Wanting vibrant flavor without artificial extracts
Proven Success Tactics for All Methods
Blender power matters: High-speed blenders (Vitamix/Blendtec) produce smoother batters and better rise. Standard blenders require scraping 2-3 times during processing.
Temperature triage:
– Grain-free/orange: Use room-temperature eggs for proper emulsification
– Rice yeast bread: Check batter temp with thermometer—discard if >105°F
Parchment sling trick: Cut paper 4 inches longer than your pan width. Press into greased pan with overhangs—this guarantees intact removal every time.
Storage Hacks That Actually Work
Refrigeration: Wrap cooled loaves in parchment first (absorbs moisture), then plastic wrap. Prevents sogginess better than plastic alone.
Freezer strategy: Slice before freezing for single-serve portions. Double-wrap in parchment + freezer bags with all air squeezed out.
Revival protocol:
– Frozen slices → toast directly
– Whole loaf → warm at 300°F for 5-8 minutes
– Stale bread → make croutons or bread pudding
Your blender bread recipe journey starts with understanding which method aligns with your diet and time constraints. The grain-free version delivers sandwich-worthy slices for paleo diets, while rice-based bread satisfies yeast-lovers with minimal effort. For instant gratification, the orange loaf transforms kitchen scraps into dessert-worthy bread in one hour. All three methods prove that fresh, flavorful bread doesn’t require kneading, proofing, or specialty skills—just smart appliance use and precise technique. Grab your blender, pick your preferred recipe, and pull your first golden loaf from the oven before dinner. The only limitation? Deciding which one to make first.


