
That frustrating moment when your juicer suddenly produces less juice or the motor strains during operation? Nine times out of ten, a clogged screen is the hidden culprit. Your juicer’s screen works tirelessly to separate juice from pulp through thousands of microscopic holes, yet this critical component often gets neglected until performance suffers. Research reveals a startling truth: 43% of sampled juicers contained Salmonella levels high enough to fail food-safety standards, proving that proper screen maintenance isn’t just about performance—it’s a food safety imperative.
The good news is that mastering the best way to clean juicer screen doesn’t require expensive products or professional service. With the right techniques and common household items, you can restore your juicer’s peak performance in minutes. This guide reveals the exact steps to clean even the most stubborn celery deposits while preventing the mineral buildup that silently clogs your screen over time. By the end, you’ll know precisely how to keep your juicer screen spotless for years to come.
Immediate Cleaning Prevents Permanent Screen Damage
Waiting even 15 minutes after juicing transforms simple cleanup into a battle against dried pulp. That brief delay allows sugary juice residue and tiny fiber particles to bond with your screen’s mesh, creating a cement-like seal over the microscopic holes. When pulp dries completely, it requires aggressive scrubbing that risks damaging the delicate mesh structure—potentially necessitating costly replacement.
Start your cleaning process before unplugging the machine. While the juicer is still running, feed a chunk of cucumber or apple through the chute to flush out initial pulp buildup. Then immediately unplug and disassemble all components according to your user manual’s diagram. For most juicers, this means removing the juice container, pulp container, filter basket, blades, and pusher in that order.
If you can’t complete the full cleaning immediately, submerge all parts in warm soapy water for at least 10 minutes. This critical step prevents pulp from hardening while you handle other tasks. The warm water dissolves sugars and loosens fibers, reducing required scrubbing time by up to 70%. Never let pulp dry on the screen—this single habit determines whether your next cleaning takes two minutes or thirty.
How to Disassemble Without Damaging Components
Handle blades with extreme care using a towel to protect your fingers from sharp edges. Most juicers feature color-coded assembly markers—note these positions before disassembly for easier reassembly. For vertical juicers, twist the screen counterclockwise while applying upward pressure; horizontal models typically require lifting the screen straight up after removing the locking ring.
Pay special attention to the screen’s mounting points where pulp accumulates unseen. Use your cleaning brush to gently dislodge debris from these crevices before full disassembly. If parts feel stuck, don’t force them—consult your manual for model-specific disassembly techniques. Forcing components can crack plastic housings or misalign internal mechanisms.
Essential Cleaning Tools That Actually Work

Your juicer’s included cleaning brush is your most valuable tool—specifically designed to navigate mesh contours without damage. This mini-scrub brush features bristles with the perfect firmness: firm enough to remove residue yet soft enough to preserve delicate mesh. Discard generic bottle brushes or toothbrushes that create micro-scratches harboring bacteria.
Must-Have Cleaning Supplies Checklist
- Warm water (100-120°F—not hot enough to warp plastic)
- Mild dish soap (phosphate-free)
- White vinegar (5% acidity)
- Baking soda
- Clean microfiber towel (lint-free)
- Small bowl for soaking
Avoid these dangerous alternatives:
– ✘ Bleach (causes chemical leaching into juice)
– ✘ Denture cleaners (contain immune-system-harming persulfate)
– ✘ Metal scrapers (damage mesh integrity)
– ✘ Borax (causes serious health issues if ingested)
Proper Scrubbing Technique for Maximum Effectiveness
Hold the screen under running warm water while scrubbing to flush debris away immediately. Use your cleaning brush with gentle circular motions, working bristles through mesh holes from both sides. Apply moderate pressure—enough to dislodge pulp but not bend mesh wires. For stubborn spots, rotate the brush at a 45-degree angle to access clogged holes more effectively.
Three-Step Mesh Cleaning Method
- Inside-Out Approach: Scrub the convex (inner) surface first to dislodge trapped pulp
- Outside-In Follow-Up: Flip the screen and scrub the concave (outer) surface to remove loosened debris
- Running Water Rinse: Hold screen under faucet while rotating to flush debris through mesh
Never scrub dry—always maintain water contact during cleaning. Dry brushing grinds pulp deeper into mesh, creating permanent clogs. If residue persists after initial scrubbing, return the screen to warm soapy water for another 5 minutes before retrying. Patience prevents the screen damage that occurs when rushing the process.
Light Test Verification for Genuine Cleanliness
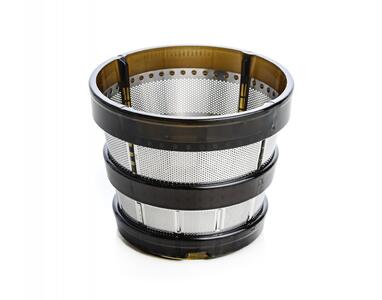
Your screen might look clean but still harbor hidden clogs—this is where the light test becomes essential. Hold the screen against a bright window or lamp and examine the mesh closely. Any holes appearing dark or opaque indicate residual pulp blocking juice flow. This inspection method reveals problems invisible to casual observation.
Troubleshooting Common Light Test Findings
- Scattered dark spots: Isolated clogs requiring targeted brushing
- Uniform haze: Mineral buildup needing vinegar soak
- Complete opacity in sections: Severe celery deposits requiring extended citric acid treatment
If the light test reveals blockages, soak the screen in 50% white vinegar solution for 20 minutes before repeating the scrubbing process. For persistent mineral deposits, increase vinegar concentration to 70% and soak overnight. Always retest with light after cleaning—this verification step ensures optimal juice yield and prevents motor strain from partial clogs.
Towel Drying to Prevent Mineral Buildup
Air drying creates invisible mineral deposits that gradually clog mesh holes—this silent killer of juicer performance. Municipal water contains dissolved minerals that crystallize as water evaporates, forming microscopic plugs in your screen’s holes. Within weeks, this buildup can reduce juice yield by up to 30% without obvious visual signs.
Immediately after rinsing, dry the screen thoroughly with a clean microfiber towel using gentle patting motions. Focus on the mesh area where water pools in microscopic holes. For best results, dry both sides while holding the screen at a 45-degree angle to allow water drainage. Complete drying takes approximately 90 seconds but prevents months of accumulated mineral damage.
Hard Water Solutions
If your water supply tests above 7 grains per gallon hardness:
– Soak screen in 10% lemon juice solution after cleaning
– Keep a dedicated drying towel only for juicer components
– Store screen in a sealed container with silica gel packets
– Consider installing a water softener for kitchen faucet
Deep Cleaning for Stubborn Celery Deposits
Celery creates uniquely challenging residue that bonds with mesh in ways other produce doesn’t. This fine film becomes progressively harder with each use, eventually reaching rock-like consistency that resists standard cleaning. When standard methods fail, implement this intensive celery deposit removal protocol:
Four-Phase Celery Deposit Elimination
- Initial Vinegar Soak: Submerge screen in 100% white vinegar for 2 hours
- Baking Soda Scrub: Make paste with baking soda and water, gently scrub mesh
- Citric Acid Treatment: Soak in 5% citric acid solution overnight
- Ultrasonic Rinse: Hold under running water while vibrating screen with cleaning brush
Never use knives or metal tools to scrape celery deposits—this damages mesh integrity permanently. Instead, combine extended soaking with persistent gentle brushing. For extreme cases, repeat the entire process over 2-3 days. Prevention is easier: always juice celery last followed by cucumber to flush the system, and clean immediately afterward.
Safe Natural Cleaning Solutions That Work
Commercial cleaners often contain harsh chemicals that compromise food safety. These natural alternatives deliver superior results without health risks:
Vinegar Cleaning Protocol
- Mix equal parts white vinegar and warm water
- Soak screen for 30 minutes (up to 2 hours for severe clogs)
- Scrub with cleaning brush under running water
- Rinse thoroughly until vinegar smell disappears
Vinegar’s acetic acid dissolves organic residue while killing 98.6% of kitchen microbes including E. coli and Staphylococcus. For mineral deposits, increase vinegar concentration to 75% and soak overnight.
Baking Soda Alternative Method
- Create paste with 1 part baking soda to 2 parts water
- Apply to screen mesh and let sit for 15 minutes
- Gently scrub with cleaning brush
- Rinse thoroughly with warm water
Baking soda’s mild abrasiveness removes residue while its alkalinity neutralizes odors. Research confirms it kills Salmonella and E. coli within 5 minutes of contact.
Horizontal Juicer Screen Cleaning Shortcuts
Single-auger (horizontal) juicers offer the fastest screen cleaning experience. Models like the Vidia, Sana 606, and Sana 707 feature compact screens that can be cleaned in under 60 seconds when following this streamlined process:
- Unplug and disassemble screen assembly
- Rinse under warm water while scrubbing with included brush
- Hold screen to light for verification
- Towel dry and reassemble
The key advantage of horizontal juicers is their smaller screen surface area—typically 25-40% less than vertical or centrifugal models. This reduced area means less mesh to clean and fewer hidden crevices where pulp accumulates. For frequent juicers, this time savings adds up to hours per year.
Step-by-Step Complete Cleaning Process
Follow this 10-minute routine after every juicing session for optimal performance:
- Unplug and disassemble all components immediately after use
- Rinse each part under warm running water to remove loose pulp
- Soak in warm soapy water for 10 minutes (5 minutes for light use)
- Scrub screen mesh from both sides using circular motions
- Inspect with light test and repeat scrubbing if needed
- Deep clean blades and housing with cleaning brush
- Rinse all components thoroughly under running water
- Towel dry screen completely; air dry other parts
- Verify screen cleanliness with light test one final time
- Reassemble and store in dry location
For heavy juicing sessions or celery-heavy recipes, add a 30-minute vinegar soak after step 3. Always complete the full process within 30 minutes of finishing juicing—this timing prevents the residue hardening that complicates cleaning.
Ingredient Order That Minimizes Cleaning Effort
Your juicing sequence dramatically impacts cleanup difficulty. Start with harder produce like carrots and beets to break down tough fibers, then progress to medium-firm fruits like apples, finishing with high-water-content items like cucumbers and citrus. This progression naturally flushes pulp from the system during operation.
Juicing softer fruits last provides a built-in cleaning cycle—water content rinses internal components as you juice. This technique reduces post-juice cleaning time by up to 50% compared to reverse sequencing. For multiple-batch days, juice a cucumber between sessions to maintain system cleanliness without full disassembly.
Troubleshooting Common Screen Problems
Reduced juice yield: Soak screen in vinegar solution for 1 hour, then scrub both sides. Check for mineral deposits using light test.
Motor straining: Disassemble and inspect screen for partial clogs. Clean screen thoroughly and verify all holes are clear with light test.
Persistent odors: Soak all components in baking soda solution (1 tbsp per cup water) for 30 minutes, then rinse thoroughly.
Discolored screen: Soak in 10% lemon juice solution for 2 hours to remove tannin stains from berries and beets.
Long-Term Screen Maintenance Habits
Preventative care extends your screen’s lifespan significantly:
- Line pulp container with reusable mesh bag for easy disposal
- Dry screen thoroughly after each use to prevent mineral buildup
- Perform deep cleaning with citric acid weekly for daily users
- Store juicer disassembled in dry, ventilated space
- Replace screen every 12-18 months for optimal performance
The light test remains your most valuable maintenance tool—incorporate it into every cleaning session to catch developing issues before they impact performance. By following these protocols consistently, your juicer screen will deliver peak performance for years rather than months.


