
There’s nothing quite like the crisp, vibrant taste of fresh apple juice in juicer—bursting with natural sweetness and complex flavors that store-bought versions simply can’t replicate. When you create apple juice in juicer at home, you bypass the pasteurization, added sugars, and preservatives that strip commercial juices of their nutritional value and authentic apple character. Just minutes after pressing your first batch, you’ll discover why home juicing enthusiasts never return to bottled alternatives—the difference is immediate, dramatic, and deliciously refreshing. This guide reveals professional techniques that transform ordinary apples into extraordinary juice, whether you’re using a high-end cold press model or a basic centrifugal juicer.
Making apple juice in juicer delivers more than just superior taste—it gives you complete control over ingredients, flavor profiles, and nutritional content. You’ll learn which apple combinations create perfect balance, how to maximize yield from every fruit, and why a simple lemon trick dramatically extends freshness. By the time you finish this guide, you’ll have the knowledge to consistently produce restaurant-quality apple juice that satisfies your exact preferences.
Why Your Apple Juice Tastes Bitter (And How to Fix It)
Bitterness in homemade apple juice often stems from overlooked preparation mistakes that you can easily correct with proper technique. Understanding these causes prevents wasted ingredients and ensures every batch delivers pure apple goodness.
How Crushed Apple Seeds Create Bitterness
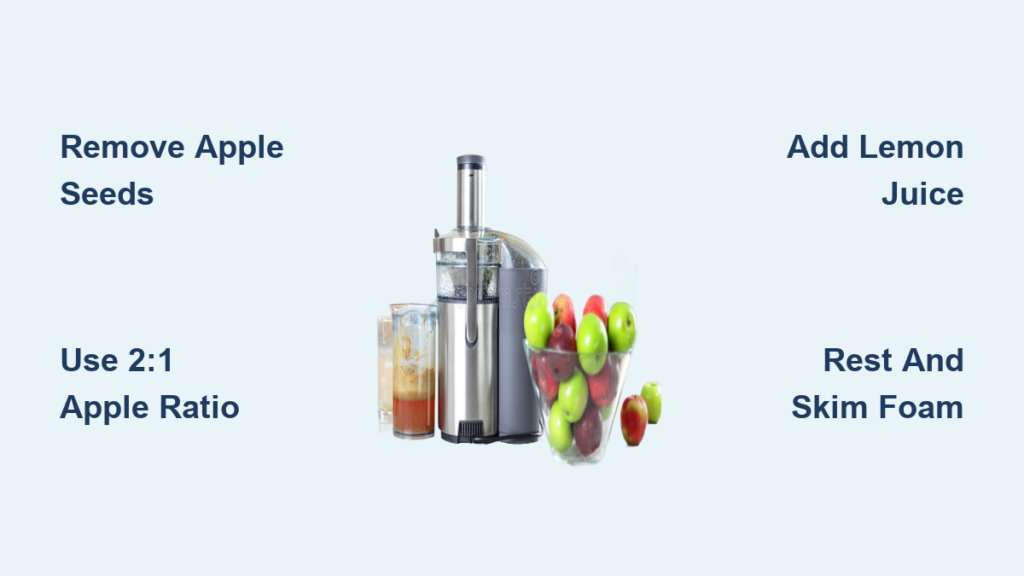
Apple seeds contain amygdalin, a compound that releases trace amounts of cyanide when crushed—though the quantities in normal juicing remain well below dangerous levels. More importantly for taste, these crushed seeds impart noticeable bitterness to your juice. When processing large batches, always remove cores before juicing to eliminate this problem. For small batches (under four apples), the minimal seed exposure typically won’t affect flavor, but serious juicers should develop the habit of coring apples regardless of quantity.
The Perfect Sweet-Tart Apple Ratio to Avoid Bitterness
The golden ratio for balanced apple juice consists of two parts sweet red apples to one part tart green apples. This proportion creates harmony where the natural sugars of Red Delicious, Gala, or Fuji apples temper the tartness of Granny Smith varieties while the green apples prevent cloying sweetness. When using exclusively sweet apples, juice can develop an artificial, one-dimensional flavor that many mistake for bitterness. Adding just one Granny Smith apple to every two sweet varieties transforms your juice with bright, refreshing complexity that tastes authentic rather than flat.
Cold Press vs. Centrifugal: Best Juicer for Apple Juice
The juicer type you select dramatically impacts juice quality, nutritional content, and your overall experience. Understanding these differences helps you maximize results with whatever equipment you own.
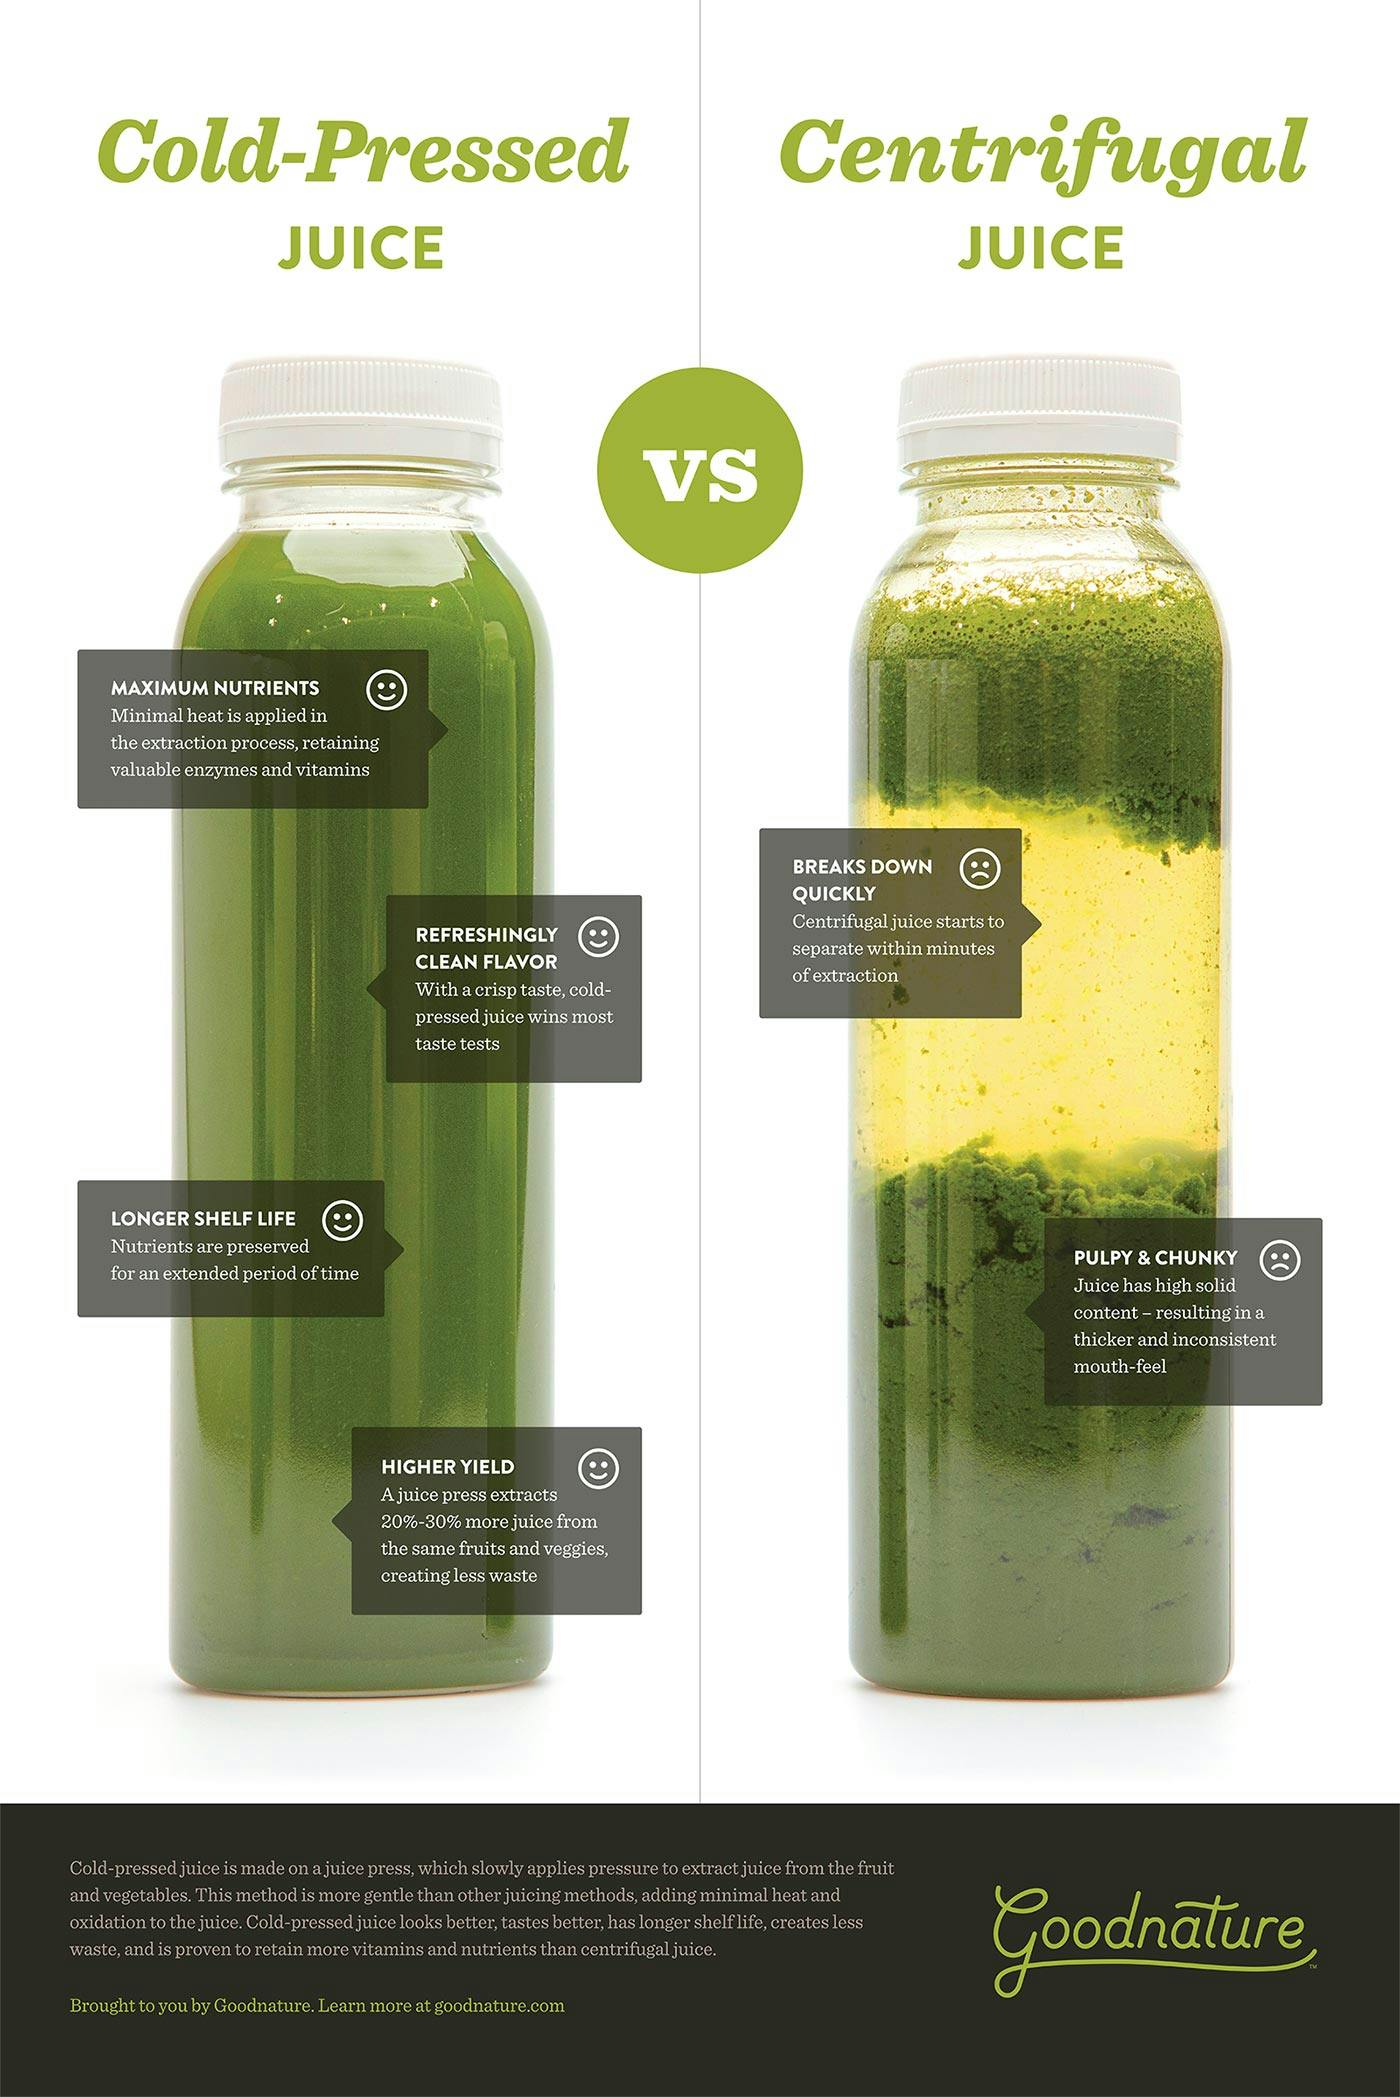
Why Cold Press Juicers Preserve More Nutrients
Cold press (masticating) juicers slowly grind and press apples without generating heat, preserving up to 30% more vitamins and enzymes compared to high-speed alternatives. The gentle extraction process minimizes oxidation, resulting in juice that maintains vibrant color and fresh flavor for 3-5 days refrigerated—nearly double the shelf life of centrifugal-juiced versions. While cold press models cost more and operate slower, they extract 20-30% more juice from the same quantity of apples, making them ideal for frequent juicers who value maximum yield and nutritional retention.
How to Minimize Foam with Centrifugal Juicers
Centrifugal juicers create foam due to high-speed spinning that incorporates air into the juice—a common frustration when making apple juice in juicer. To minimize this issue, always ensure your machine operates at full speed before feeding apples through the chute. Feed apples steadily rather than in large chunks to maintain consistent processing. After juicing, let the foam rise for 5-10 minutes before skimming it off with a spoon. For completely foam-free juice, strain through a fine mesh sieve immediately after extraction—this simple step creates professional-looking juice with smooth mouthfeel.
The Exact Apple Ratio for Perfectly Balanced Juice
Professional juicers achieve consistently delicious results by following precise apple selection guidelines that home users often overlook. These ratios transform ordinary juice into extraordinary beverages.
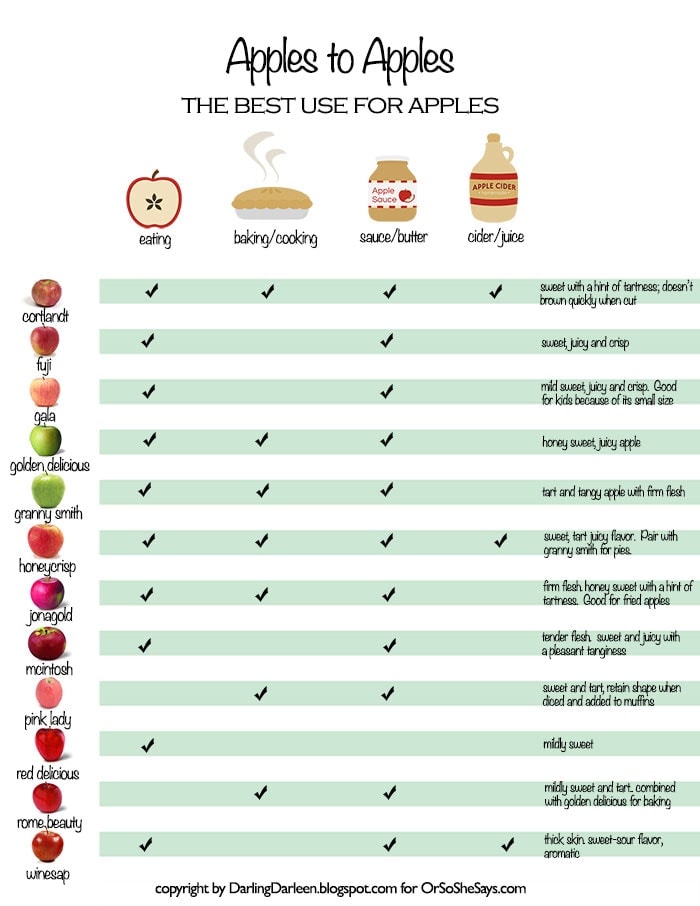
Best Sweet Apple Varieties for Maximum Juice Yield
Fuji and Honeycrisp apples deliver exceptional juiciness and natural sweetness with minimal need for added sweeteners. Their high water content produces generous yields—expect about 4 ounces of juice per medium Fuji apple compared to 3 ounces from Red Delicious varieties. When selecting apples, choose firm specimens without bruises or soft spots, as damaged fruit yields significantly less juice. For optimal extraction, allow refrigerated apples to reach room temperature before juicing—cold apples resist juice release, reducing your overall yield by up to 15%.
Why Granny Smith Apples Transform Your Juice Flavor
Granny Smith apples provide essential tartness that balances overly sweet varieties and creates complex, restaurant-quality juice. Their bright acidity prevents the flat, one-dimensional flavor common in single-variety juices while enhancing the natural apple character. When using the 2:1 ratio (two sweet apples to one Granny Smith), the resulting juice has sophisticated depth that tastes expensive yet requires no special ingredients. For best results, always add Granny Smith apples last during juicing to maximize their bright flavor contribution without overwhelming the blend.
How to Peel Apples for Juicing Without Wasting Time
Proper apple preparation significantly impacts juice quality and efficiency. Knowing when to peel—and how to do it quickly—streamlines your juicing process while optimizing results.
When to Keep Peels On for Extra Nutrients
Apple peels contain valuable fiber and antioxidants, making them worth keeping when using cold press juicers that efficiently separate pulp. The extra nutrients enhance juice’s health benefits with minimal impact on texture. However, centrifugal juicers often struggle to fully separate peel particles, resulting in slightly gritty juice that many find unpleasant. If using a centrifugal model, peel apples for smoother results—reserve the peels for composting or baking projects where texture matters less.
The Fastest Way to Prep Apples for Your Juicer
Skip time-consuming coring by cutting apples into wedge-shaped pieces that fit your juicer’s feed chute. Most models accommodate apple quarters, eliminating the need for specialized equipment. For large batches, process multiple apples simultaneously by stacking wedges—this technique reduces prep time by 40% while maintaining safety. Always wash apples thoroughly before cutting to prevent transferring surface contaminants to the flesh during preparation.
How to Prevent Foam in Fresh Apple Juice
Foam formation on freshly made apple juice in juicer affects presentation and mouthfeel but is easily managed with proper technique. These solutions work regardless of your equipment type.
Why Centrifugal Juicers Create More Foam
Centrifugal juicers inherently generate foam due to their high-speed extraction method—typically producing 15-20% more foam than cold press alternatives. The spinning action incorporates air into the juice during processing, creating a layer that rises to the surface. While harmless, excessive foam dilutes flavor perception and creates an unprofessional appearance. Understanding this mechanical cause helps you implement targeted solutions rather than treating symptoms.
3 Proven Methods to Eliminate Juice Foam
- Rest and skim: Allow juice to sit undisturbed for 5-10 minutes after juicing, then gently skim foam from the surface with a spoon
- Fine mesh straining: Pour juice through a fine mesh strainer immediately after extraction for instant foam removal
- Lemon integration: Add 1 teaspoon of lemon juice per 8 ounces of apple juice during processing—the acidity reduces foam formation by stabilizing proteins
The Lemon Trick That Doubles Your Juice Shelf Life
Adding lemon isn’t just for flavor—it’s the single most effective method for extending your homemade apple juice’s freshness while enhancing taste.
How Lemon Juice Slows Oxidation in Apple Juice
The citric acid in lemon juice dramatically slows enzymatic browning and oxidation in apple juice, preserving fresh flavor and vibrant color. This natural preservative effect extends refrigerated shelf life from 24-48 hours to 3-5 days—nearly doubling your window for enjoyment. For optimal results, add lemon juice during the juicing process rather than after, ensuring thorough integration with minimal oxidation occurring before protection begins.
Exact Lemon-to-Apple Ratio for Best Results
Use one medium lemon (peeled) for every 8-10 medium apples. For centrifugal juicers or the blender method, always peel lemons first to prevent bitter compounds from the pith affecting flavor. Cold press juicers can process lemons with skin intact for maximum nutrient retention. The ideal ratio provides noticeable preservation benefits without overpowering the delicate apple flavor—you should detect subtle brightness rather than distinct lemon taste.
Why Your Juicer Yields Less Juice (5 Fixes)

Low juice yield frustrates many home juicers, but these common issues have simple solutions that maximize extraction from every apple.
How Apple Temperature Affects Juice Extraction
Cold apples resist juice release, reducing your yield by up to 15% compared to room-temperature fruit. Always allow refrigerated apples to warm to room temperature for 30-60 minutes before juicing. This simple step softens cell structures, enabling more efficient juice extraction. For immediate juicing needs, briefly run cold apples under warm water—this surface warming provides significant yield improvement without affecting flavor.
The Critical Speed Setting for Maximum Yield
Centrifugal juicers require full-speed operation before introducing apples to achieve optimal extraction. Always let the machine reach maximum RPMs before feeding fruit through the chute. Processing apples too early—while the juicer is still accelerating—reduces yield by 20-30% as the machine struggles to process the load. Listen for the motor pitch to stabilize indicating full speed has been reached, then begin feeding apples steadily for best results.
How Long Apple Juice Lasts in Fridge (Storage Guide)
Proper storage techniques determine whether your fresh apple juice in juicer remains vibrant or quickly deteriorates—follow these guidelines for maximum freshness.
Why Airtight Containers Extend Freshness
Oxygen exposure accelerates oxidation and flavor degradation in fresh juice. Always store apple juice in completely filled, airtight containers to minimize air contact. Glass jars with tight-sealing lids work best—leave no headspace as juice will contract slightly when chilled. Properly stored juice maintains peak quality for 3-5 days when made with lemon, compared to just 24-48 hours for plain juice.
Signs Your Juice Has Started Fermenting
Slight bubbling, a yeasty aroma, or visible foam on refrigerated juice indicate natural fermentation has begun. While generally safe to consume, fermented juice develops tangy, cider-like flavors that may not appeal to everyone. To prevent premature fermentation, always refrigerate juice immediately after preparation and avoid temperature fluctuations during storage.
Green Apple Cucumber Juice Recipe for Beginners
This three-ingredient variation creates a refreshing, lightly sweet beverage that introduces beginners to vegetable juicing with minimal adjustment.
Why Peeling Cucumber Matters for Smooth Juice
Unpeeled cucumber yields juice with visible green specks and slightly textured mouthfeel that many find unappealing. Always peel cucumbers before juicing for smooth, professional results—this extra step takes just 15 seconds but dramatically improves texture. The peel contains compounds that can create bitterness in juice, particularly noticeable in lighter blends like green apple combinations.
Exact Measurements for Perfect Green Juice
Process two peeled green apples (washed and quartered), one peeled cucumber (cut into 2-inch strips), and one peeled lemon (quartered) through your juicer. This combination yields 16 ounces of vibrant juice with balanced sweetness, hydration, and brightness. Serve immediately over ice for best flavor—this variation maintains quality for only 24-48 hours refrigerated due to the cucumber content.
Making apple juice in juicer delivers immediate satisfaction and long-term health benefits when you follow these professional techniques. By selecting optimal apple varieties, using proper preparation methods, and implementing smart storage solutions, you’ll consistently produce juice that surpasses commercial alternatives in flavor, nutrition, and value. Start with the 2:1 sweet-to-tart apple ratio and lemon preservation trick—these two techniques alone will transform your results. As you gain confidence, experiment with ginger, mint, or cucumber additions to create signature blends that match your personal taste. The investment of just 10-15 minutes yields a nutrient-rich beverage that nourishes your body while delighting your taste buds—a simple kitchen ritual with extraordinary rewards.


