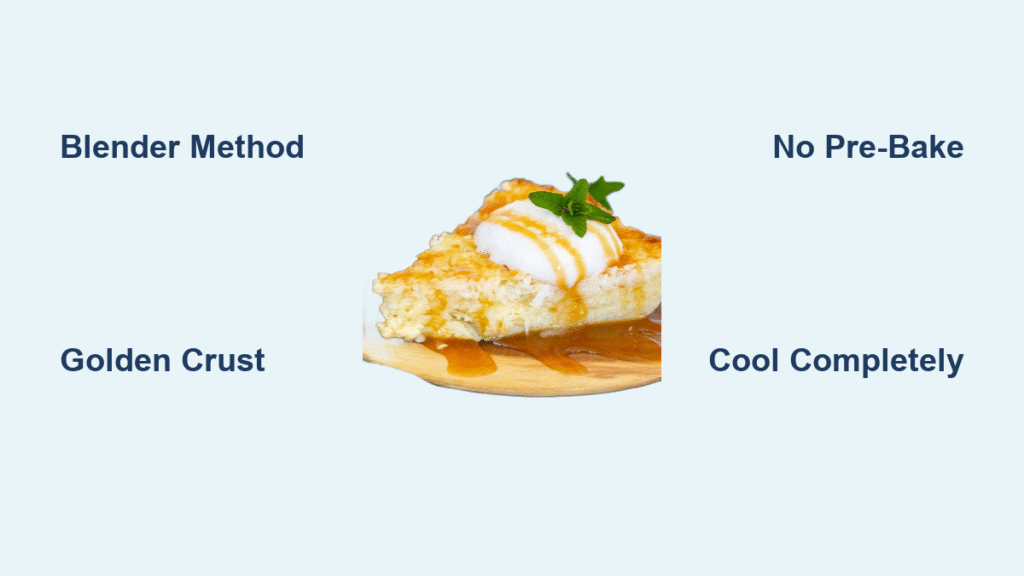
The magic of apple cinnamon blender bread lies in its revolutionary simplicity—no sifting flour, no hand-mixing, and no arm fatigue. Just toss whole ingredients into your blender, hit “pulse,” and watch ordinary pantry staples transform into an aromatic, bakery-quality loaf that fills your kitchen with the essence of fall. This gluten-free quick bread delivers professional results using only a high-speed blender, making it perfect for busy mornings or impromptu dessert cravings. With ripe bananas as the secret moisture booster and rolled oats replacing traditional flour, you’ll achieve a tender crumb packed with visible apple chunks and warm cinnamon spice—every time.
Unlike finicky traditional recipes, this blender bread eliminates guesswork through its foolproof batter creation. The blender’s vortex action simultaneously grinds oats into fine flour while emulsifying wet ingredients into a perfectly smooth, pourable consistency. You’ll skip the common pitfalls of lumpy batter or uneven spice distribution that plague hand-mixed versions. Whether you’re a baking novice or a seasoned pro short on time, this method guarantees moist, flavorful results with minimal cleanup. In this guide, you’ll discover the exact ingredient ratios, critical blender techniques, and smart variations that make apple cinnamon blender bread a weeknight hero.
Essential Ingredients for Perfect Texture Every Time
Why Each Component Matters
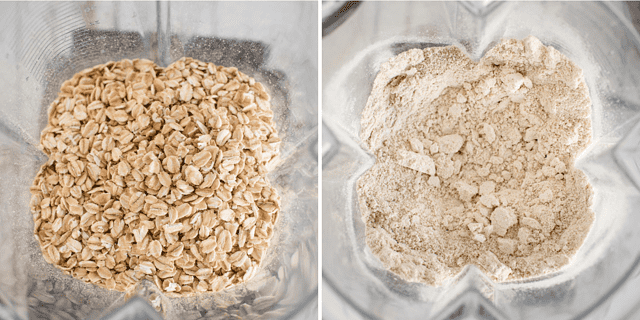
3 perfectly ripe bananas provide the foundation for this bread’s signature moisture and natural sweetness. As bananas develop brown spots, their starch converts to sugar, eliminating the need for excess added sweeteners. 2 large eggs create structure without heaviness, binding ingredients while contributing to a light, springy crumb. 1 teaspoon pure vanilla extract amplifies the apple-cinnamon harmony with subtle floral notes—never use imitation here. ¼ cup pure maple syrup adds caramel depth that refined sugars can’t match; honey or agave make acceptable substitutes. 2 cups rolled oats (old-fashioned, not quick-cooking) become your gluten-free flour when pulverized, yielding a tender texture impossible with pre-ground oat flour.
1 teaspoon baking soda ensures reliable rise when activated by the bananas’ acidity—check expiration dates for optimal lift. 1 teaspoon ground cinnamon must be freshly ground for vibrant warmth; pre-ground loses potency after 6 months. ½ cup finely chopped apple delivers juicy bursts in every slice—leave skins on for fiber and visual flecks of color. For presentation, reserve extra chopped apple to scatter across the batter’s surface before baking.
Critical Ingredient Swaps
Gluten-free bakers can use certified GF rolled oats with zero texture compromise. Replace maple syrup cup-for-cup with honey for floral notes or date syrup for caramel richness. Avoid quick oats—they create gummy results due to their pre-cooked texture. Never substitute steel-cut oats; they won’t blend fine enough. Stick to room-temperature eggs to prevent curdling when blended with cold bananas.
Blender and Pan Setup Non-Negotiables
Must-Have Equipment
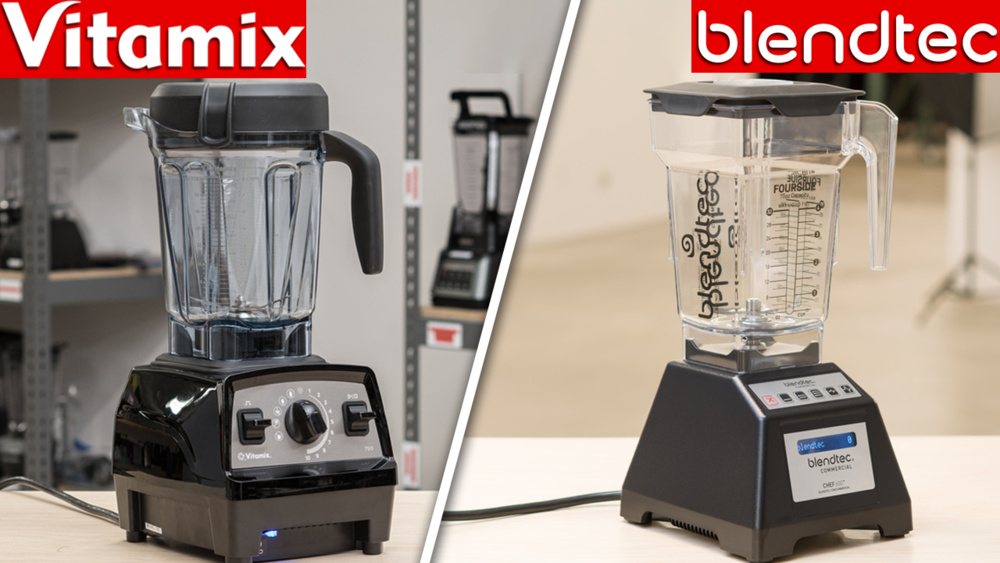
A high-speed blender (minimum 1000 watts like Vitamix or Blendtec) is non-negotiable—standard blenders won’t fully pulverize oats, leaving gritty texture. An 8×4 or 9×5 inch loaf pan works universally; smaller pans cause dangerous overflow. Parchment paper is your stick-prevention secret: cut a strip 2 inches wider than your pan’s length to create lift handles. Skip non-stick spray—it creates uneven browning where oil pools.
Pro Setup Sequence
Place your blender near the oven to minimize batter transfer time. Line the loaf pan with parchment, pressing it firmly into corners with no air pockets. Fill the pan only ¾ full—batter will rise dramatically during baking. Position your oven rack in the center position for even heat circulation. Never skip the parchment; this bread’s moisture-rich formula bonds aggressively to bare metal.
Foolproof Blender Method in 3 Critical Steps
Create Silk-Smooth Batter Base
Add ingredients to your blender in this exact order: bananas, eggs, vanilla, maple syrup, oats, baking soda, and cinnamon. Starting with wet ingredients prevents blade jamming. Blend on high for 45-60 seconds until completely homogeneous—scrape sides once if needed. The batter should coat a spoon thickly but drip slowly, resembling heavy cream. Visual cue: Shine a light inside the blender—if you see any oat flecks, blend 15 seconds longer.
Fold Apples Without Sacrificing Texture
Pour batter into a bowl immediately after blending (residual heat thickens it in the blender jar). Gently fold ½ cup apple pieces with 3-4 downward strokes using a silicone spatula. Over-mixing breaks down apple chunks into mush. For visible fruit pockets, cut apples into ¼-inch dice—larger pieces sink, smaller ones vanish. Honeycrisp or Pink Lady apples hold shape best during baking.
Perfect Pan Loading Technique
Pour batter into your parchment-lined pan, smoothing the top with a wet spatula. Scatter extra chopped apple across the surface for bakery-style presentation. Do not compact the batter—tapping the pan once removes air bubbles but preserves delicate aeration. Remember: underfilling causes dry edges, overfilling creates a volcano-like dome that collapses.
Texture Troubleshooting for Flawless Results
Fixing Common Issues
Gritty texture? Your blender lacked power to fully grind oats—process oats alone for 20 seconds first next time. Dense, heavy loaf? Over-mixing after blending deflated air bubbles; fold apples with extreme gentleness. Soggy bottom? Pan was overfilled or oven temperature too low—ensure proper preheating. Cracked top? Normal for quick breads; indicates perfect moisture retention underneath.
Moisture Balance Secrets
Bananas must show 75% brown spotting—green bananas won’t provide enough natural sugar or moisture. If batter seems too thick after blending, add 1 tablespoon milk (dairy or nut-based). For extra moisture retention, replace 2 tablespoons maple syrup with applesauce. Never drain liquid from bananas—those juices are flavor gold.
Flavor Maximization Techniques
Spice Level Customization
Boost cinnamon to 1½ teaspoons for intense warmth, or create an “autumn spice blend” with ¼ teaspoon each nutmeg and allspice. Add pinch of cardamom (⅛ teaspoon) for sophisticated depth that complements apple beautifully. For kids, reduce cinnamon to ½ teaspoon and add 2 tablespoons raisins.
Texture-Enhancing Mix-Ins
Fold in ¼ cup chopped walnuts after apples for nutty crunch that contrasts the tender crumb. Dried cranberries (soaked in warm water for 5 minutes first) add festive tartness. Orange zest (½ teaspoon) brightens heavy spices—never omit the vanilla, as it bridges all flavors.
Critical Blender Performance Notes
Power Requirements
Blenders under 900 watts fail to fully pulverize oats, creating unpleasant grittiness. If your machine strains, process oats alone for 20 seconds before adding other ingredients. Pause blending halfway to scrape sides—oats cling to jar walls. Warm ingredients blend smoother; chill eggs/bananas only if your kitchen exceeds 80°F.
Batter Consistency Red Flags
Too thin? Oats were old or rancid—store in the fridge to extend freshness. Too thick? Bananas were underripe; always use spotty specimens. Lumpy? Baking soda clumped—sift it over wet ingredients before blending. Never add ice to thin batter; it disrupts emulsion and causes gumminess.
What the Recipe Doesn’t Tell You (And How to Adapt)
:strip_icc()/toothpick-test-057af7b7-367e64c7c51f4c30a8de03bd0b717375.jpg)
Missing Critical Details
The original recipe source omits baking temperature, time, and doneness indicators—a significant gap for beginners. Standard quick bread practices suggest 350°F for 45-60 minutes, but monitor visually: bake until the top springs back when lightly pressed and edges pull from the pan. No oven thermometer? Invest in one—most run 25°F off. Missing storage guidelines mean err on caution: keep at room temperature in an airtight container for up to 2 days; refrigerate longer storage to prevent mold.
Scaling and Pan Warnings
Doubling the recipe requires two separate blender batches—overfilling prevents proper oat grinding. For muffins, use 12 standard cups and reduce baking time by 15 minutes. An 8×4 pan yields a taller loaf needing 5-7 extra minutes versus a 9×5. Never use glass pans—they cause uneven browning.
Final Pro Tips for Guaranteed Success
Apple cinnamon blender bread’s genius is its flexibility—slightly overbaked loaves still taste incredible toasted with butter. Always use room-temperature eggs to prevent curdling when blended with cold bananas. For clean slices, cool completely on a wire rack (minimum 1 hour) before cutting. Leftover bread shines as French toast: soak slices in egg mixture and pan-fry until golden.
This recipe’s true superpower is transforming “I don’t have time to bake” into “I made this from scratch!” The blender does the heavy lifting while you prep ingredients—total hands-on time is under 10 minutes. Once mastered, experiment with pear-ginger or blueberry-lemon variations using the same method. Your family’s new favorite comfort food is just one blender pulse away, with zero bowls to wash. Grab those spotty bananas and dented apples—they’re about to become your kitchen’s most requested treat.