
Your blender is secretly a rice flour factory. Skip the $6 store-bought bags and transform pantry rice into fresh, additive-free flour in under three minutes of active time—saving 78% per pound while controlling texture and freshness. Whether you’re gluten-free baking, thickening sauces, or craving crispy fried chicken, this guide reveals exactly how to leverage your Vitamix, Blendtec, or Ninja to create versatile flour without special equipment. You’ll master rice selection, grinding tricks for silky-smooth results, and storage secrets that keep flour fresh for a year.
Select Your Rice for Perfect Texture Results
White Rice vs Brown Rice: Shelf Life and Flavor Trade-Offs
Long-grain white rice creates neutral-flavored flour that stays fresh for 1+ years in your pantry. Its low oil content prevents rancidity, making it ideal for frequent bakers. Brown rice adds nutty depth and extra fiber but spoils faster—limit pantry storage to 3-6 months due to natural oils. Medium-grain rice delivers balanced starch for muffins and pancakes, while short-grain or Arborio varieties produce stickier flour perfect for dumpling wrappers. Avoid pre-seasoned or parboiled rice; additives like oil or salt create lumpy textures that ruin grinding.
Specialty Rice Blends for Authentic Dishes
Sweet (glutinous) rice transforms into stretchy mochi flour when ground—use short-grain white glutinous rice only. Wild rice adds earthy notes and dark specks; blend it with white rice for rustic breads. Never use instant or pre-cooked rice—it contains moisture-absorbing starches that turn to paste in your blender. Stick to raw, unprocessed grains for reliable results.
Critical Prep: Rinse, Dry, and Chill
Rinse rice in a fine-mesh sieve under cold water for 2-3 minutes to remove dust, debris, and excess starch. Drain thoroughly and spread on a clean kitchen towel for 30 minutes until bone-dry—any moisture causes clumping during grinding. For smoother flour, freeze measured rice 15-30 minutes before blending. This chills the grains, reducing heat buildup that makes flour gummy. Never skip drying; damp rice creates cement-like paste that strains your blender motor.
Gather These Blender-Specific Tools

Must-Have Blender Models and Containers
A 1000W+ blender like Vitamix (Explorian E310 or dry-grain container), Blendtec, Ninja, or NutriBullet is non-negotiable. Standard wet containers work if completely dry, but dedicated dry-grain containers prevent flour from escaping blade seals. Test your blender’s power: if it struggles with frozen fruit, reduce rice batches to ½ cup. Weak blenders overheat, yielding gritty flour—don’t force it.
Supporting Gear for Flawless Results
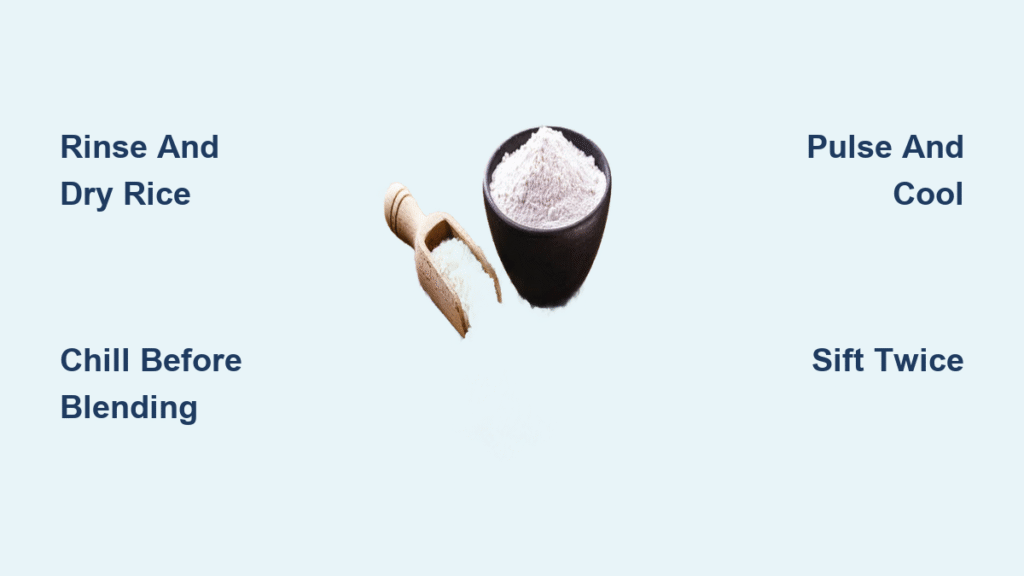
You’ll need a fine-mesh strainer (or flour sifter), airtight glass jars, and a kitchen scale. Pro tip: One cup (185g) raw rice equals exactly 1½ cups (140g) finished flour—weighing ensures recipe accuracy. Skip volume measurements; rice flour compacts differently than wheat flour. Keep a dry cloth nearby for immediate post-grind wiping—rice dust hardens into concrete if exposed to moisture.
Grind Rice Flour in 4 Foolproof Steps
Load Correctly to Prevent Motor Burnout
Never exceed 1 cup (185g) of dry rice per batch. Overloading causes uneven grinding and overheats motors. For blenders under 1200W, drop to ½ cup batches. Scoop rice directly into the dry container—no liquid needed. Secure the lid tightly; fine flour escapes through tiny gaps.
Master the Pulse-Blend-Cool Sequence
- Pulse 3-5 times to shatter whole grains into coarse sand
- Start on lowest speed, then ramp to maximum within 5 seconds
- Blend 30-60 seconds until powder feels smooth between fingers
- Pause if warm—let flour cool 1-2 minutes before continuing
Heat is your enemy: overheated flour clumps and develops stale flavors. If your blender sounds strained, stop immediately. High-powered models (Vitamix/Blendtec) often finish in 45 seconds; weaker units may need 90 seconds with cooling breaks.
Verify Superfine Texture Instantly
Stop blending and rub a pinch of flour between thumb and forefinger. Gritty? Blend in 15-second bursts. Perfect flour should feel like cornstarch—not silky as commercial superfine, but smooth enough for pancakes and frying. Critical check: Hold a spoonful against light; no visible specks mean it’s ready. Don’t trust visual cues alone—texture testing is non-negotiable.
Sift for Maximum Yield and Consistency
Tap flour through a fine-mesh strainer into a bowl. Hard rice fragments will catch in the sieve—re-blend these remnants for 10-15 seconds. Discarding them wastes 5-10% of your yield. For delicate cakes, repeat sifting through a tea strainer. This double-sift method gets you 90% of commercial superfine quality using only household tools.
Store Flour to Prevent Rancidity and Clumping

Container Hacks for Year-Long Freshness
White rice flour lasts 1 year in glass mason jars kept in a dark pantry. Brown rice flour needs refrigeration or freezing (max 6 months pantry, 1 year frozen) due to oil content. Never use thin plastic bags—rice flour absorbs odors like a sponge. Place freezer bags inside rigid containers to block spice smells. Always label with production date; flour older than 6 months needs sniff-testing.
Emergency Spoilage Check Before Use
Rancid brown rice flour develops a paint-like odor. White flour turns musty if exposed to moisture. Scoop a spoonful into a bowl—if it clumps when pressed, it’s absorbed humidity. Discard any flour with dark spots (mold) or off-smells. Properly stored flour stays powdery and neutral-smelling for months.
Fix Gritty Flour in 60 Seconds Flat

Double-Grind Technique for Bakery-Quality Results
Gritty flour? Blend it again in 30-second bursts, sifting between cycles. Most home blenders can’t match commercial mills, but this trick gets you 95% there. For ultra-smooth tempura or delicate cakes:
– Sift flour through the finest mesh available
– Re-blend retained particles with 1 tsp cornstarch (reduces static)
– Repeat up to three times
Warning: Blending beyond 90 seconds overheats flour—pause 2 minutes between cycles. Never add liquid; it creates paste.
Why Your Flour Clumps (and How to Stop It)
Clumping happens when warm flour meets cool air, creating condensation. Fix it by:
– Chilling rice 30 minutes pre-blend
– Reducing batch sizes to ½ cup
– Letting flour cool completely in the blender jar before transferring
If clumps form in storage, break them with a fork and sift again—no need to re-blend.
Use Rice Flour Like a Pro Chef
Baking Substitutions That Actually Work
Replace wheat flour 1:1 by weight (not volume!) in pancakes, muffins, or cookies. Volume swaps fail—rice flour weighs 30% less per cup. For structure, add ½ tsp xanthan gum per cup of rice flour in baked goods. Skip it for frying or thickening. Critical tip: Mix rice flour with tapioca starch (1:1 ratio) for chewy gluten-free bread.
Best Applications by Rice Type
- White rice flour: Crispy fried chicken, neutral-flavored cakes, soup thickener
- Brown rice flour: Hearty muffins, nutty crepes, hearty breads
- Sweet rice flour: Stretchy dumpling wrappers, chewy mochi, gluten-free pasta
Never use rice flour alone in yeast breads—it lacks elasticity. Blend with sorghum or oat flour for best results.
Troubleshoot 5 Common Blender Failures
| Problem | Real Cause | Instant Fix |
|---|---|---|
| Gritty texture | Insufficient blending time | Blend in 15-sec bursts; sift and re-blend residue |
| Flour won’t sift | Overheated motor | Chill rice first; reduce batch size to ½ cup |
| Strange motor noise | Rice loaded above max line | Empty half the rice; never exceed 1 cup |
| Flour smells stale | Stored near spices | Transfer to glass jar; freeze for 24 hours to kill odors |
| Container won’t detach | Rice dust clogged threads | Wipe dry with cloth; run hot water over base (not motor) |
Protect Your Blender During Grinding
Post-Grind Cleaning That Prevents Damage
Wipe the container and blades with a dry cloth immediately—never add water while rice dust remains. Moisture turns dust into concrete that seizes blades. For stuck residue, grind ¼ cup coarse salt on high for 30 seconds, then wipe dry. Never soak the container; rice flour absorbs water and swells, damaging seals.
Motor Overheating Red Flags
If the blender base feels hot or emits a burning smell, stop immediately. Let it cool 5 minutes between batches—continuous grinding beyond 60 seconds strains motors. High-powered blenders (Vitamix/Blendtec) handle 3 batches back-to-back; weaker models need 2-minute cooldowns.
Key Takeaway: You can make restaurant-quality rice flour in under three minutes using only pantry rice and your existing blender—no specialty mill needed. By selecting the right rice, chilling grains before grinding, and sifting twice, you’ll achieve smooth flour that saves 78% versus store-bought while avoiding preservatives. Start with 1 cup of dry long-grain rice, blend for 45 seconds, and transform your gluten-free baking tonight. Store it properly in glass, and you’ll have fresh flour ready for crispy coatings, silky sauces, or tender muffins for a full year. Your blender’s next job: turning $1.29 worth of rice into professional-grade flour before dinner.


