
Imagine this: It’s 3 PM on a sweltering summer day. Your kids are dragging from the heat, and you’ve got nothing but a bowl of plump grapes staring back at you. Instead of grabbing sugary store-bought juice packed with preservatives, you can transform those grapes into vibrant, antioxidant-rich liquid sunshine using just your blender. How to make grape juice with a blender skips complicated equipment and delivers fresher flavor than bottled versions—capturing every heart-healthy polyphenol nature intended. You’ll control the sweetness, avoid artificial additives, and create a nutrient powerhouse that tastes like summer in a glass.
This isn’t just about convenience—it’s about reclaiming what store-bought juice steals from you. Commercial versions lose heat-sensitive vitamins during pasteurization and often add cheap sweeteners. But when you make grape juice with a blender, you preserve 100% of the natural antioxidants that support blood-vessel health and skin vitality. Whether you’re using seedless grocery-store grapes or tart Concord varieties from a farmers market, this 5-minute method extracts every drop of juice while keeping calories low (just 126–156 per cup without added sweeteners).
Why Your Blender Beats Store-Bought Juice Every Time
Heart-Healthy Juice Without the Guesswork
Commercial grape juice loses up to 40% of its flavonoids during processing. But when you make grape juice with a blender, you retain all the polyphenols that help maintain healthy blood pressure and reduce clotting risk. Unlike bottled versions with hidden sugars, your homemade blend stays naturally fat-free and cholesterol-free—packing potassium (216–433 mg per cup) and vitamins A & C without artificial junk.
The Cost & Flavor Advantage
Two pounds of grapes yield exactly two cups of pure juice—costing less than $3 versus $5+ for organic store brands. And taste? Homemade juice bursts with bright, complex flavors that bottled versions can’t replicate. Concord grapes deliver candy-like sweetness needing zero added sugar, while green grapes offer refreshing tartness perfect for spritzers.
Grab Exactly What You Need: No-Fail Blender Juice Ingredients
Must-Have Ingredients for 2 Cups of Pure Juice
- Grapes: 2 lbs (3–4 cups) seedless or seeded (red, black, or green)
- Cold water: 1 cup (start here; adjust later for thickness)
- Fine strainer: Nut-milk bag or double-mesh sieve (critical for smooth texture)
- Glass jar: For storage (plastic absorbs purple stains permanently)
Flavor Boosters Worth Trying
Add these during blending for gourmet results:
– ½-inch fresh ginger (aids digestion, adds zing)
– 1 Tbsp lemon juice (brightens flavor, prevents browning)
– 5 mint leaves (creates garden-fresh complexity)
Pro Tip: Skip sweeteners until after straining—taste determines need.
Prep Grapes Like a Pro: Wash and Chill for Maximum Flavor
The 10-Minute Deep Clean (For Non-Organic Grapes)
- Destem: Pull grapes off stems (takes 3 minutes per pound). Discard mushy or moldy berries.
- Salt-Vinegar Soak: In a wide bowl, sprinkle 2 Tbsp sea salt + splash of vinegar over grapes. Let sit 10 minutes while gently rubbing skins.
- Triple Rinse: Swish under cold water 3–4 times until runoff runs crystal clear—this removes pesticide residue that causes off-flavors.
Cold Grapes = Better Juice Yield
Refrigerate washed grapes 1–2 hours before blending. Cold fruit:
– Crushes more efficiently (less oxidation)
– Creates instantly chilled juice (no watery ice dilution)
– Never wash grapes ahead of time—excess moisture speeds spoilage.
The 90-Second Blending Technique for Smooth, Seed-Free Juice
Load Your Blender Like a Chef
- Layer correctly: Add grapes first, then cold water (starting with 1 cup).
- Insert boosters: Toss in ginger or mint now—never add sweeteners yet.
- Pulse smart: Start on low for 10 seconds to break down skins, then ramp to high.
Blending Sequence That Prevents Bitterness
- First blend: 45 seconds on high until skins vanish (mixture looks uniformly purple).
- Scrape sides: Use a rubber spatula to dislodge clinging pulp.
- Second blend: 30 more seconds until completely smooth. Stop here—over-blending seeds releases bitter compounds. Total time: 75 seconds max.
Visual Cue: Perfect puree coats a spoon but drips off slowly. Too thick? Add water ¼ cup at a time. Too thin? Blend in ½ cup extra grapes.
Strain Without the Mess: Two Methods for Crystal-Clear Juice

Nut-Milk Bag vs. Fine Mesh Sieve: Which Wins?
| Method | Yield | Clarity | Effort |
|---|---|---|---|
| Nut-milk bag | 10% more juice | Slightly hazy | High (requires twisting) |
| Double-mesh sieve | Standard yield | Restaurant-clear | Low (press with spatula) |
Pro Straining Technique: Place your chosen strainer over a large bowl. Pour puree slowly while pressing solids in circular motions with a rubber spatula. For bar-quality clarity, strain a second time through cheesecloth—this extra 2 minutes removes all pulp sediment.
Squeeze Every Drop (You’ll Thank Me Later)
After initial straining, gather the nut-milk bag or cheesecloth and twist like wringing a towel. From 2 lbs of grapes, you’ll extract exactly 2 cups of juice. Never skip this—it’s the difference between wasting precious antioxidants and maximizing your yield.
Perfect Sweetness Every Time: When and How to Add Sweeteners
Taste Before You Sweeten (This Changes Everything)
Concord grapes often need zero added sugar, while green grapes may require 1–2 Tbsp. Here’s the foolproof method:
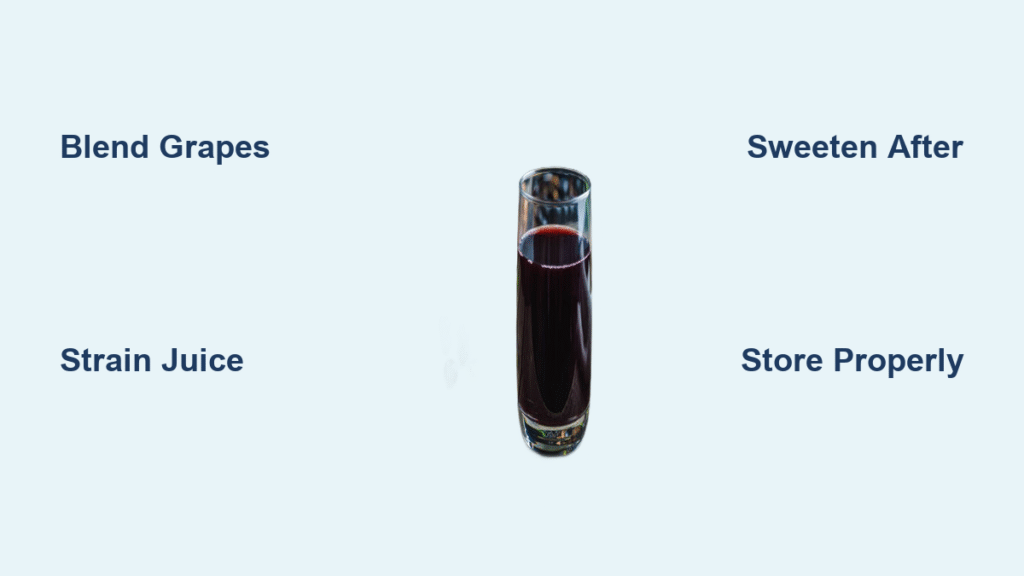
1. Strain juice into a clean glass.
2. Sip plain juice first—note natural sweetness level.
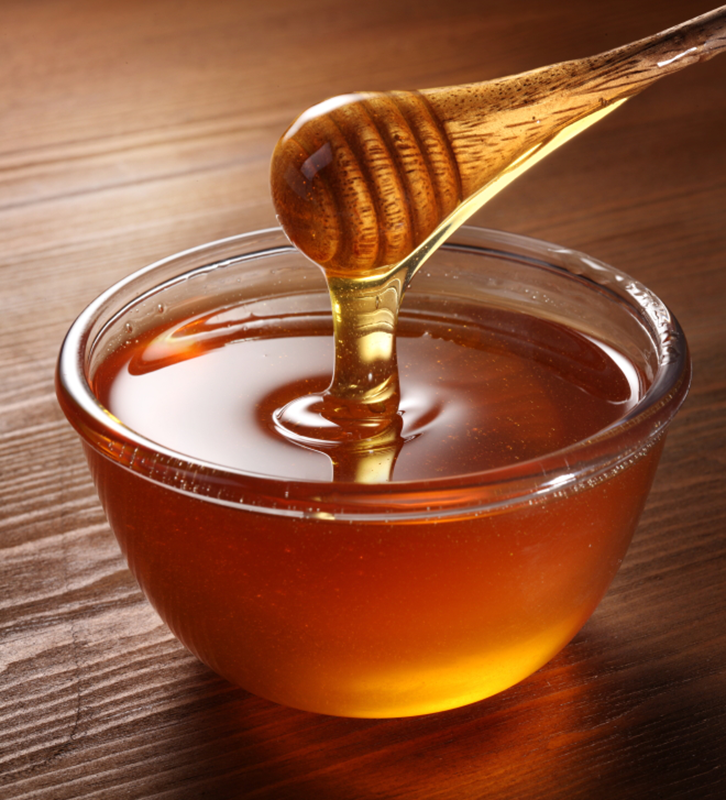
3. Add honey or maple syrup 1 Tbsp at a time, stirring vigorously.
Critical: Always sweeten AFTER straining. Dissolving sugar in pulp creates gritty texture.
Sparkling Grape Soda in 60 Seconds
For kids’ parties or elegant mocktails:
– Fill glasses ⅓ full with fresh juice
– Top with chilled club soda (1:1 ratio)
– Float frozen grapes as “ice cubes” (they won’t dilute flavor)
– Garnish with mint sprig for Instagram-worthy presentation
Store Fresh Grape Juice Safely for Up to a Week

The Air-Tight Jar Method That Prevents Spoilage
- Fill to the brim: Pour strained juice into glass jars, leaving zero headspace (oxygen causes oxidation).
- Seal immediately: Screw lids on tightly—no waiting.
- Refrigerate: Store at 35–40°F for 5–7 days max.
Warning Signs: Day 5+ brings natural fermentation (slight fizz/sourness). Discard if you see bubbles, mold, or detect vinegar smells—fresh juice should smell purely fruity.
Freeze Like a Pro for Year-Round Use
- Popsicle molds: Freeze juice for healthy, colorful treats (no artificial colors needed).
- Smoothie cubes: Pour pulp into ice trays; use within 3 months for fiber-rich smoothies.
Never freeze in plastic bottles—purple pigments stain permanently.
Fix Bitter or Thin Juice in Minutes: Troubleshooting Guide
Bitterness? It’s the Seeds—Here’s the Fix
Cause: Over-blending seeded grapes releases tannins.
Solution: Next time, reduce blending to 60 seconds total. For current bitter juice:
– Stir in 1 Tbsp lemon juice to neutralize bitterness
– Add a pinch of salt (enhances sweetness without tasting salty)
– Prevention: Use seedless grapes for foolproof results
Too Thin? Thicken Without Cooking
Cause: Excess water dilutes natural pectin.
Solution: Simmer strained pulp gently for 5 minutes, then strain again and mix ¼ cup reduced pulp back into juice. Never boil—heat destroys vitamin C.
Stain Rescue Protocol
Red grapes dye countertops and clothes instantly. Act fast:
– Clothing: Rinse with cold water (hot sets stains), then rub with baking soda paste.
– Countertops: Wipe with hydrogen peroxide before color sets.
– Pro Tip: Always use stainless steel bowls during prep—glass shows stains less than plastic.
Fresh grape juice made in your blender isn’t just a drink—it’s liquid insurance for your health. Once you taste that vibrant, unadulterated flavor, store-bought versions will taste flat and artificial. Remember: peak freshness starts with grapes that have a powdery “bloom” on their skin (that natural coating means they’re recently picked). Within 5 minutes, you’ll have a pitcher of pure, antioxidant-rich joy ready to nourish your family. And when you’re done? Don’t toss the pulp—stir it into oatmeal or freeze it for fiber-packed smoothies. Your blender just became the most powerful wellness tool in your kitchen.


