
Forget hauling out that expensive juicer gathering dust in your pantry. Your everyday blender transforms whole vegetables into vibrant, nutrient-packed green juice in under 10 minutes—no special equipment needed. This method preserves more fiber than traditional juicing while saving you counter space and hundreds of dollars. You’ll learn exactly how to make green juice in a blender that’s silky smooth, never grassy, using foolproof straining techniques and smart ingredient combinations. Whether you’re a busy parent needing a quick nutrient boost or a juicing newbie tired of bitter failures, this guide delivers restaurant-quality results with zero guesswork.
The secret? Strategic layering, precise straining, and balancing bitter greens with natural sweetness. Unlike store-bought versions loaded with sugar, your homemade blend packs vitamins without additives. Plus, you’ll repurpose every bit of pulp—zero waste, maximum value. Let’s turn your blender into a wellness powerhouse.
Essential Blender Setup for Flawless Juicing
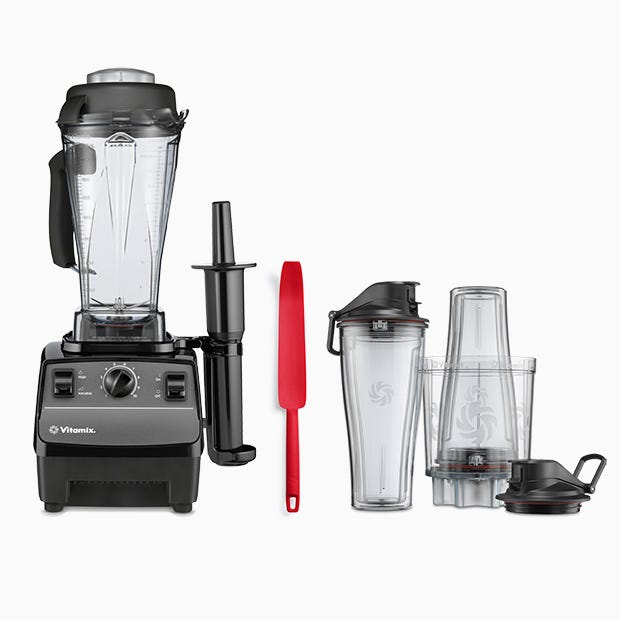
Your blender’s power determines success. High-speed models like Vitamix 5200 or Blendtec pulverize kale stems and celery strings into liquid gold within 45 seconds. Mid-range blenders like Breville BBL605XL work but require smaller produce chunks and 20% longer blending. Skip basic $30 units—they’ll overheat on frozen pineapple and leave stringy spinach bits that ruin texture.
Critical gear beyond your blender:
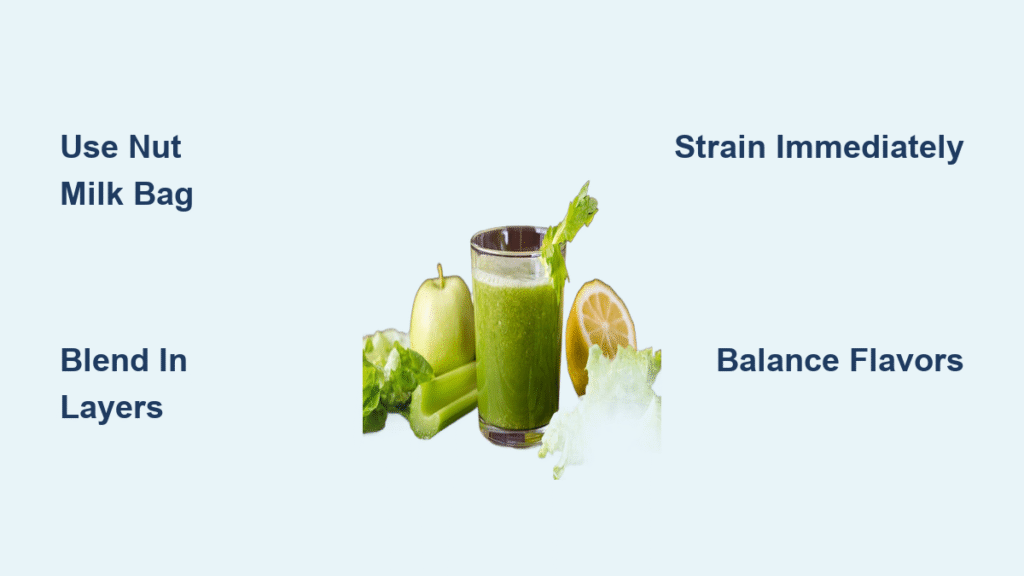
– Nut milk bag (non-negotiable for smooth texture)
– Large bowl with pour spout (prevents spills during straining)
– Sharp knife for precise 2-inch chopping
– Lemon squeezer (maximizes citrus brightness)
Warning: Basic blenders will struggle. Stick to spinach, cucumber, and ripe pears until you upgrade—forcing tough kale through weak motors risks burning out your machine.
Core Green Ingredients That Actually Taste Good
Leafy greens form your juice foundation—but not all work equally. Kale delivers powerhouse nutrients but needs balancing. Start with 2 cups baby spinach for beginners (milder flavor), then blend in 1 cup curly kale once comfortable. Swiss chard adds earthy depth without bitterness, while arugula brings peppery zing—limit to ½ cup.
Supporting vegetables prevent “lawn clippings” syndrome:
– Cucumber (½ peeled): Cools bitterness; use full if organic
– Celery (2 stalks): Adds mineral-rich crunch
– Broccoli (¼ cup): Sneaks in extra greens without flavor
Fruits are your secret sweetness weapon—no sugar needed:
– Green apples (1 cored): Tartness cuts earthiness
– Pineapple (1 cup): Tropical notes mask kale
– Pears (1 cored): Gentle sweetness for sensitive palates
Pro tip: Always use frozen fruit instead of ice—it chills without dilution.
Flavor Enhancers That Transform Bitter to Brilliant
Fresh herbs make or break your juice. Parsley’s clean finish balances strong greens (use whole stems for max flavor). Mint cools spicy ginger, while cilantro detoxifies—add both for restaurant-worthy complexity. Never skip 1-inch peeled ginger: it adds anti-inflammatory punch but overpowers easily. Start with ½ inch, taste, then add more.
Citrus is non-negotiable—but timing matters. Squeeze 1-2 lemons after straining to avoid bitter pith. For electrolytes, swap water for coconut water. Emergency hack: Out of lemons? A splash of apple cider vinegar brightens flavors identically.
Step-by-Step Blending Process
Prep Ingredients Like a Pro
Wash everything—even organic produce—to remove dirt. Chop all ingredients into uniform 2-inch cubes; larger pieces jam blenders. Remove kale’s tough central stems but keep tender leafy parts. Core apples and peel ginger if non-organic.
Time-saver: Pre-chop Sunday ingredients into mason jars. Weekday juicing takes 3 minutes flat—no prep time.
Master the Blend Sequence
Always add liquid first—½ cup water or coconut water—to prevent air pockets. Layer strategically: greens closest to blades (spinach first, kale on top), then fruits, then herbs. This ensures even pulverization.
Exact blending sequence:
1. Pulse on low 10 seconds to break down chunks
2. Ramp to high for 45-60 seconds until completely smooth (no visible fibers)
3. Stop immediately—over-blending heats juice, destroying nutrients
4. Add water 1 tbsp at a time if too thick
Weak blender fix: Blend half the ingredients first, then add remaining with extra water. Prevents motor strain.
Straining Secrets for Silky-Smooth Juice

Nut Milk Bag Method (Guaranteed Smoothness)
Place the bag over your pour-spout bowl, stretching it wide. Slowly pour blended mixture—never fill past halfway. Squeeze technique: Twist the bag top closed, then work downward in sections with both hands. Finish by pressing twisted ends between palms for 20% more yield.
Critical: Rinse the bag immediately after use. Dried pulp clogs fibers permanently.
Cheesecloth Emergency Fix
Double-layer cheesecloth over a fine-mesh strainer. Pour in batches—overfilling causes leaks. Press pulp with a spatula, then gather corners and twist aggressively. Warning: Single-layer cheesecloth fails. Always double it.
Fixing Common Green Juice Disasters
Blender won’t move? Your mixture’s too thick. Add water 2 tbsp at a time through the lid while pulsing. Bitter juice? Balance with ½ green apple or pineapple chunk—never add sugar. Pulpy texture? Your strainer’s inadequate. Switch to a nut milk bag immediately.
Grassy smell? You overused kale. For beginners, use 1 cup spinach + ½ cup kale max. Warm juice? Blend in 10-second bursts with ice cubes. Heat destroys live enzymes.
Storage Hacks That Preserve Nutrients
Drink immediately for 100% nutrient retention—light and air degrade vitamins fast. Refrigerate in airtight glass jars filled to the brim (minimizes oxidation) for 24-48 hours max. Separation is normal—shake vigorously before drinking.
Freeze for meal prep: Pour into mason jars leaving 1-inch headspace. Thaw overnight; nutrients stay intact for 3 months. Pulp cubes: Freeze strained pulp in ice trays for instant smoothie boosters.
Creative Pulp Uses Beyond the Compost Bin

Transform “waste” into gourmet ingredients:
– Veggie muffins: Replace ½ cup zucchini with pulp in batter
– Creamy spread: Blend pulp with cream cheese for bagel topping
– Soup thickener: Stir into tomato or lentil soup
– Marinara upgrade: Mix ¼ cup into pasta sauce
Pro storage: Refrigerate pulp 48 hours max in sealed containers. For longer use, freeze in portioned cubes.
Foolproof Flavor Variations
Beginner’s dream (mild): 2 cups spinach, 1 cucumber, 2 green apples, 1-inch ginger, juice of 1 lemon. Advanced detox (bold): 1 cup kale, 1 cup parsley, 2 celery stalks, 1 pear, juice of 2 lemons.
Tropical escape: Swap apples for 1 cup pineapple + coconut water base. Citrus burst: Replace water with fresh orange juice + mint leaves.
60-Second Clean Method
Prevent green stains: Fill blender halfway with warm water + 1 drop soap. Blend 10 seconds, then rinse. Nut milk bag care: Rinse under cold water until clear, then hang to dry. Stain removal: Blend water with 1 tbsp baking soda + lemon wedge—cleans like magic.
Never soak bags overnight. Dried pulp causes permanent clogs.
Final Takeaways
Your blender is now your ultimate wellness tool. Start with spinach-based juices before tackling kale, and always taste before straining—adjust sweetness with apple, not sugar. Perfect green juice balances three elements: earthy greens (60%), sweet fruit (30%), and bright citrus (10%). Drink immediately when possible, but don’t stress over 24-hour storage—your body still gains massive benefits.
Critical reminder: Never discard pulp. That fiber boosts digestion and turns “waste” into gourmet ingredients. Ready to transform wilted spinach into liquid energy? Grab your blender—your healthiest habit starts today.


